|
|
 20-04-2007, 06:00 AM
|
#1 |
|
Senior Member

Join Date: Feb 2003
Location: Edinburgh, Scotland
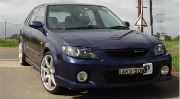
Car: A Mazda 323F BJ Sport.
Posts: 1,064
 |
HOW TO: Angel/Demon eyes for BJ
 Finally done the how to.... Finally done the how to....Bumper needs partly removed to get the lights out. :wink: I used 8mm acrylic rod, round and solid, not hollow. I got it from Ebay. LED's are 3.6volt 5000 brightness, and 300 ohm resistors. 1. Remove all the bulbs and rubbers from the unit. Pay particular attention to the 2 screws (red arrows).  2. Pop the light unit in the oven, about 10 minutes at 150 celcius, probably about gas mark 3 or 4. Put ot on wooden blocks to stop it melting on the oven shelf.  3. Bend the tabs up whle they're still hot. Gloves may be required.  4. You may have to put the light back in the oven for 3 or 4 minutes before splitting the lens, trial and error here, but the hotter the glue gets the easier to split.  5. Once its apart, leave all the sticky stuff in place. Remove the 2 screws from the unit.  6. Use a peice of stiff wire to figure out where your going to place the angel eyes. Cut your acrylic rod to length, and pop it in the oven. Be careful and keep checking the rod to make sure they don't melt. Do one at a time.  7. Bend the rods, making sure they sit on the light perfectly flat. Good contact is needed for the glue to stick them perfectly.  8. Once your satisfied that the rods fit well, drill a 5mm hole in the end of the rod and using the epoxy glue stick the prepared LED's in. Leave to dry.  9. Drill holes or cut slits in the rods. About 3 mm into the rod from the back, not the front. I did my holes with a 3mm drill and about 3mm apart.  10. Using a 6 or 7mm drill, make holes in the light for the wires. Go easy, as the plastic is quite brittle.  11. The glue I used. Resin and hardener.  12. Clamp the rods on any way you can. Do a trial run with this first, it can get a bit messy if you try it with the glue and it starts moving about. The glue takes about 10 minutes to set solid. Remember to feed the wires through the holes you made.  13. Once you've stuck both on, test the lights.  14. My tester. A Nintendo gamecube power lead, with the gamecube plug cut off and 2 croc clips in its place.  15. Make sure the inner light and inner glass is completely clean, re-assemble it but leave the seal slightly open. Make sure to feed the wires for the angel eyes through the back of the light unit. Put the whole unit back in the oven for 5 to 10 minutes.  16. Once its out the oven, push the joint closed and bend the tabs back down. Make sure the seal is completely closed, and the tabs are all holding the glass. 17. Make nice spade connectors for the lights.  Job done. 
|

|

|
| Sponsored Links |
|
|
|
26-04-2007, 11:31 PM
|
#2 |
|
Junior Member

Join Date: Dec 2005
Location: Lost in Brisbane somewhere
Car: 2002 SP20
Posts: 49
|
Pretty Damn impressive - gutsy stuffing a car part in the oven - knowing me, I would forget about it and have headlight souflé
__________________
2002 Mazda Astina SP20 Loads of work to do......with so little time and money |
|
|
|
|
27-04-2007, 10:39 AM
|
#3 |
|
AstinaGT Regular
|
awesome stuff
my daily driver is a BJ 1.6 maybe i should do that :P i dont think the boss would mind :P
__________________
1996 ST205 Toyota Celica GT4 *Gone* 1991 Astina GT, 102wkw/138whp Built a KL-ZE 220whp engine for a KF Laser |
|
|
|
|
30-05-2007, 06:24 PM
|
#4 |
|
Senior Member

Join Date: Nov 2006
Location: SE Brissy
Car: Old: 1989 DOHC Mazda 323 New: Nissan 180SX Type X
Posts: 2,135
|
mate that deserves a round of applause love the custom stuff keep it up....
__________________
Today you will die and then you will know what it feels like to live... Straights Are For Fast Cars, Corners Are For Fast Drivers: Colin McRae Visit My Ride:  http://www.astinagt.com/forums/vbpic...?do=view&g=319 Come see my deviantness....hehe http://dawnblade.deviantart.com/ |
|
|
|
|
18-01-2009, 11:16 PM
|
#5 | |
|
Junior Member

Join Date: Sep 2008
Location: Melbourne
Car: mazda 323 astina hardtop
Posts: 4
|
Quote:
i have mazda 323 astina hardtop?? |
|
|
|
|
|
18-01-2009, 11:57 PM
|
#6 |
|
Senior Member

Join Date: Jan 2007
Location: Brisbane, Queensland
Car: Mazda 323 Astina BG
Posts: 658
|
cant see why not...but i suggest you use some light reflective tape on the back side of the tube as it traps the light better
|
|
|
|
|
19-01-2010, 09:34 AM
|
#7 |
|
Junior Member
|
id love to try that but knowin me id stuff up somewhere
|
|
|
|
|
02-06-2010, 11:45 PM
|
#8 |
|
Junior Member

Join Date: May 2010
Location: McCrae VIC
Car: BJII Familia
Posts: 30
|
I must say that these look absolutly fantastic am very tempted to give it a go myself.
|
|
|
|
|
03-06-2010, 07:04 AM
|
#9 | |
|
Senior Member

Join Date: May 2009
Location: tullamarine,melbourne
Car: 92 astina 323 bg & 01 SP20
Posts: 660
|
Quote:
__________________
 oh you hit my spot! oh you hit my spot!
|
|
|
|
|
|
13-11-2012, 10:59 AM
|
#10 |
|
Senior Member
|
Bit of a Thread Revival here...
But I was considering doing this to my next pair of headlights... Just a thought for anybody else considering this. With technologies such as EL getting MADD cheap would be a lot easier and look nicer using some EL strip wire. They are cheap... very easy to wire, very flexible, are fairly bright with even light. come in all sorts of sizes and colours. only down side is you need to have an inverter. which wont be waterproof... so would have to be under the dash. So a little extra length wiring is all 
__________________
|
|
|
|
|
13-11-2012, 12:42 PM
|
#11 | |
|
Senior Member
Join Date: May 2012
Location: shellharbour
Car: 02, bj2 j48
Posts: 520
|
Quote:
__________________

|
|
|
|
|
 |
|
|


 Linear Mode

