|
|
 05-09-2011, 07:36 PM
|
#61 |
|
obsessed-incomplete-broke
 
Join Date: Oct 2008
Location: Brisbane
Car: BA Hardtop/Hatch
Posts: 5,441
|
well this arvo i bought a bench grinder, angle grinder + flap and grind disks, some spray putty and primer, rust converter, an 8mm drill bit, foam sanding blocks, wet and dry paper and some more grease. went home, stole my mates MIG and did a bit of testing on my old hatch. welded far better than I anticipated on the lowest available setting with cored wire. bought some argon gas but the regulator has a weird attachment so I tried gasless. ground down my brand new 8mm bit on my new bench grinder and did a few test runs to see how well I reduced the cutting angle. still needs a little more, but it happily still cut nicely after a 2mm pilot was drilled. certainly need some practice welding though. cant wait to try my new-found skills and tools on the real thing. perhaps on the weekend... then I can bash out the damage, fill what doesnt want to bash out, or get a replacement panel from the wreckers and weld that in. still no interior progress
 the final verdict on the turbo conversion is that I can do it legally but I can ONLY use my stock engine and "add a turbo", keeping all emissions equipement the same... not sure if that allows me to add my own programmable ECU or whether they expect a GTX or my stock one (which wouldnt work at all!) to be used... and my seats can be tested and plated too, so that will mean that others MAY be able to just use my certificate to get their MS seats done too. dont see why they might fail... decided i might just get new front seatbelts in red. hoping to get this all sorted within the month, ready for the Mod day! |

|

|
|
06-09-2011, 09:21 PM
|
#62 |
|
obsessed-incomplete-broke
Join Date: Oct 2008
Location: Brisbane
Car: BA Hardtop/Hatch
Posts: 5,441
|
Swapped locks on the rear hatch, may end up just filling the hole when painting. Removed badges and did a post mortem on my welds. Received a new steering wheel, gearknob, pedals, seats and another sticker today too. Seats do need a very good clean up and perhaps new foam on the sides. Now I have to play with my airbag. Yee-ha... :S
|
|
|
|
|
09-09-2011, 08:04 AM
|
#63 | ||
|
Senior Member

Join Date: Jun 2009
Location: Baxter, VIC
Car: Sooby B4 - Astina SP parting out
Posts: 2,447
|
Quote:
Quote:
") Buddy, you have to use the turbo ECU with the turbo engine. Even if you turbo an N/A, still need the fuel mapping/AFRs & sensor reads from the turbo computer. Try and swap a turbo engine/ECU/harness (even from a front cut if you can). This way you have all the bits you need that will be a problem with your stock harness & gear Buddy, you have to use the turbo ECU with the turbo engine. Even if you turbo an N/A, still need the fuel mapping/AFRs & sensor reads from the turbo computer. Try and swap a turbo engine/ECU/harness (even from a front cut if you can). This way you have all the bits you need that will be a problem with your stock harness & gear  Whilst youmay get away with a stand alone ECU, it will have to be locked off so you may as well save yourself the time & expense & use the J-Spec ECU & be done with all the requirements necessary....... Whilst youmay get away with a stand alone ECU, it will have to be locked off so you may as well save yourself the time & expense & use the J-Spec ECU & be done with all the requirements necessary.......Keep going man. It'll work out!
__________________
My Shepherds in the Avatar haha  "When the power of love overcomes the love of power, the world will know peace" - Jimi Hendrix 
Last edited by NaughtyGT; 09-09-2011 at 08:08 AM. |
||
|
|
|
|
09-09-2011, 07:34 PM
|
#64 |
|
obsessed-incomplete-broke
Join Date: Oct 2008
Location: Brisbane
Car: BA Hardtop/Hatch
Posts: 5,441
|
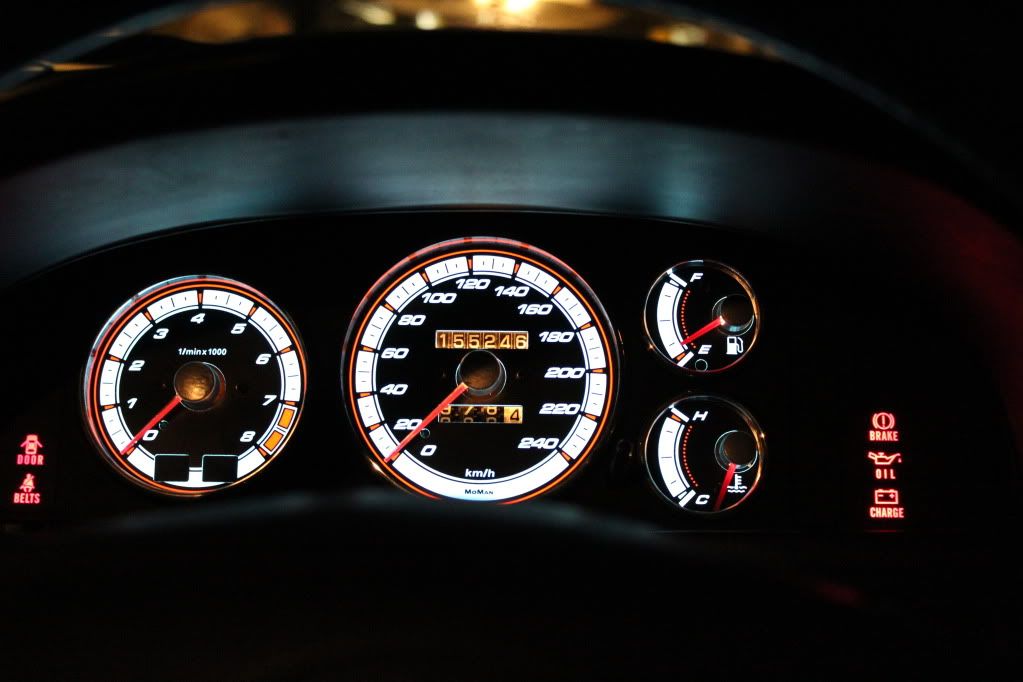
Thanks Tim. So, after 4hours with a coat hanger, I gave up trying to break in. Came back and tried just going through the window. Lets just say I wish I had tried that first. Just made it into the valley with my lock with the code on it and got 3 brand new keys cut, one in bright red. $60 But id rather not have this trouble ever again. So, with my door back together I've fitted and somewhat adjusted the dials. They dim with the dash properly but its really flickery when adjusting it. Will see how the voltage output changes as its not smooth like my lab supply unfortunately. Tried fitting the wheel with airbag and after 45minutes of not fitting figured out why. Basically a small spacer is needed to offset the wheel to make the nut flush inside the wheel, either that, or cut 2mm off the bolt...no thanks! Using a gas blow torch to solder was exciting enough. So not much progress but on Sunday I'll have the dash back together. Looks sexy with the dials and wheel. Can't wait to see it with the seats in!
Over and out. |
|
|
|
|
09-09-2011, 09:10 PM
|
#65 | ||
|
Senior Member

Join Date: Sep 2004
Location: n/a
Car: n/a
Posts: 10,929
|
Quote:
Treat it as 2 steps to simplify it. 1. engine swap 2. add turbo. the requirement in Queensland will only be a turbo mod plate. Quote:
|
||
|
|
|
|
10-09-2011, 10:56 AM
|
#66 |
|
Senior Member

Join Date: Oct 2009
Location: NSW
Car: 1998 Toyota Supra 3.0L Twin Turbo
Posts: 1,413
|
They flicker due to the voltage being insufficient. The transformer hates it.
You can dim it to a point without flicker. Did you properly insulate the voltage stabilizer? Doing this gave me a larger range of dimming without flicker.
__________________
 1996 Mazda 323 Astina BA Hatch 1.8L - No Longer Mine
|
|
|
|
|
10-09-2011, 05:28 PM
|
#67 |
|
obsessed-incomplete-broke
Join Date: Oct 2008
Location: Brisbane
Car: BA Hardtop/Hatch
Posts: 5,441
|
I wrapped in electrical tape and zip-tied the tranny to the plastic support on the back (about 30mm wide in the middle) and I dont understand as with my lab supply, even on 2.5v it would glow and not flicker at all. so it cannot be the actual voltage, more so the ripples in it from the alternator id guess...which is harderto fix.
on a more positive note (like the little pun segue?) my cockpit currently looks like this: 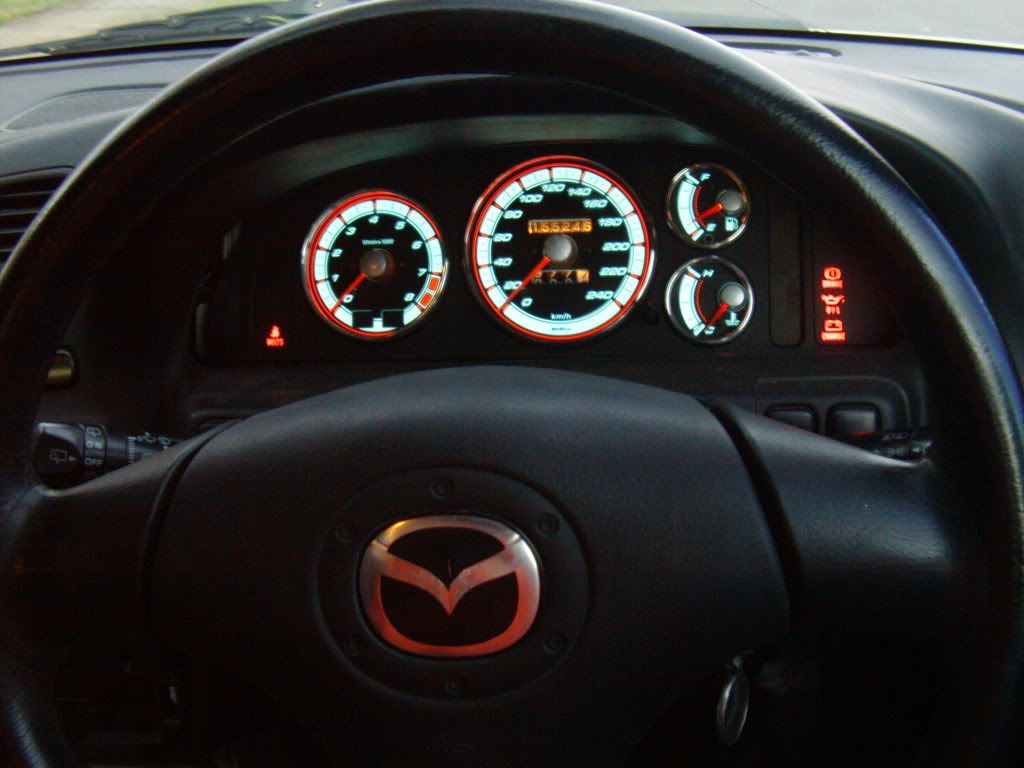  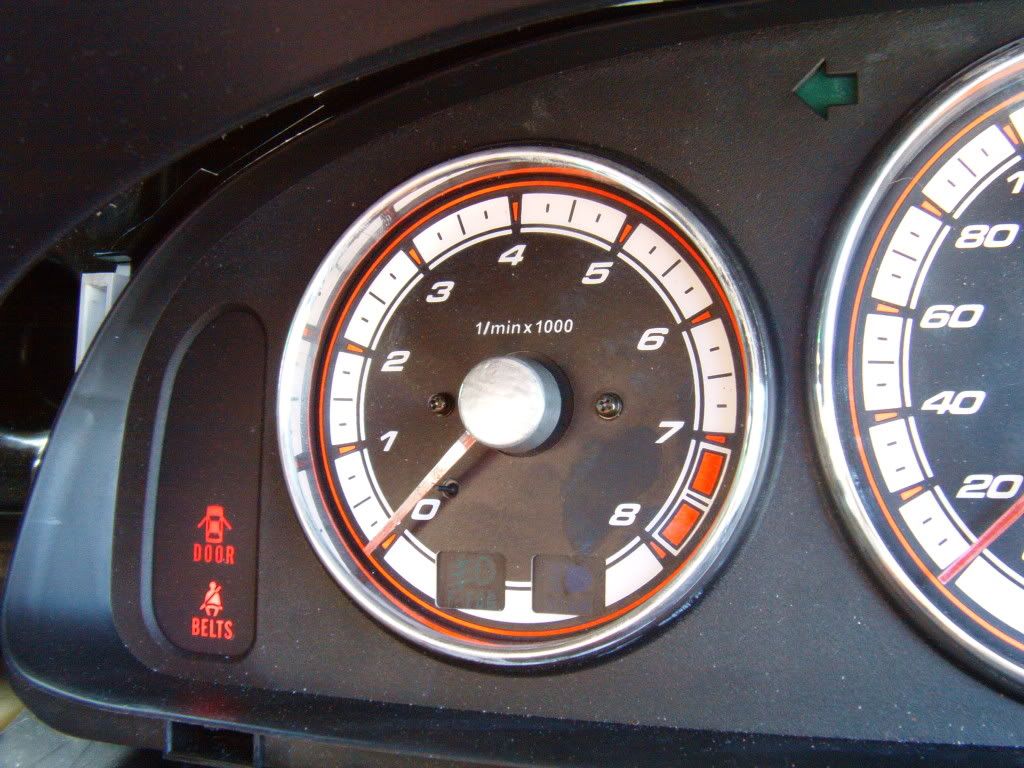 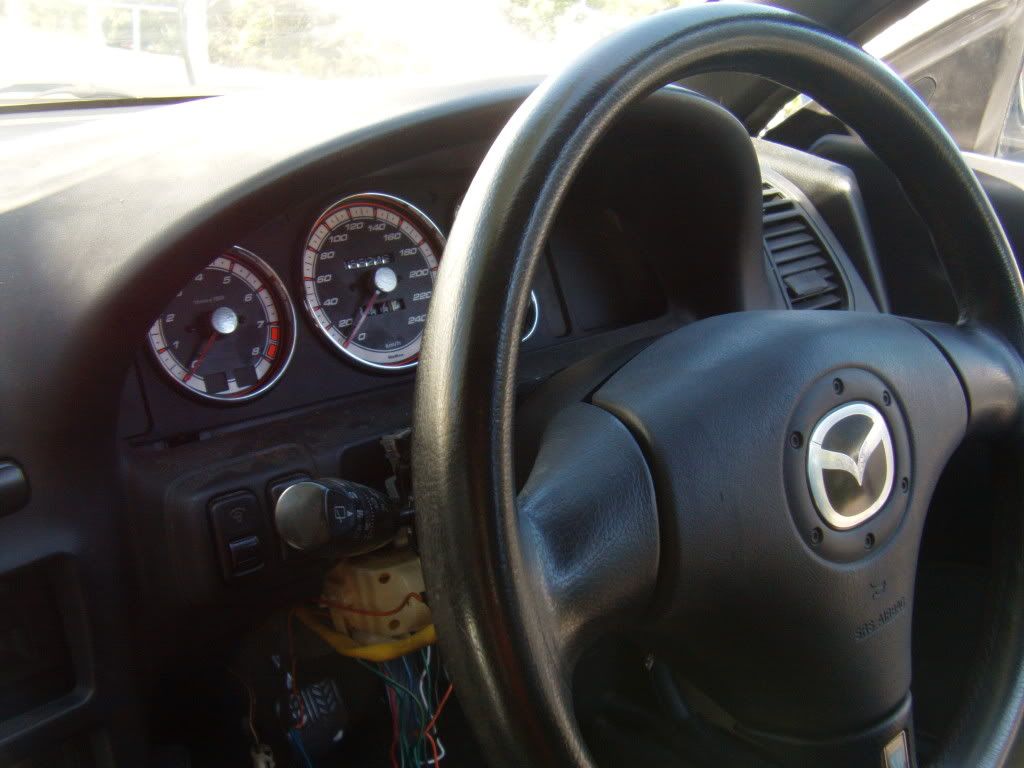 Got my wheel to fit finally without squashing stuff too much. airbag didnt explode and the light now doesnt flash, meaning its at least plugged in and not shorted... YAY. to get it to fit ill make a guide but basically: drill out the back of the wheel for the clockspring thingos to fit, about a 6mm drill bit. then hacksaw 3mm off the actual bolt, and smooth off. remove plastic from airbag module, and it JUST fits without resitance. im sure itd fit without taking the plastic off but it was a little tight for something so (aparently) fragile. horn works too. 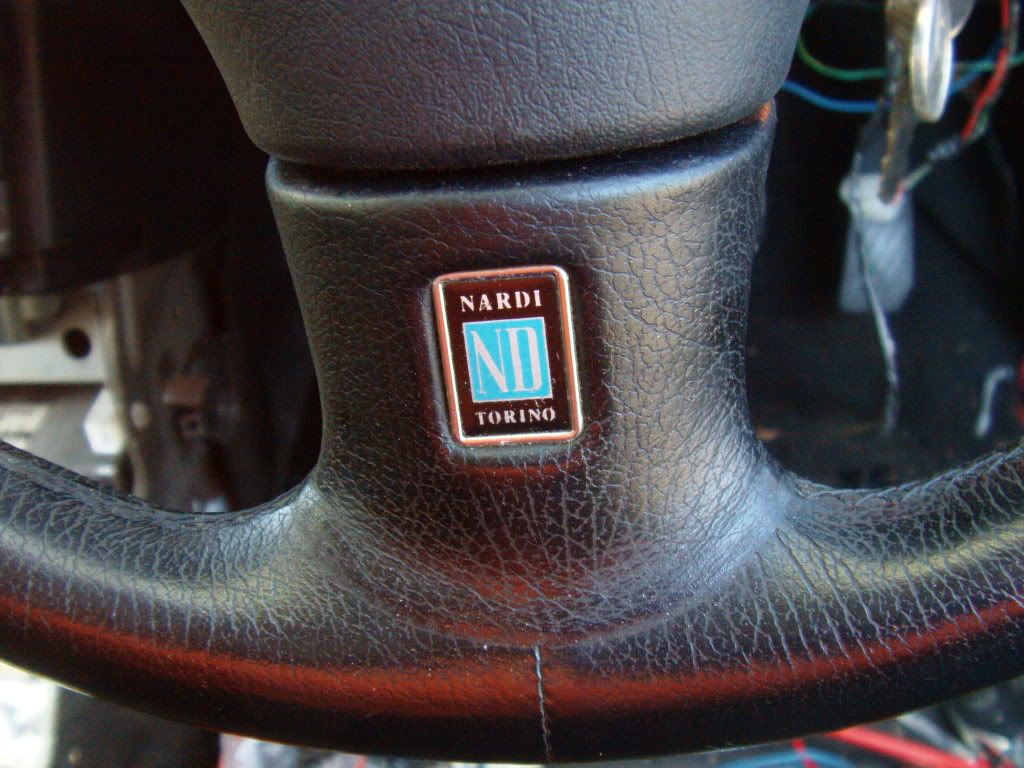 Painted my spare rear sunvisor/brakelight/washer nozzle piece this arvo in black. i will have to redo it as the wind and dust screwed it up, but it looks a ton better. the other one on the car fell into about 30 pieces when i tried to remove it... 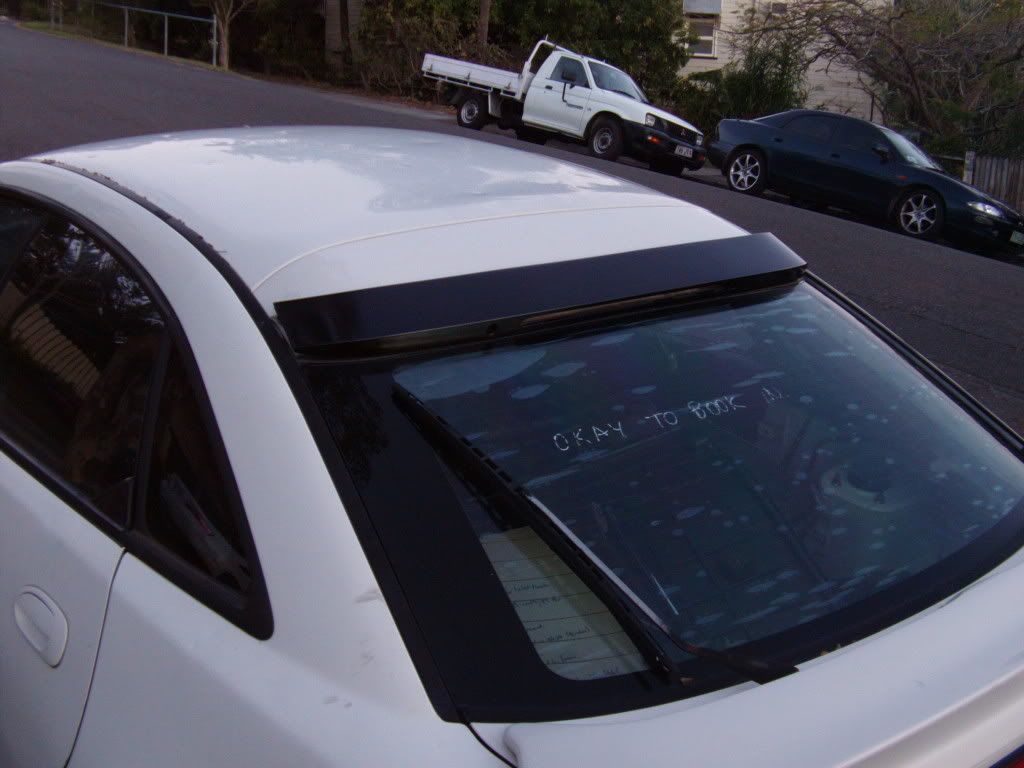 started drilling out the welds at the back to do more panel beating... theres about 80 holes all up ill have to reweld... so i guess itll take about 3 weeks of spare time to do it-but hey, its free! also painted a part of the smashed rear garnish, in black. orginally i thought a white panel would look the best, but the black looks good too. keep in mind the lights will be the black style ones -to be installed after its all on the road. 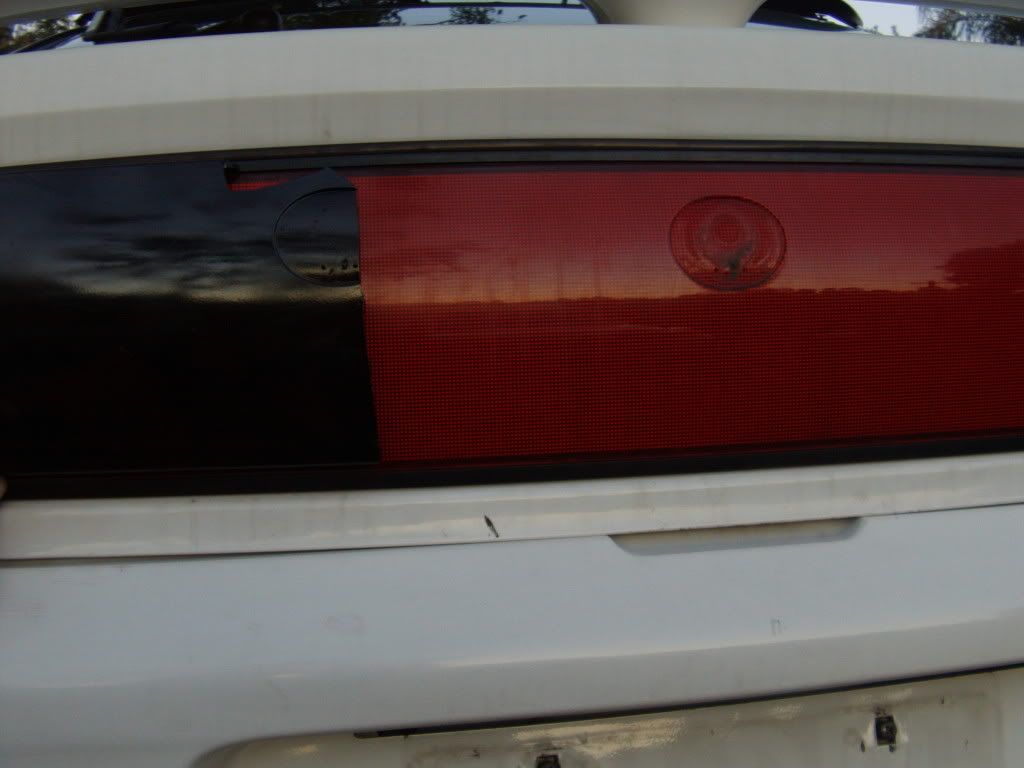 hmm that photo is too dark... anyway... thoughts opinions or more advice is welcome! @Tim, why cant they have one set of rules for this country...so bloody complicated and confusing. @ryan, yes i suppose i could do that, but whats the point really? i know this block has only done 155k, and has been maintained, so nothing can be terribly wrong. or are you suggesting buying a turbo motor, swapping it and then just literally adding the tubro manifold and getting a mod plate>? Last edited by Clean_Cookie; 10-09-2011 at 05:32 PM. |
|
|
|
|
10-09-2011, 07:01 PM
|
#68 | |
|
Senior Member
Join Date: Jun 2009
Location: Baxter, VIC
Car: Sooby B4 - Astina SP parting out
Posts: 2,447
|
Quote:
now where called states yes, they are nationalising some things now but each state likes it's 'sovereignty bull****' Imagine footy if we nationalised it. No more state of origin matches  
__________________
My Shepherds in the Avatar haha "When the power of love overcomes the love of power, the world will know peace" - Jimi Hendrix
|
|
|
|
|
|
10-09-2011, 07:49 PM
|
#69 |
|
Senior Member

Join Date: Jun 2011
Location: Sunshine Coast
Car: MPS
Posts: 1,939
|
mmm love the cluster! Looks mad!
|
|
|
|
|
12-09-2011, 09:00 PM
|
#70 |
|
Senior Member

Join Date: Apr 2011
Location: Brisbane, QLD
Car: 2000 BJ Protege
Posts: 714
|
Lookin good! Can't wait to see it finished. Let me know if you ever need a spare hand doing stuff.
|
|
|
|
|
12-09-2011, 09:16 PM
|
#71 |
|
Senior Member
Join Date: Apr 2011
Location: Brisbane, QLD
Car: 2000 BJ Protege
Posts: 714
|
Haha aren't we meeting up tomorrow anyways? I suppose that's at 7 though so if you're close by i could come over after work and give you a hand
|
|
|
|
|
12-09-2011, 09:28 PM
|
#72 |
|
Senior Member
Join Date: Apr 2011
Location: Brisbane, QLD
Car: 2000 BJ Protege
Posts: 714
|
No worries. I'll give you a call or a txt when I'm finished work to see what's happening.
|
|
|
|
|
29-09-2011, 08:55 PM
|
#73 |
|
obsessed-incomplete-broke
Join Date: Oct 2008
Location: Brisbane
Car: BA Hardtop/Hatch
Posts: 5,441
|
just some pics to show my hard work
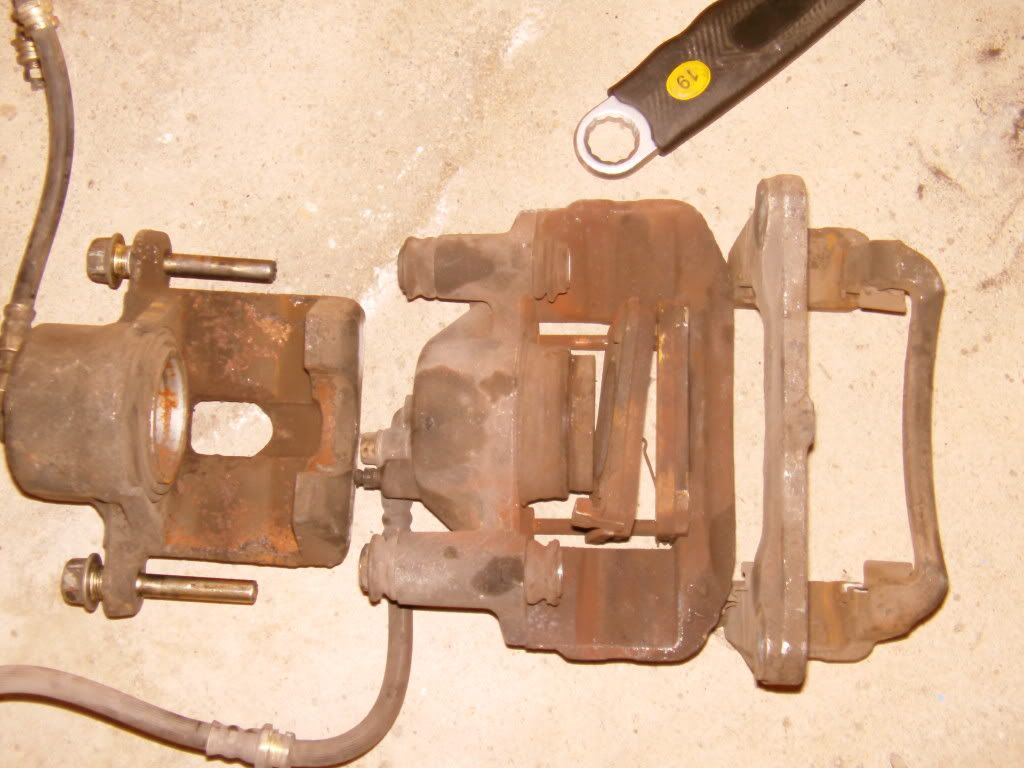
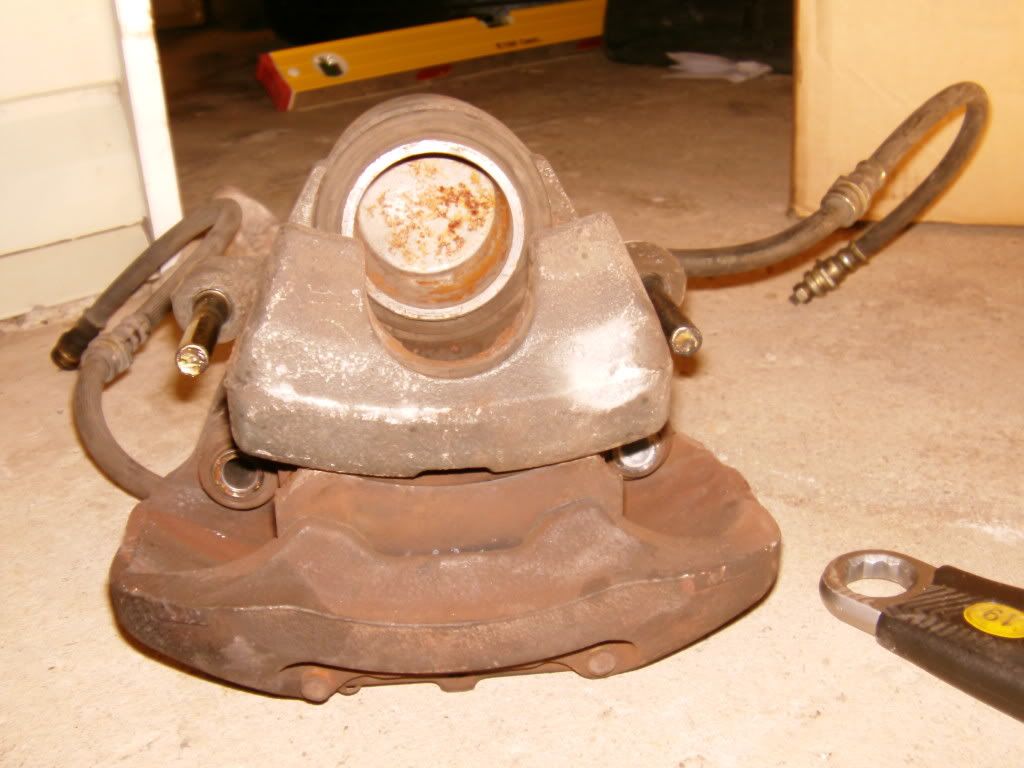
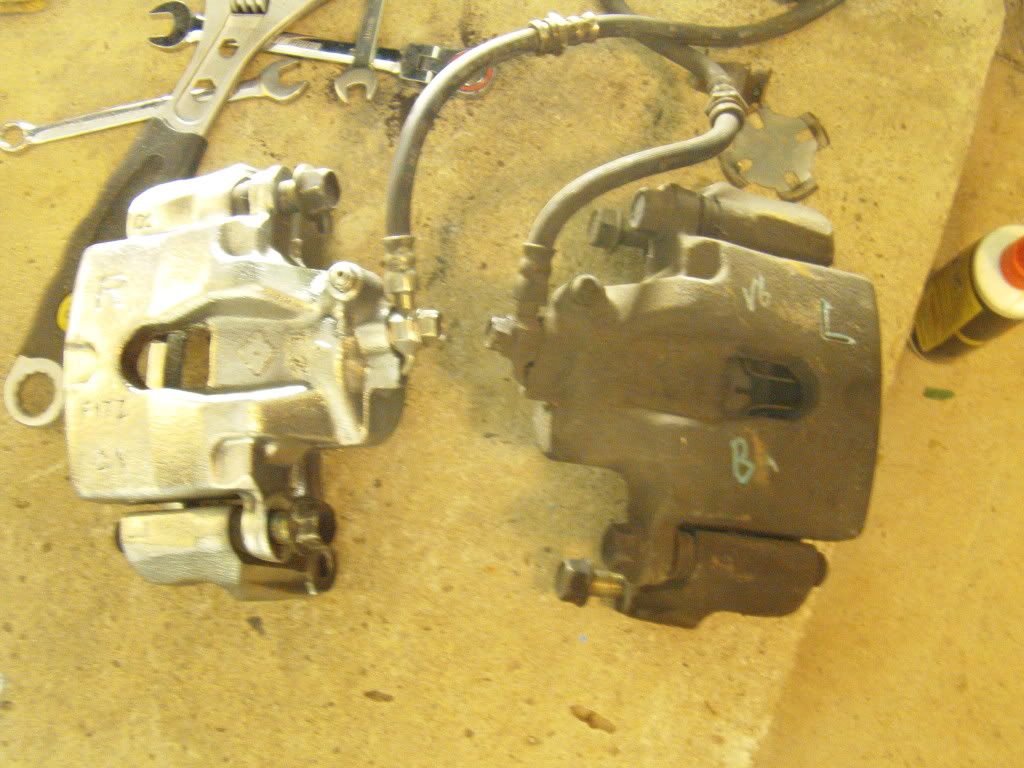
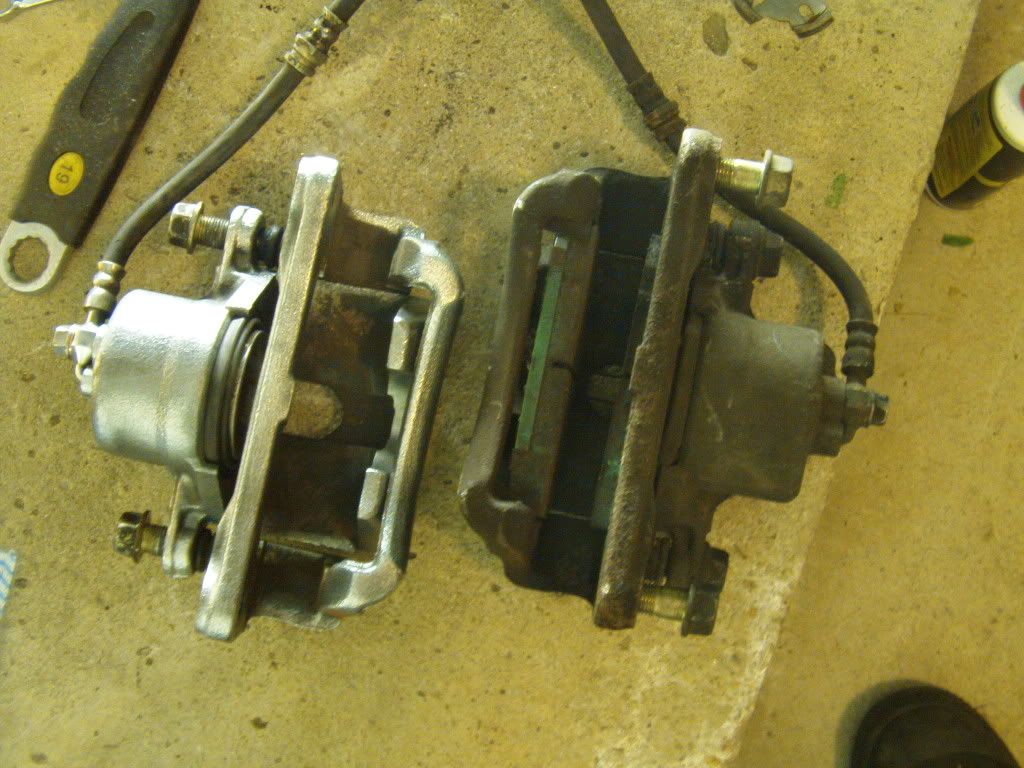
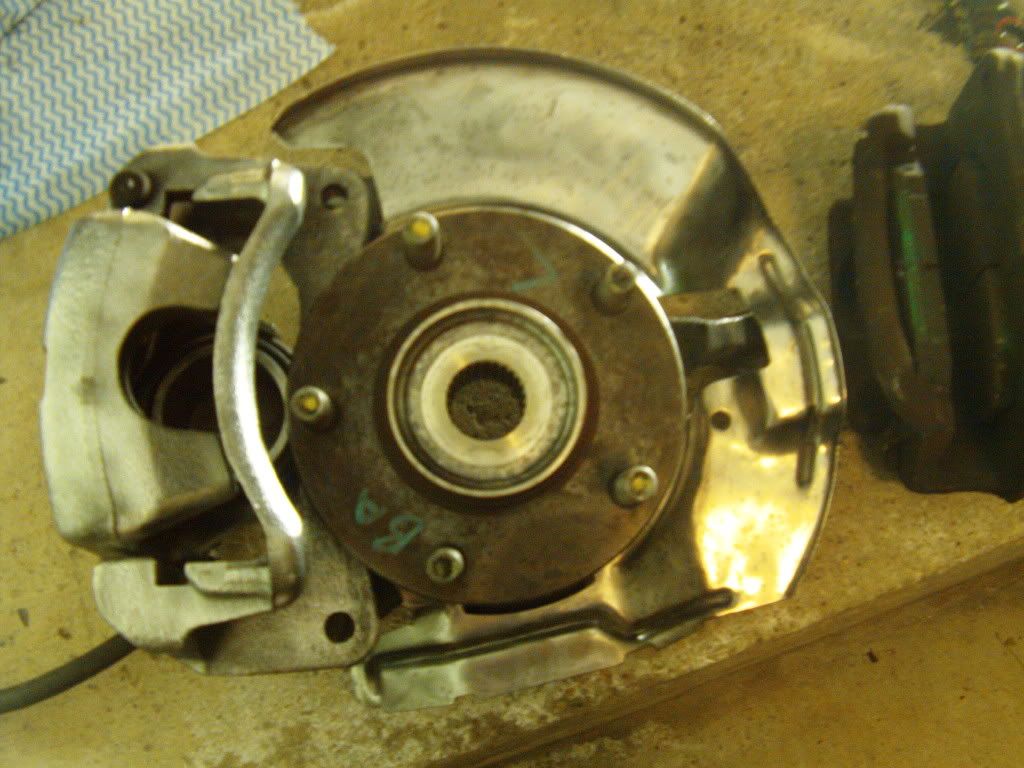
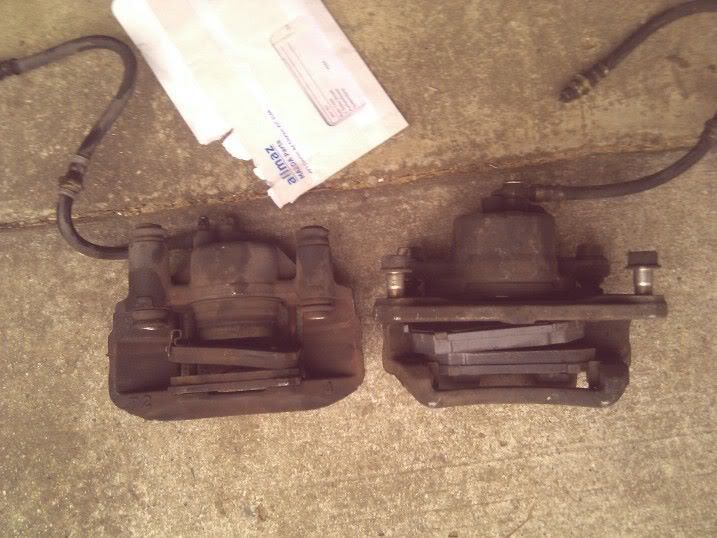  its been done before but just confirming, ON MY CAR (P3 I4) everything fits perfect from the old suspension with new v6 stub axle and calipers/rotors. on the front. all thats required on the rear is the stub axle, and 5 stud rear rotors. brakes are identical. Last edited by Clean_Cookie; 30-09-2011 at 06:47 AM. |
|
|
|
|
30-09-2011, 07:03 AM
|
#75 |
|
Senior Member

Join Date: Aug 2009
Location: QLD
Car: ......
Posts: 952
|
Looks good , where did you get dials from.
|
|
|
|
|
30-09-2011, 07:17 AM
|
#76 | |
|
Banned
Join Date: May 2006
Location: Brisneyland, Queensland
Car: 2002 Mazda Frankenstina
Posts: 2,868
|
Quote:
Must say its a fun project you have there Ryan and those dials actually look better in person than in the photo!!! Im looking forward to seeing the completed project. |
|
|
|
|
|
30-09-2011, 07:52 AM
|
#77 |
|
Senior Member
Join Date: Oct 2009
Location: NSW
Car: 1998 Toyota Supra 3.0L Twin Turbo
Posts: 1,413
|
I cant decide whether red needles or stock needles looks better.
They both look great... I just don't wanna remove my needles to paint them
__________________
1996 Mazda 323 Astina BA Hatch 1.8L - No Longer Mine
|
|
|
|
|
01-10-2011, 08:01 PM
|
#78 |
|
obsessed-incomplete-broke
Join Date: Oct 2008
Location: Brisbane
Car: BA Hardtop/Hatch
Posts: 5,441
|
@ mikey: both look good, mine arent perfect but it was impossible to get the paint to be a consistant thickness over the whole surface, and keeping the paint off the edges...ugh. took about 5 hours to do the whole thing. worth it but not perfect still...also i need to make a dimmer... maybe tomorrow... just maybe.
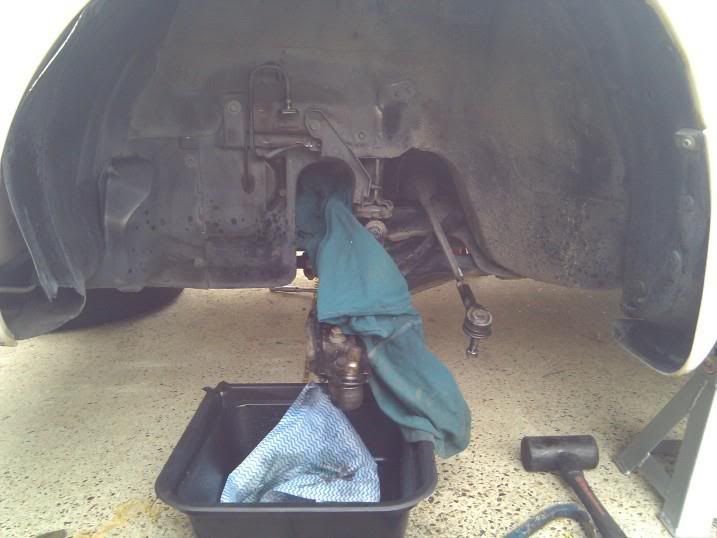
anyway for todays progress. Went to Marcs place and grabbed his stock tyres/rims, and retrieved his ring! went to repco, bought heatproof paint, tie-rod ends, and a wire brush wheel... got home, stared at the car and went "i dont really feel like doing anything"... so I replaced my totally ROOTED sub which was only held onto itself by the voice coil. amazed it still works actually. will buy a ring kit and try my luck, but the new one is a JVC twin voice coil...sounds great!!! (in the HT) back on track. bashed, shoved and screamed at the drivers side CV joint (decided to replace it afterall. do it once, do it right...) - there goes the ones for the HT! anyway... 90 minutes later,and less skin on my body, I finally got it off. Ended up using a plumbing wrench as a lever and bashed the handle until it dislodged it... NEVER again. hopefully To my dismay, I noticed that the LHS was leaking from the seal now... GRRR so im not sure what is required to replace the seals - a job for tomorrow when I'm more awake. After comparing the shafts the one I was sold (after spending a good 30 minutes in Repco looking at the catalouge, was about 30mm too short! (585mm long FYI). so back to repco, along with other stuff i no longer needed. Wasted another 30 minutes in the catalouge, and now a 615mm one is coming from Coopers Plains for me... heres hoping! Back home I fought with the tie-rod ends -which were cheap, and look alot less strong, but should be ok...heres hoping again! what a PITA to get them off. had to use 2 adjustable spanners and only JUST got them off. replaced. yay. next on the adgenda was cleaning up the brake components ready for painting. also removed the plastic from the wheel arches and underneath. scrubbed the entire wheel arches and emptied about a kilo of dirt from the front mud guards. (HIGHLY RECOMMEND YOU LOOK AT YOURS TO AVOID RUST!!!) luckily there is no rust and the paint was in OK condition... 8 battery packs later heres some photos. I was going to paint them white to match the car, as the gold rims would look interesting with silver caliers but now I really love how they've turned out just with a good sand... may buy yet another can of paint and just high-temp clear coat it... suggestions? I am also contemplating spraying the entire wheel arch in a few coats of white, and leaving the plastic black. Haven't seen it done before - and yes, i realise when stones chip it, it will look bad, but thats easily fixed... the paint will be pearled eventually, so the colours will not match at all -and that is the only thing making me re-consider at this point in time. (just thought it would look cool with white suspension, arms, brakes and wheel arches. (leaving the swaybar and links black)... open for suggestions... photos are pretty straight forward, mostly comparisons of old vs new and some shiny vs dirty... enjoy another 8+ hours of effort. getting there...slowly. off to repco tomorrow for the bottom joints (which the stub axle sides ontop of) to replace them as well as new bearings - which will need to be pressed in... anyone got the know-how and/or tools to do such a thing? Read a guide on 323F about doing it but looked a bit difficult... how much should I expect to pay for a simple remove and install jobbie on all 4 stub axles... 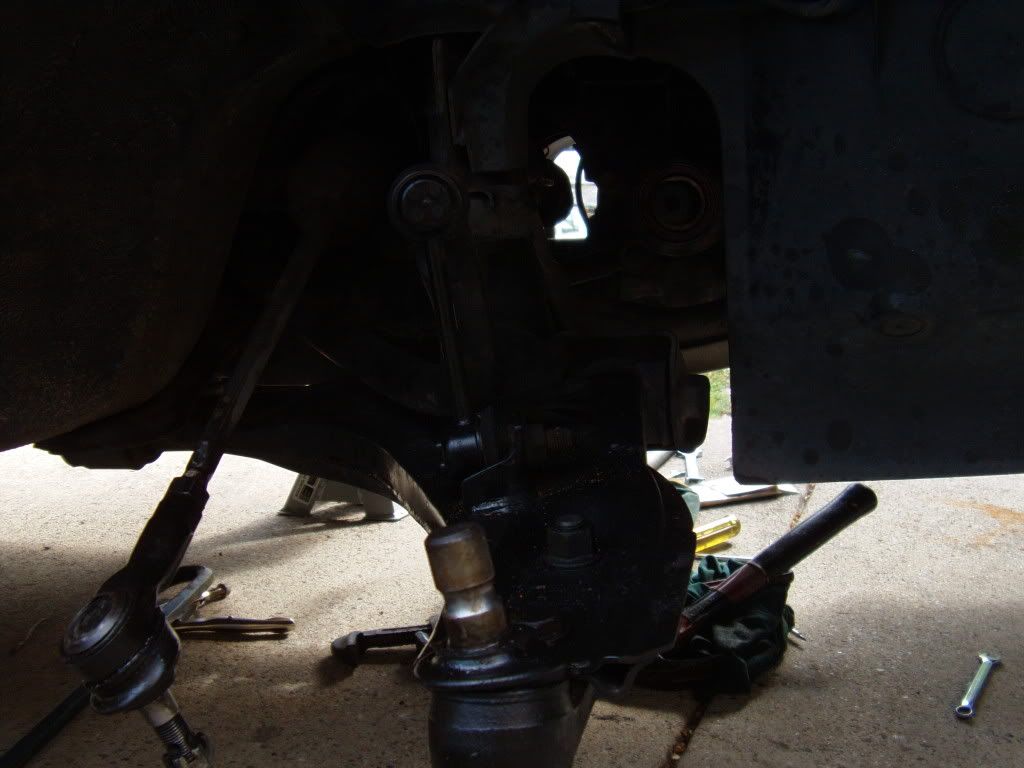 MESS:  Temp Rims:  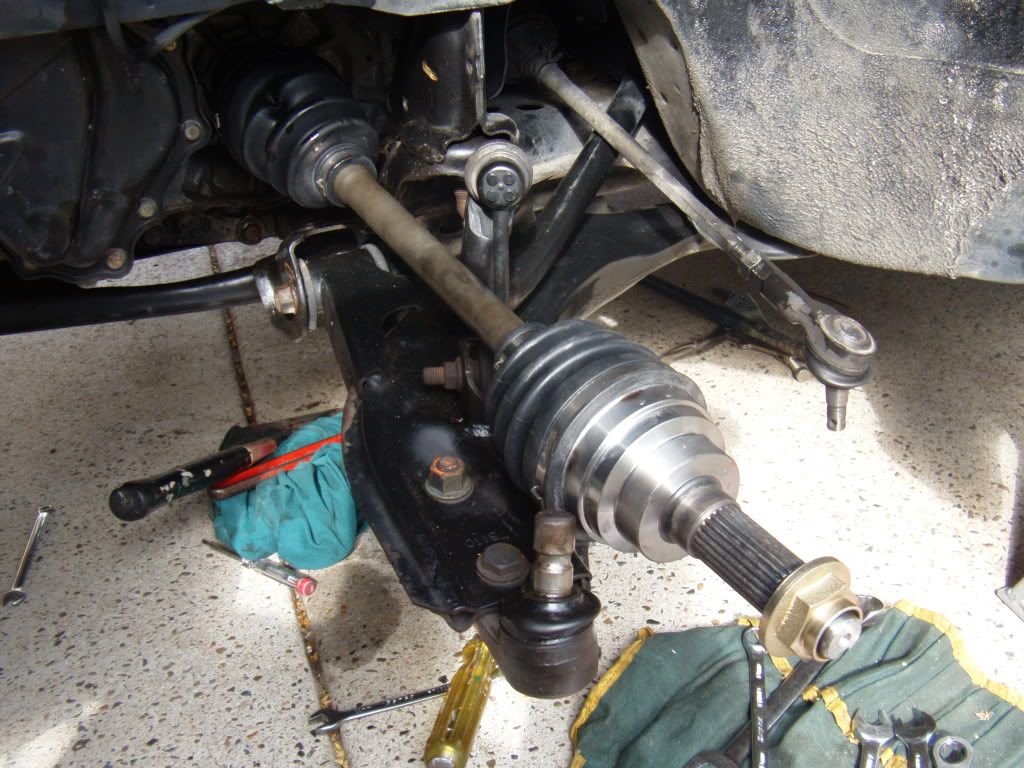 Tie rods: 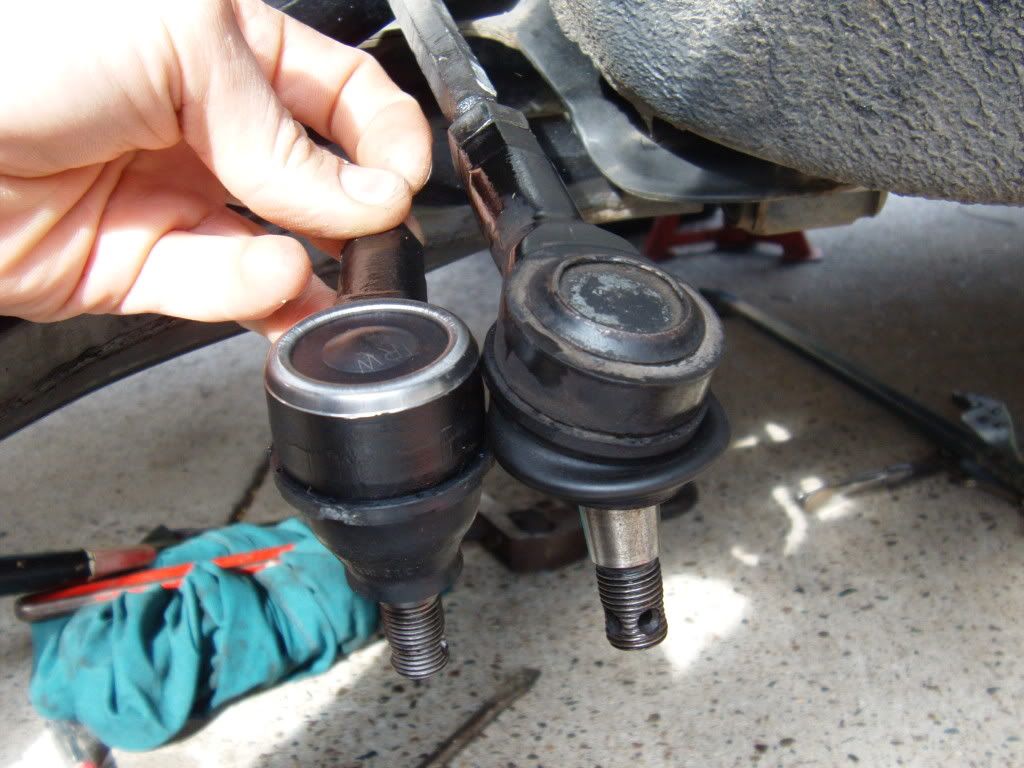 Dirt: 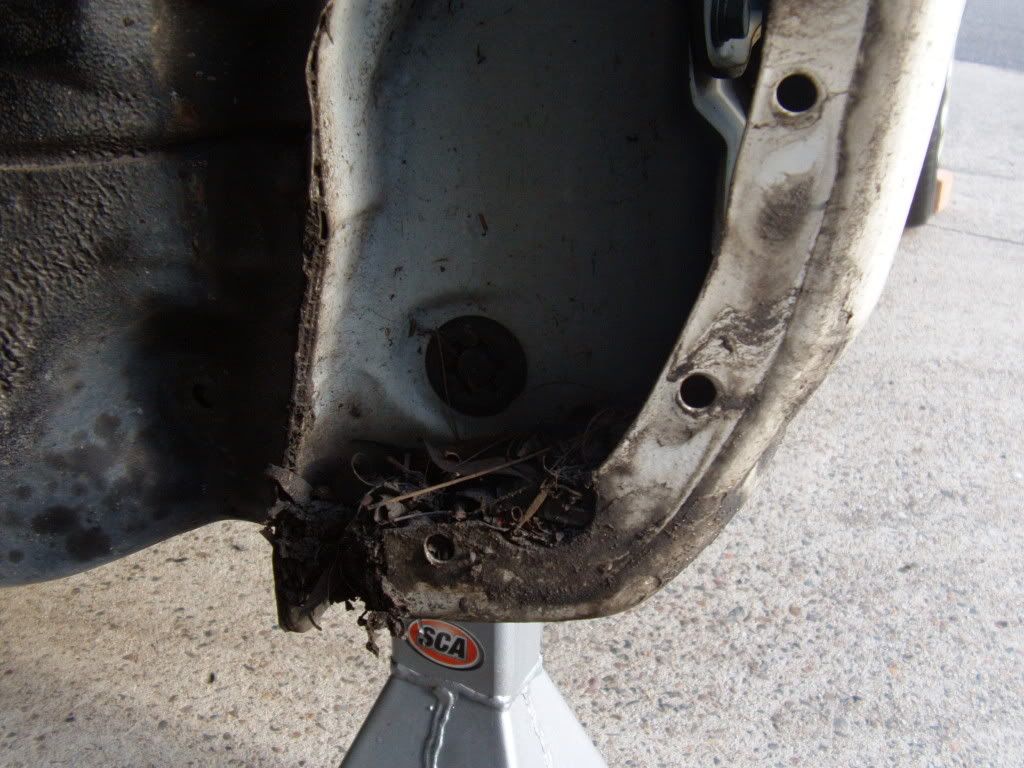 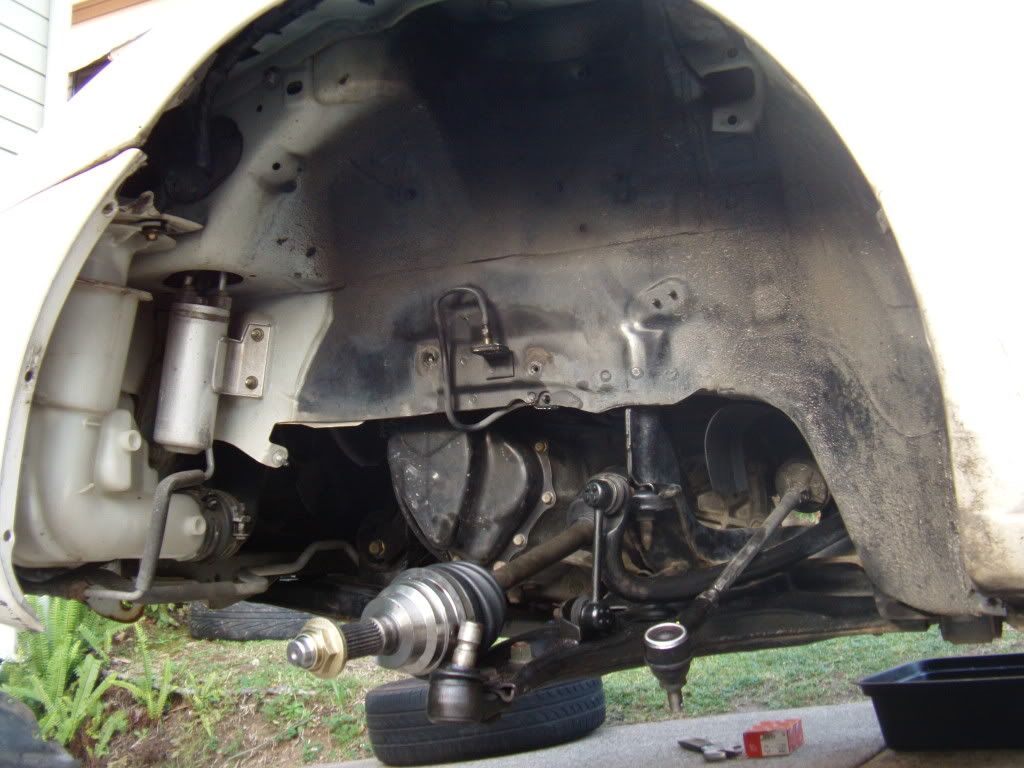 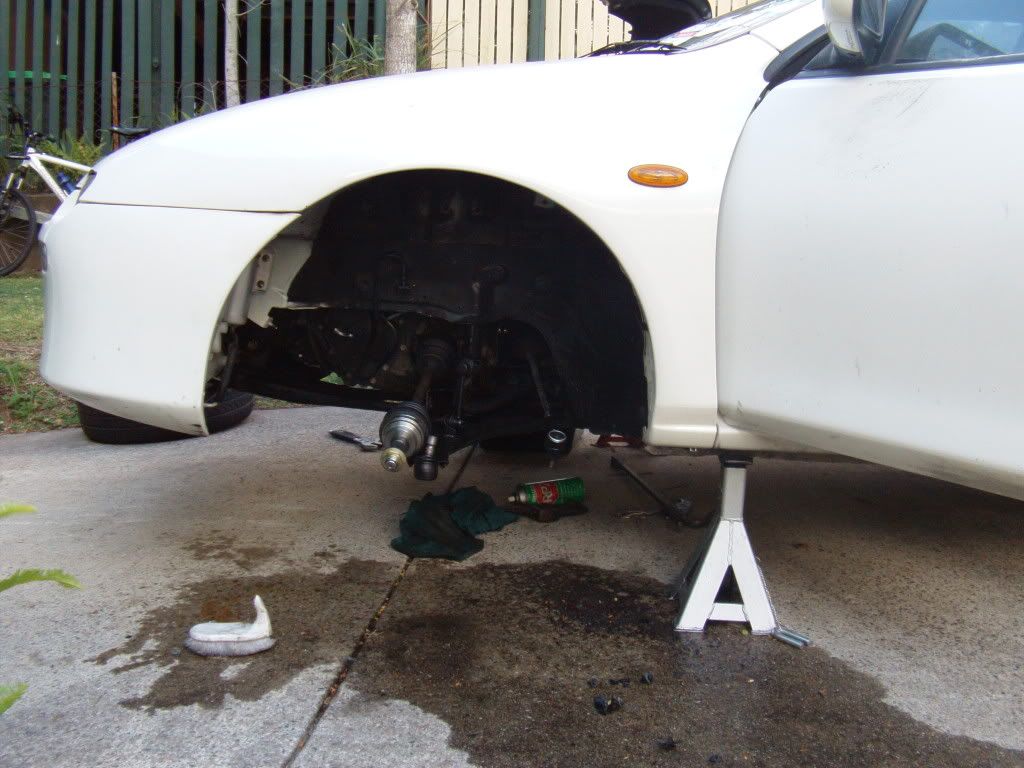 Clean:  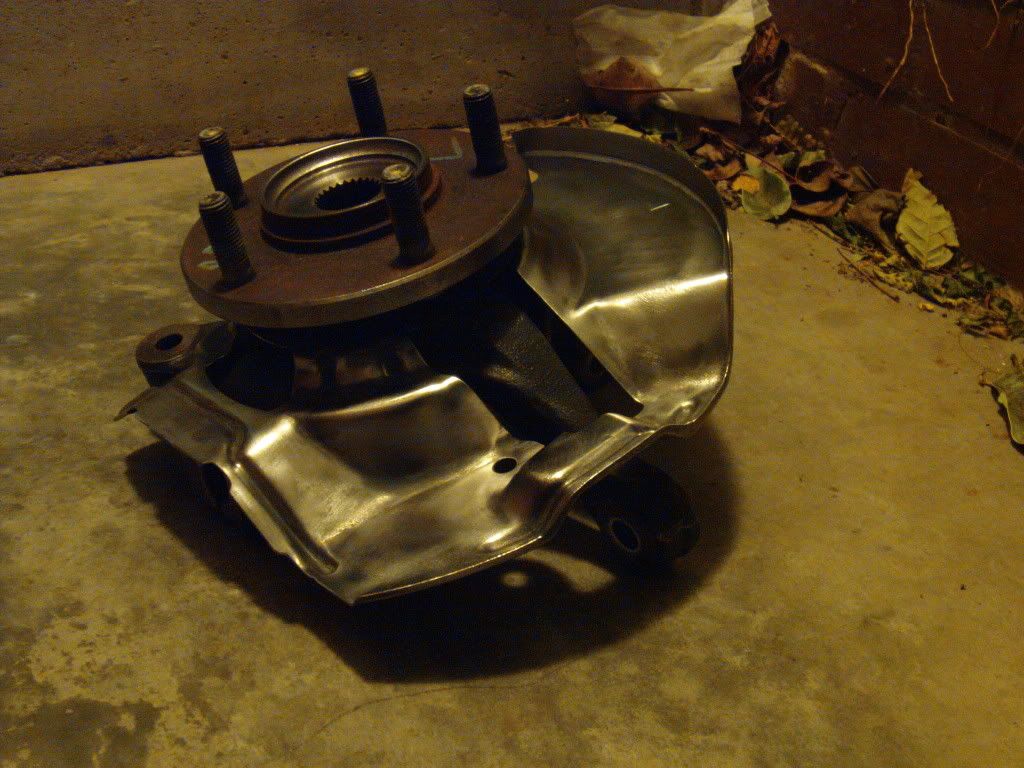 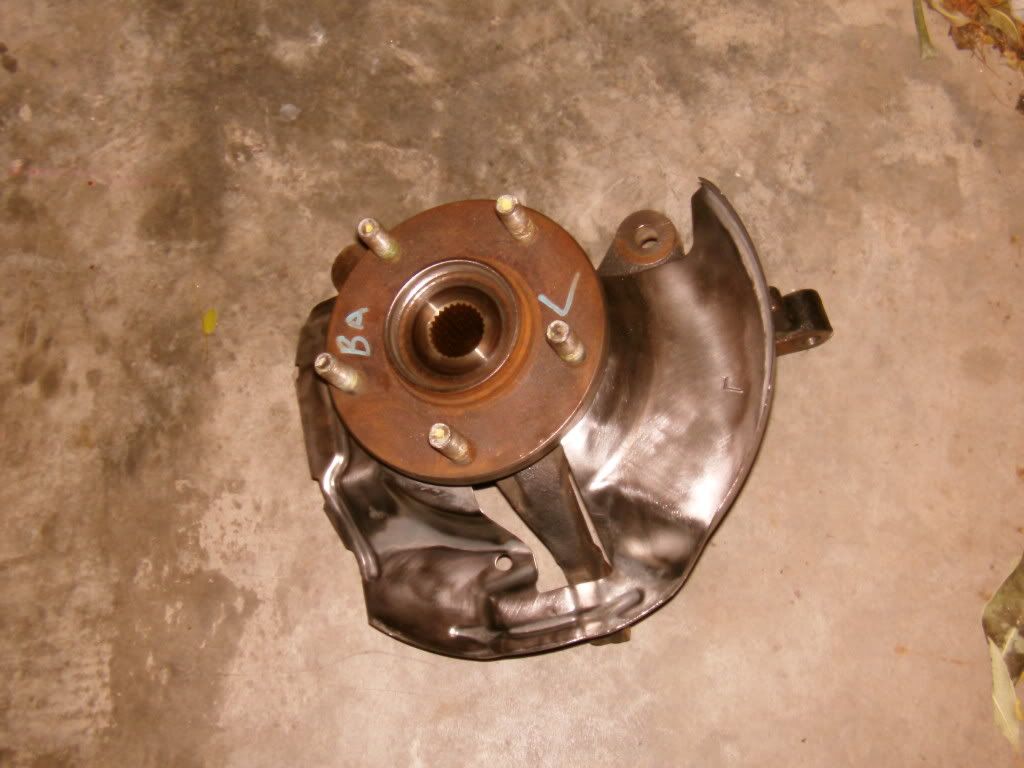 Washed VS dirty: 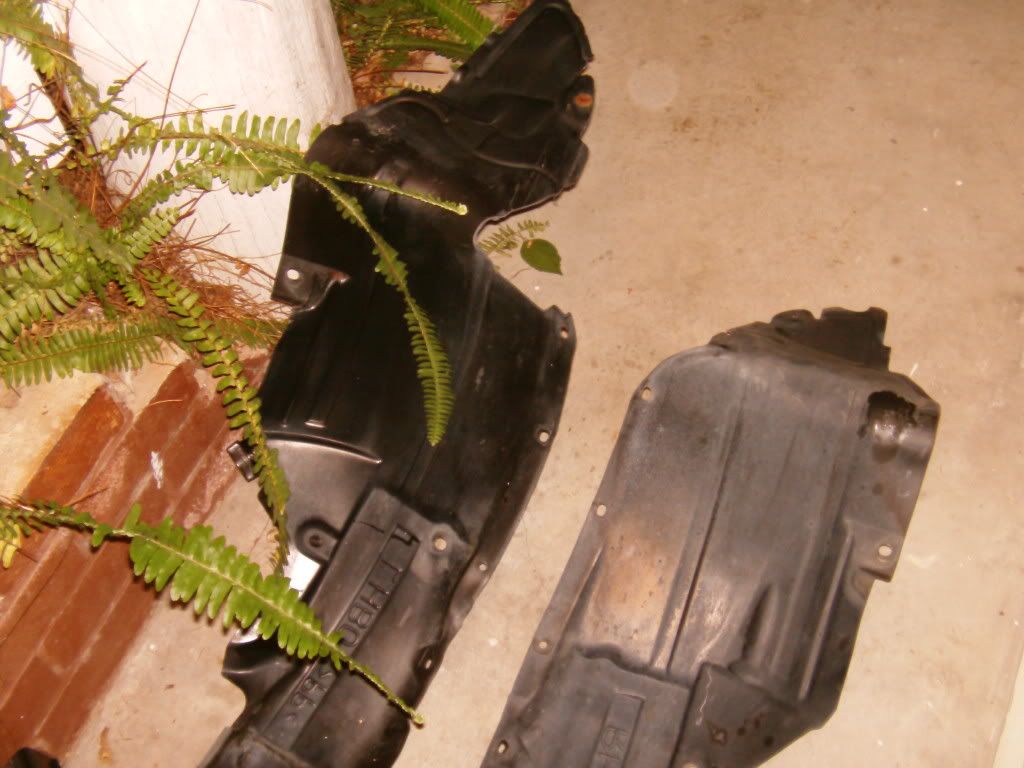 Washed + Armour-All'ed vs dirty -note black oil bottle 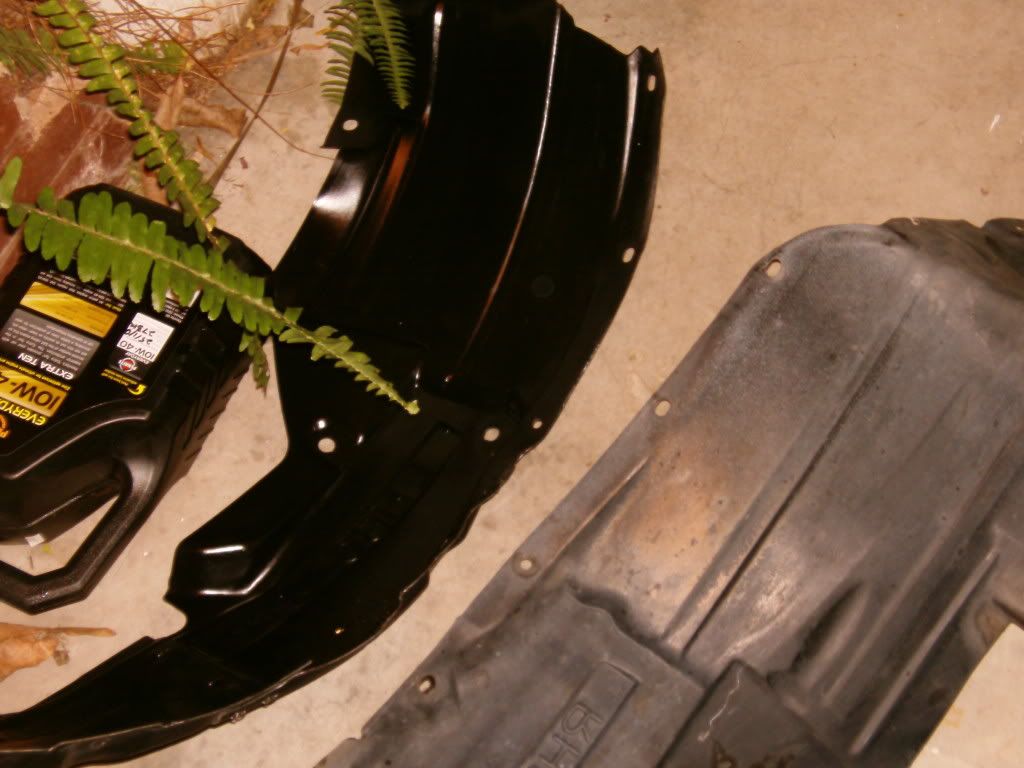 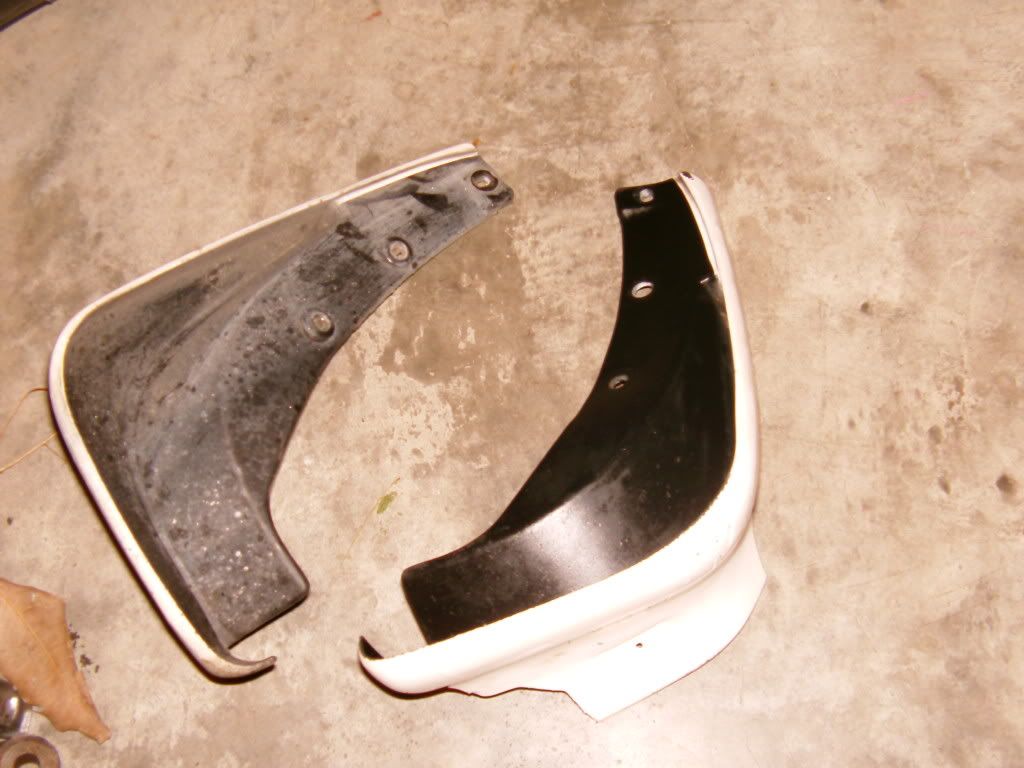   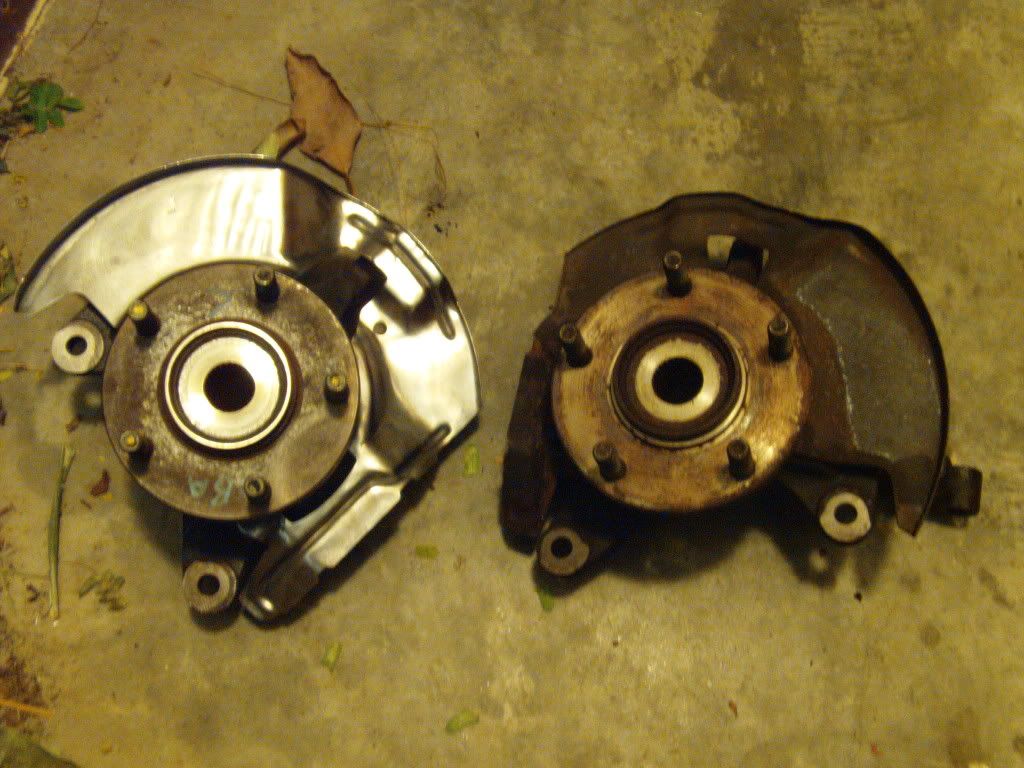
|
|
|
|
|
02-10-2011, 09:53 AM
|
#80 |
|
Senior Member
Join Date: Apr 2011
Location: Brisbane, QLD
Car: 2000 BJ Protege
Posts: 714
|
Now you've made me want to clean my rotors and callipers.
|
|
|
|
 |
|
|


 Linear Mode

