|
|
 04-03-2009, 08:50 PM
|
#1 |
|
AstinaGT Regular

Join Date: Feb 2008
Location: Quakers Hill, NSW
Car: Mazda 3 & BA Astina
Posts: 277
|
SP BLING's SP23
Here's my current daily driver......The car as purchased new in May 05:
Mazda 3 SP23 - Leather/BOSE pack - Colour: Sunlight Silver   Dyno Results: 91.0kW - JAN 2007 Mods: K&N Panel Filter, Advanced Timing, 98 Octane Fuel, Stock 17" Wheels 
__________________
2005 | Mazda 3 SP23 Hatch | Sunlight Silver [daily driver] 1997 | Mazda 323 Astina Hatch | Fridge White [soon to be daily driver] Last edited by SP BLING; 04-03-2009 at 09:04 PM. |

|

|
| Sponsored Links |
|
|
|
04-03-2009, 09:51 PM
|
#2 |
|
AstinaGT Regular
Join Date: Feb 2008
Location: Quakers Hill, NSW
Car: Mazda 3 & BA Astina
Posts: 277
|
The car was involved in a front ender after just 3 months of ownership - thankfully we were insured.
The accident put the car of the road for 3.5 months, but enabled us to do a little "modding" while being rebuilt. The new stock front bar was modifed to have the honeycomb black plastic lower grille removed and fitted with silver mesh instead. Mounting tabs for the plastic grille were cut off and sanded smooth before being painted. A new fiberglass grille was fitted to the bonnet whcih removed the big Mazda logo. The headlights (both new) were cracked open and had the orange side reflectors removed and angel eyes (rings) fitted around the 2 chrome rings inside the light, then re-sealed and fitted to the car.  This was the start of the "modding".... then the bug bit......           Within a few months after all this, the Car was lowered using "KMAC" springs (these were sh1t and didn't last too long ") ) along with the brake calipers painted red. Custom ordered number plates of ASP.023 were also fitted. ) along with the brake calipers painted red. Custom ordered number plates of ASP.023 were also fitted.The KMAC spings were later pulled out and replaced with a set of Eibach Sportlines along with a set of Mazdaspeed Shocks (imported from the US). The Eibachs lowered the car a further 5-10mm and made it sit super low. Ride quality was improved 50% over the KMAC springs previously fitted as the Eibach's were progressive. The Mazdaspeed shocks also helped firm up the ride as well, though not too good for Sydney's roads.... Technafit braided brake lines were also fitted at this stage. This improved the factory braking system greatly - even with the stock pads still fitted!!!    
|
|
|
|
|
04-03-2009, 09:57 PM
|
#3 |
|
AstinaGT Regular
Join Date: Feb 2008
Location: Quakers Hill, NSW
Car: Mazda 3 & BA Astina
Posts: 277
|
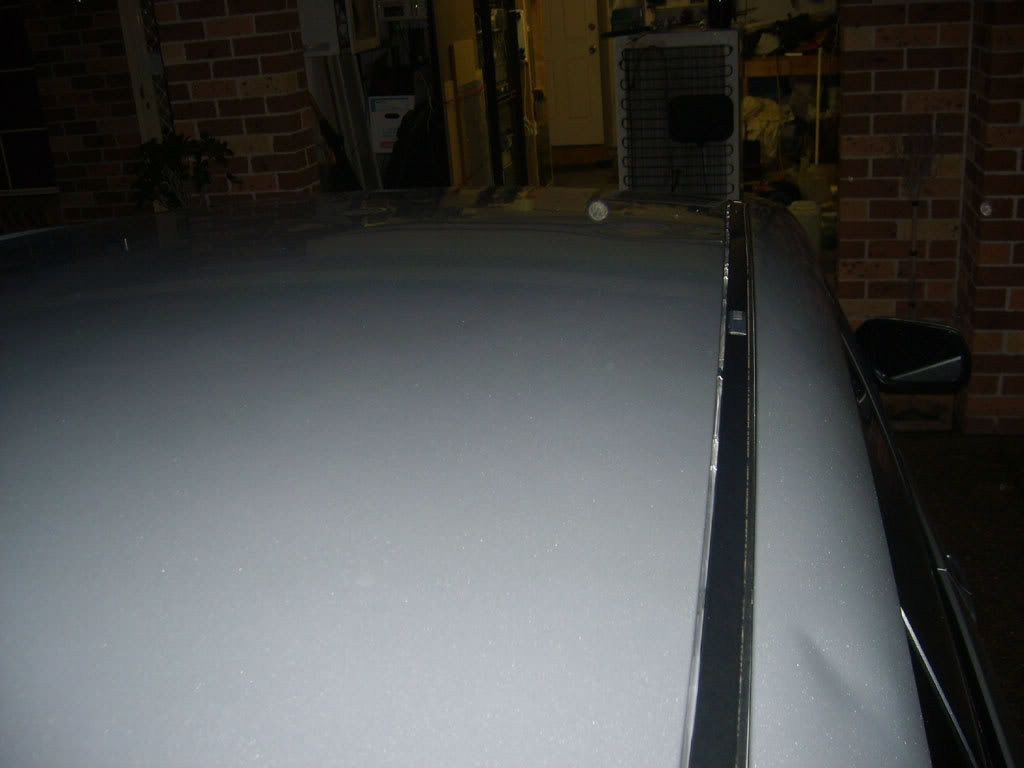
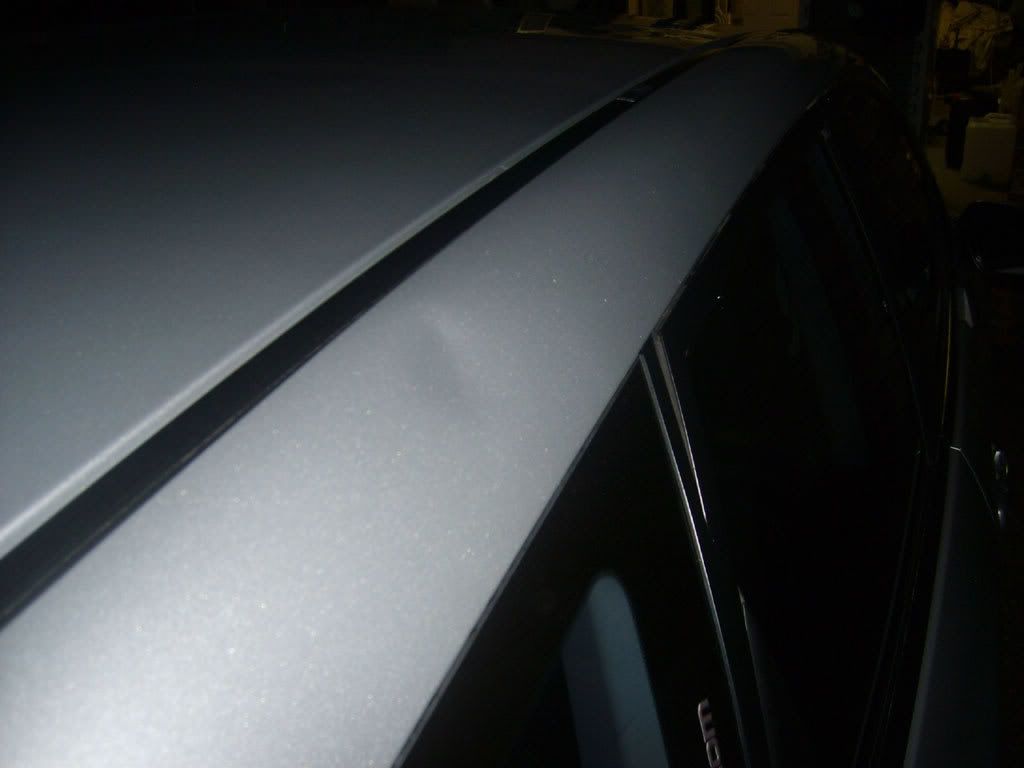
DEC 07:
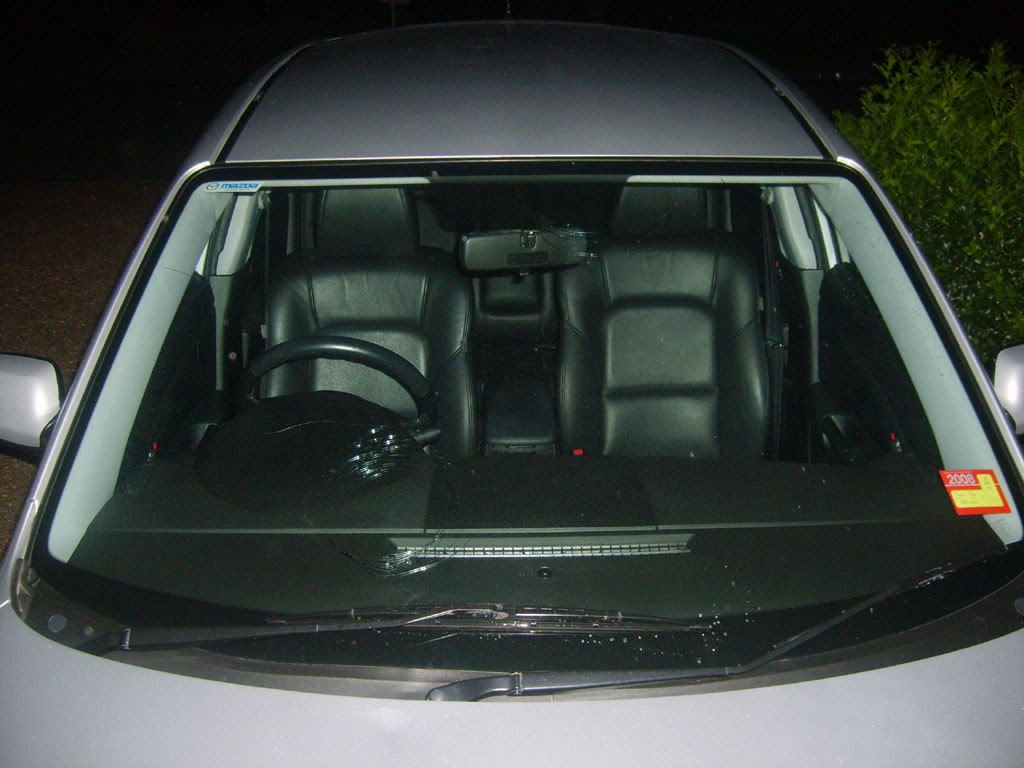
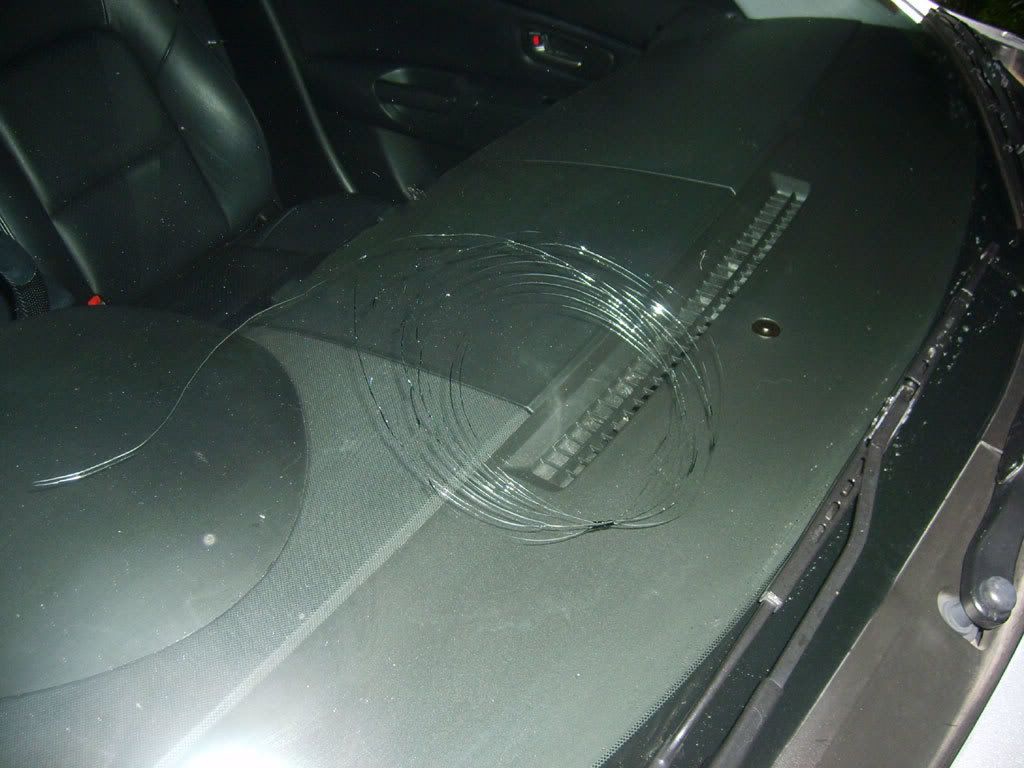
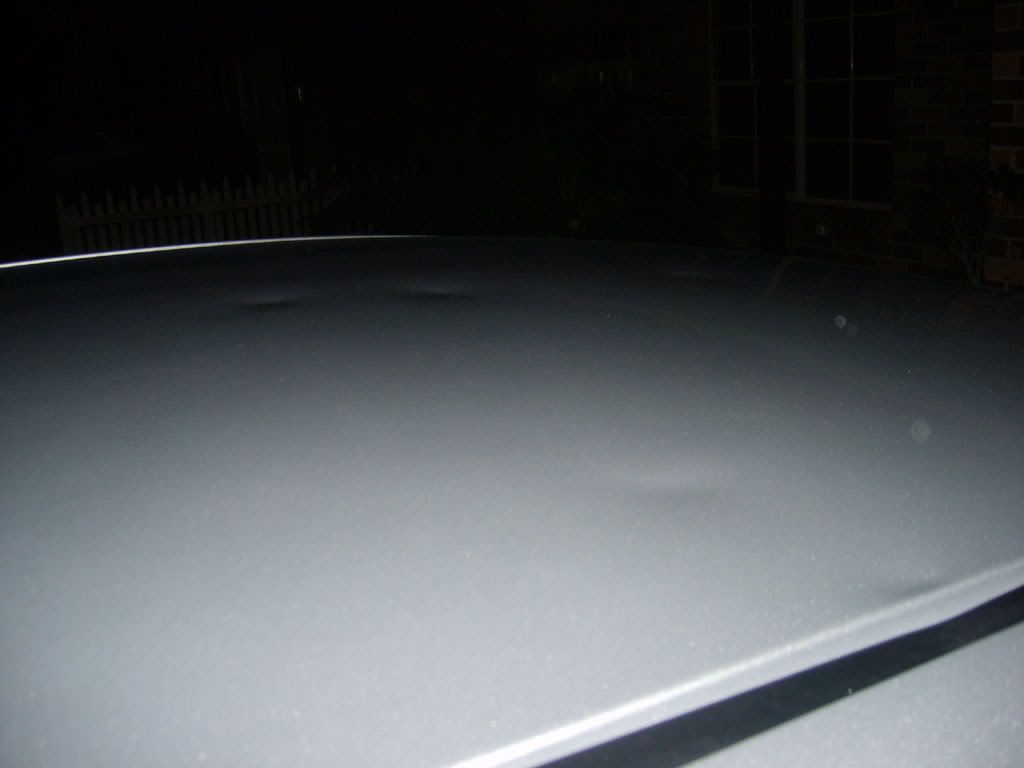
- I decided to give the car some golf ball aerodynamics (thanks to hail storm in December 07 that went through Blacktown) Damage to Windscreen (now replaced), front drivers guard, bonnet and roof. Very lucky considering I was driving through the middle of the storm at the time. Hopefully should be repaired by April/May.- Number Plates have now been changed to SP23XS  - Eibach Sportline springs have now been swapped out for Pedders Sports Ryder. The Eibach's were just not suited to the MazdaSpeed Struts and as such made the car too bumpy/harsh. Great for a race track, but shocking (Literally) on Sydney roads. The 10mm or so raise of the car now gives the suspension a little more travel and has made the car very nice to drive now. Handling hasn't changed between the springs. |
|
|
|
|
04-03-2009, 10:13 PM
|
#4 |
|
AstinaGT Regular
Join Date: Feb 2008
Location: Quakers Hill, NSW
Car: Mazda 3 & BA Astina
Posts: 277
|
MARCH 08:
X Force Headers & High flow cat + MPS 3 Exhaust sourced for a bargain price  Well the 3 now roars!!!..... And yep, it's pretty loud :thumbsup: Previous 2" stock system: 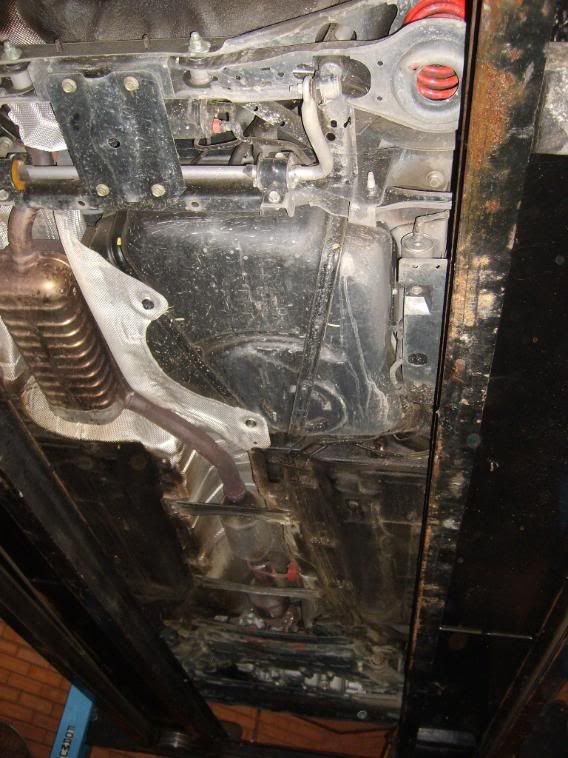 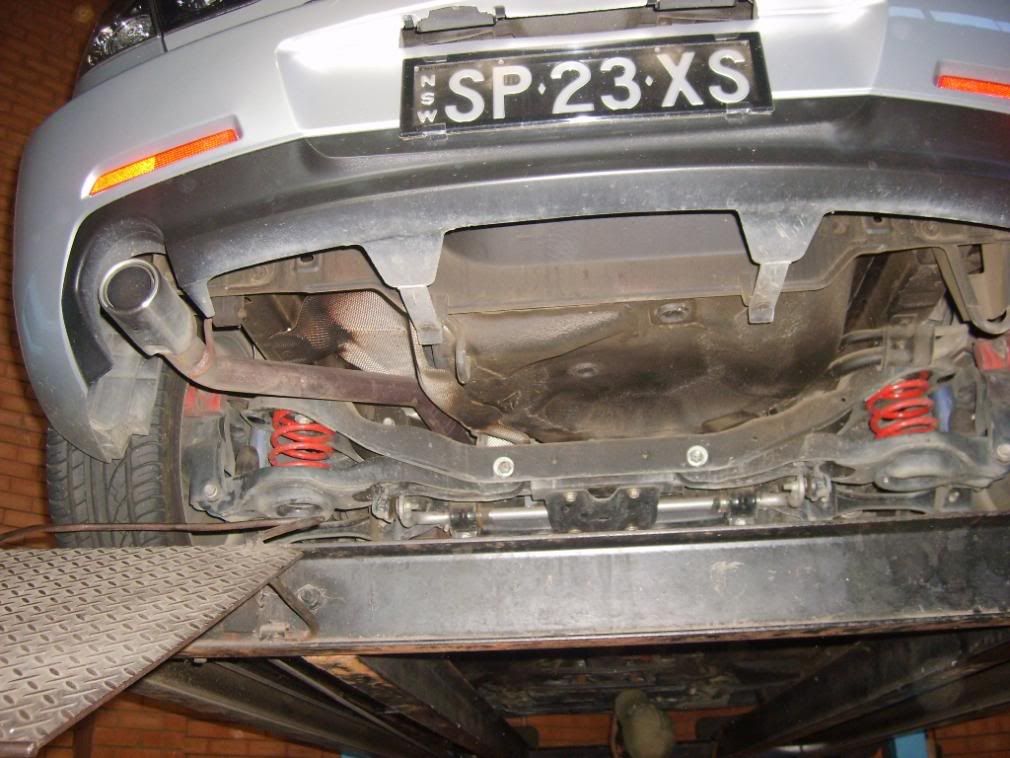 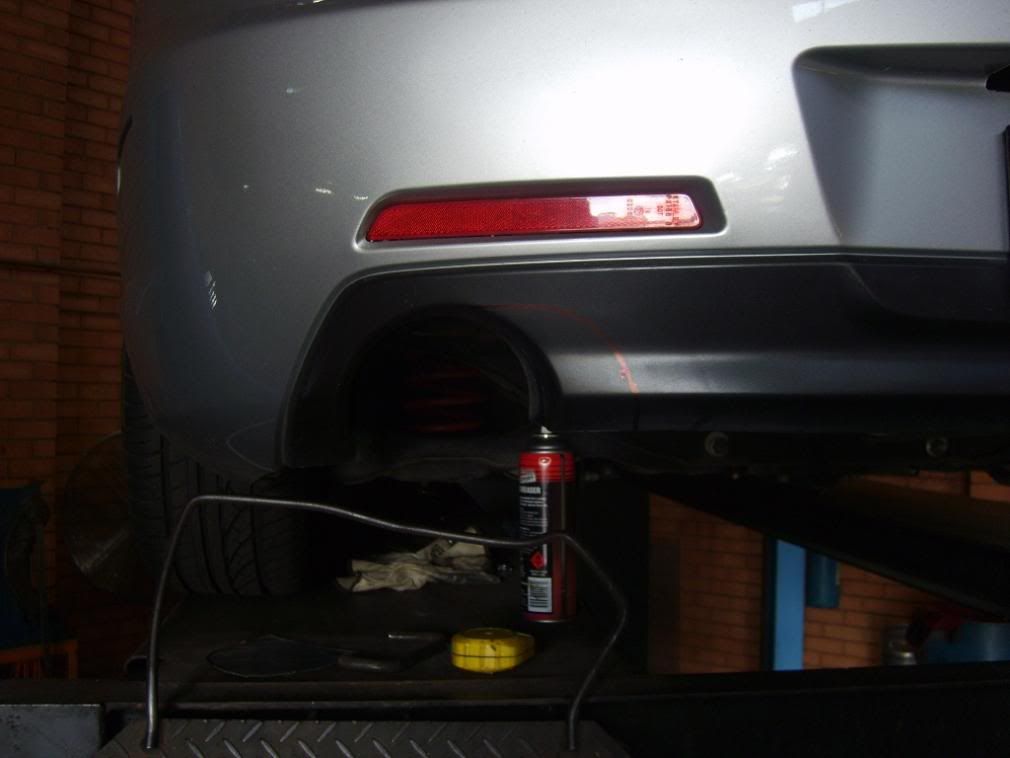 New 2.5" system with High flow cat, no second cat. A flange was welded on after the main muffler to allow for the system to be removed if needed. 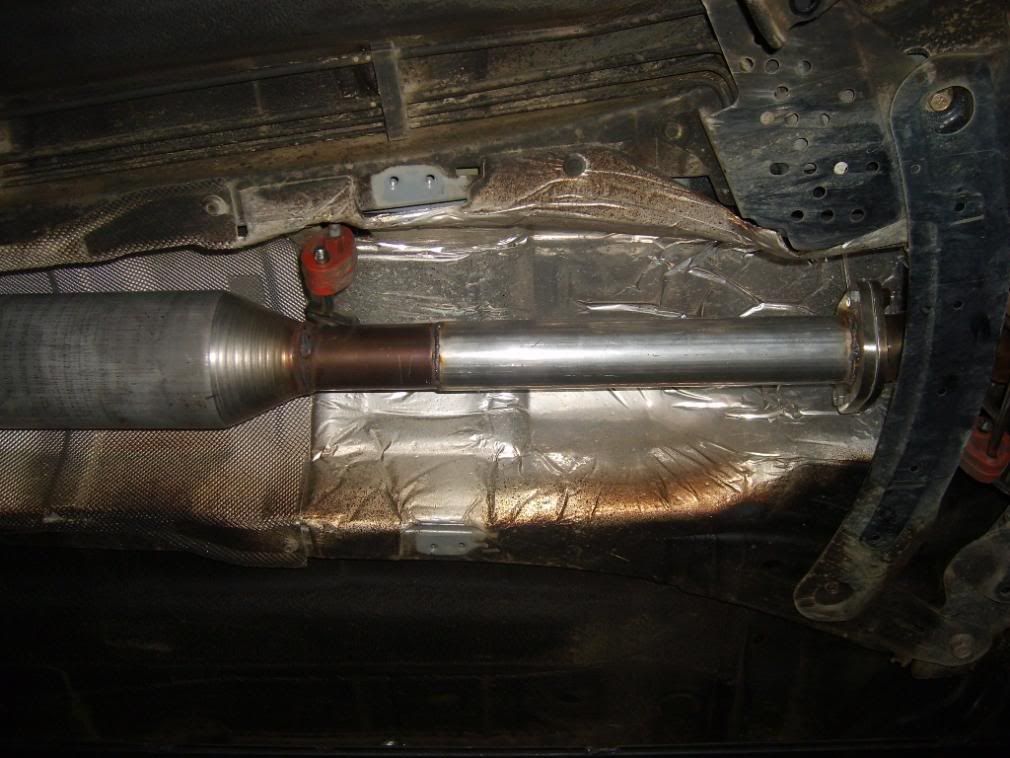  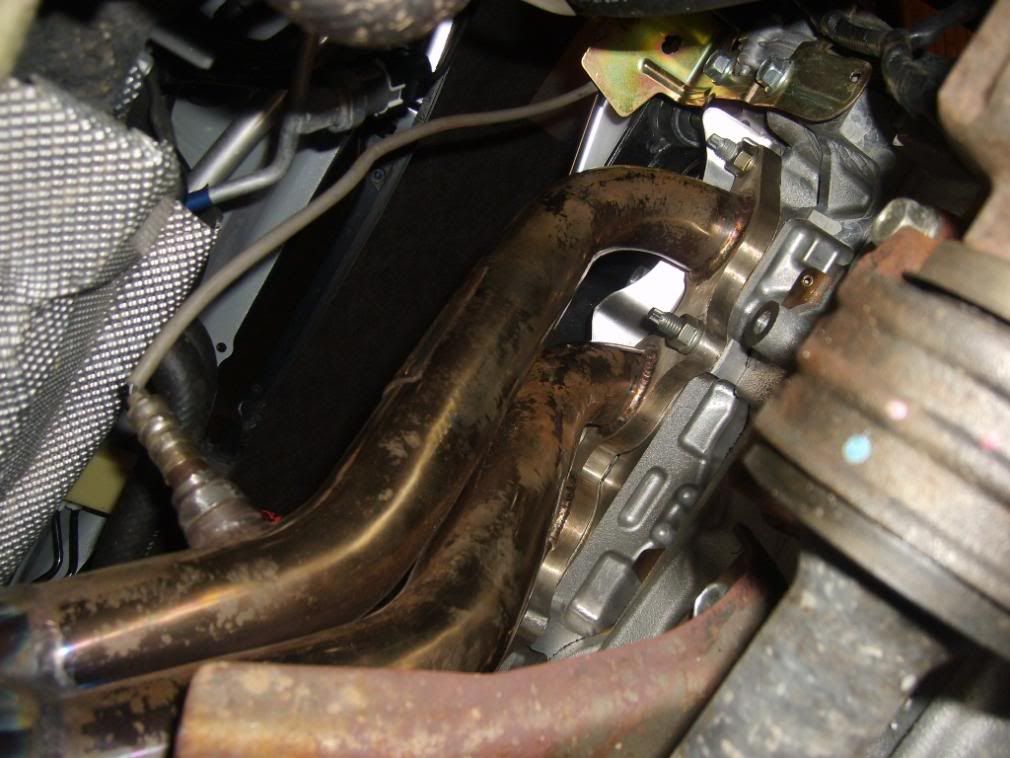 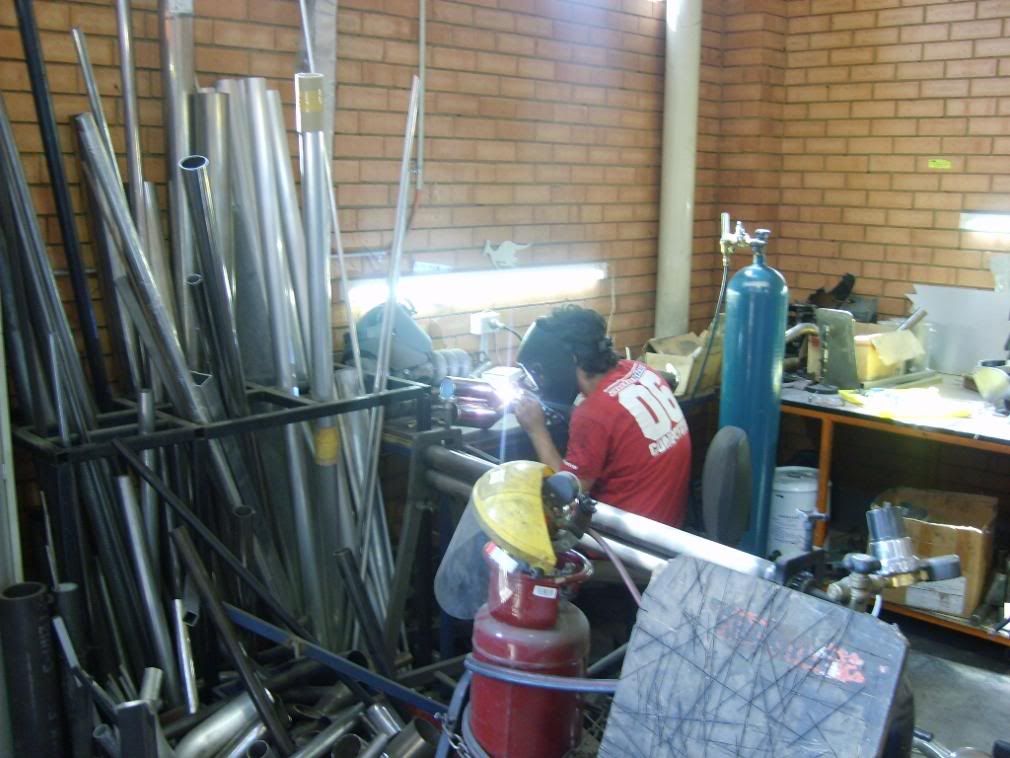 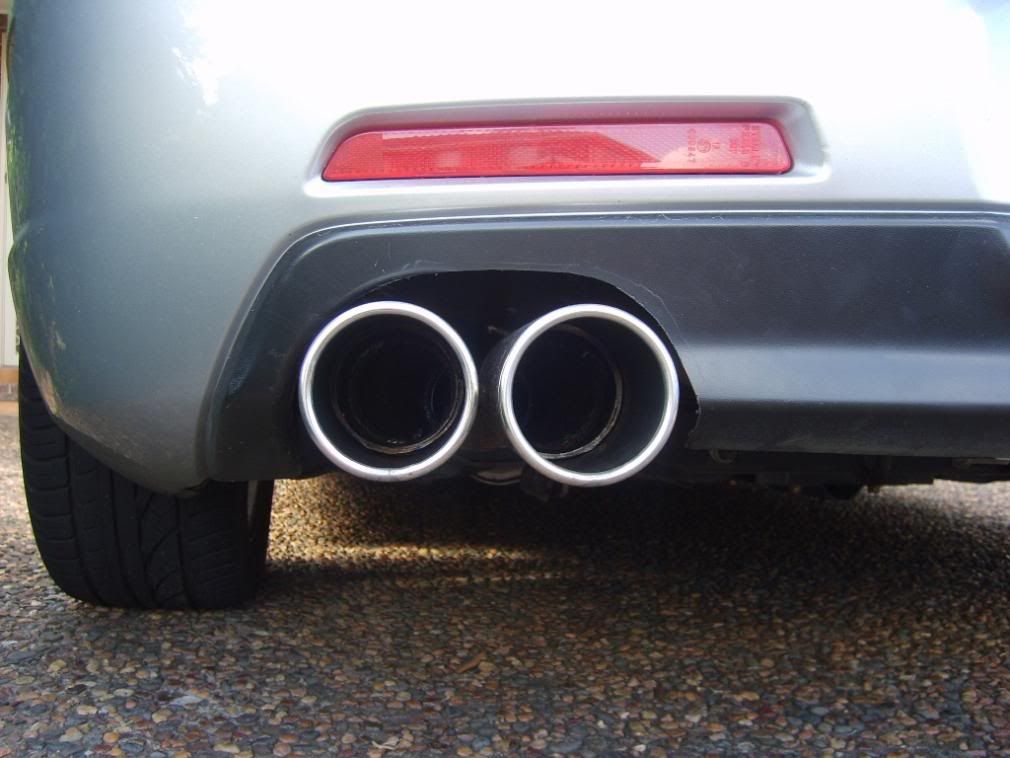  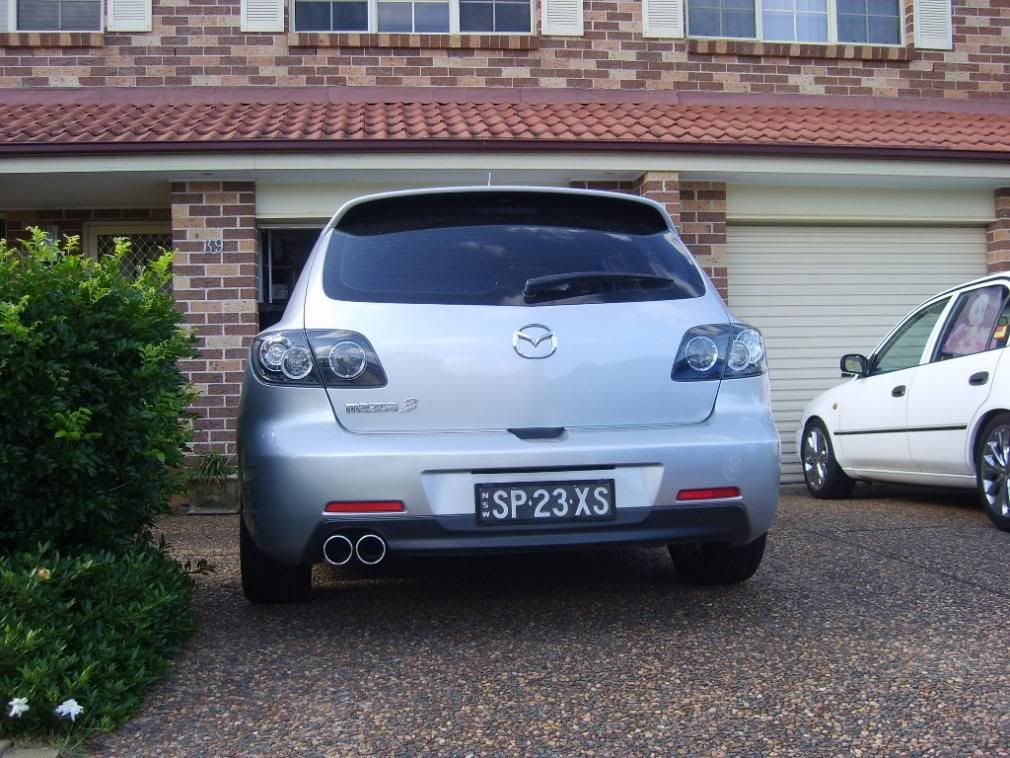 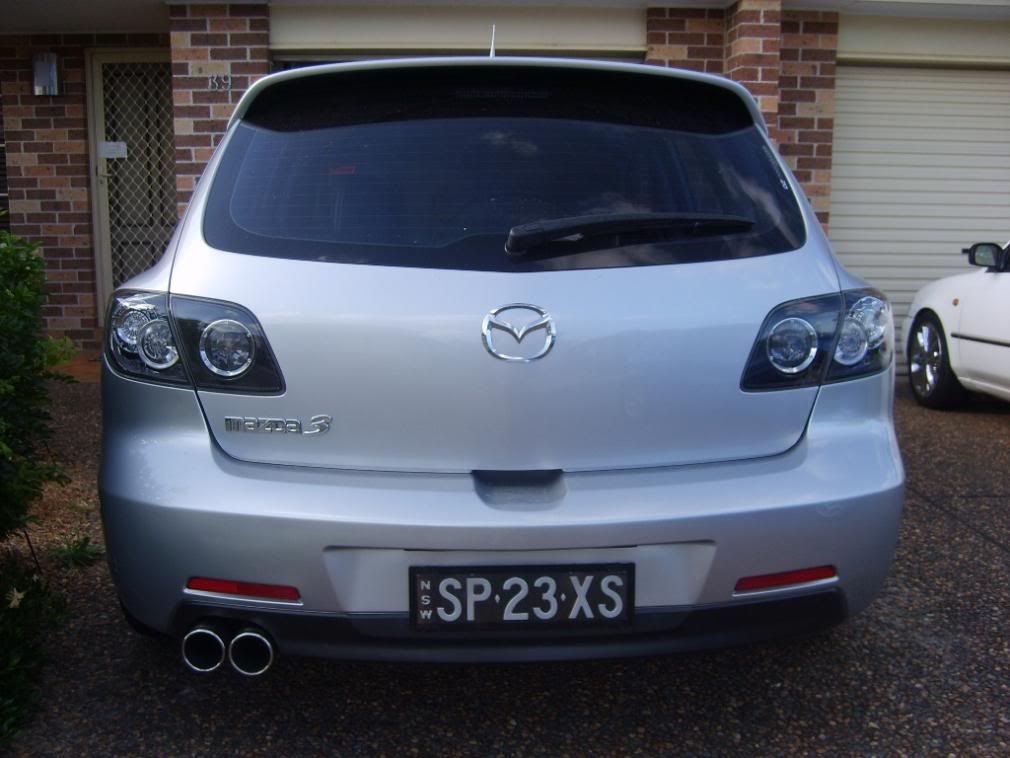 The MPS system had to be extended at the front to cater for the removal of the second cat, but other than that it would've bolted straight up. The rear mini muffler was removed from the system to allow for the custom twin 3" tips hanging out the back. The rear bumper was also expanded on the inside to fit the two tips in the hole, instead of just the one. I must give credit to the guys at Westside Mufflers :thumbsup: These guys know how to weld!!!! It took them approx 7 hours to fit the whole mandrel bend system with every joint TIG welded. ================================================== The resonator removed from the rear of the stock MPS3 system was added back in a week later due to the excessive (read above legal limit) noise. An additional resonator was also added up the front of the system where the 2nd Cat used to live. So all up my car now has 3 resonators and 1 muffler. And the result........Bloody brilliant!!!!! Sounds deep as and is semi quiet, instead of a car farting into a large milo tin while rattling your house as I drove past 
|
|
|
|
|
04-03-2009, 10:18 PM
|
#5 |
|
AstinaGT Regular
Join Date: Feb 2008
Location: Quakers Hill, NSW
Car: Mazda 3 & BA Astina
Posts: 277
|
APRIL 08:
Fibreglass MPS3 rear wing with carbon fibre overlay 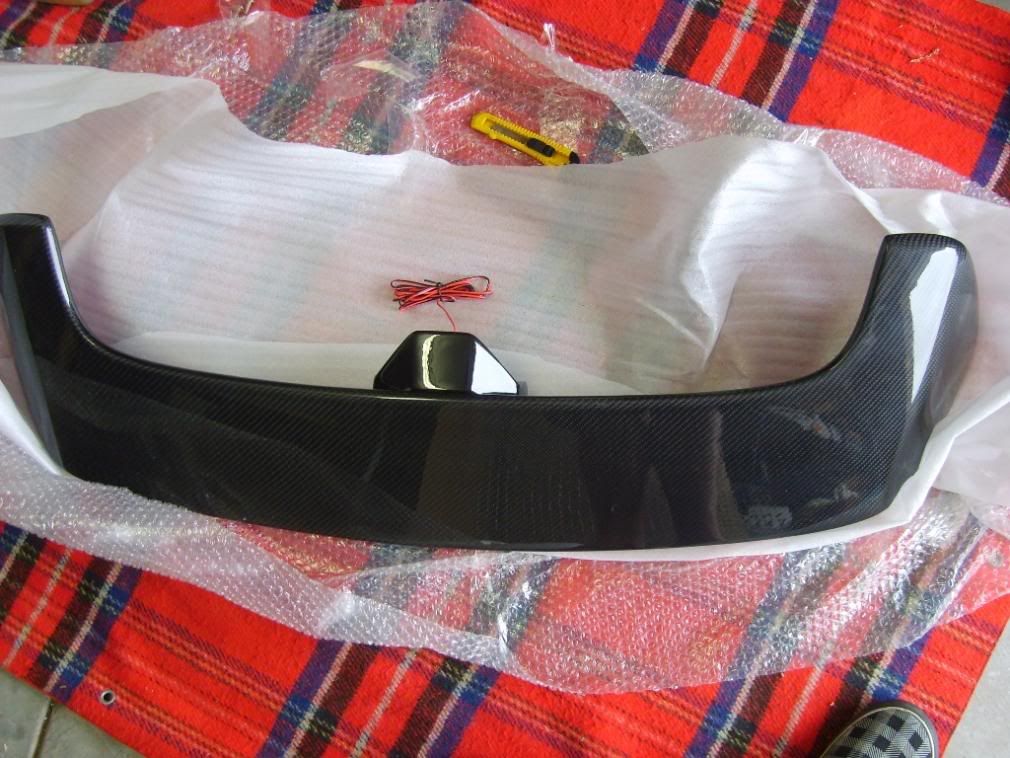 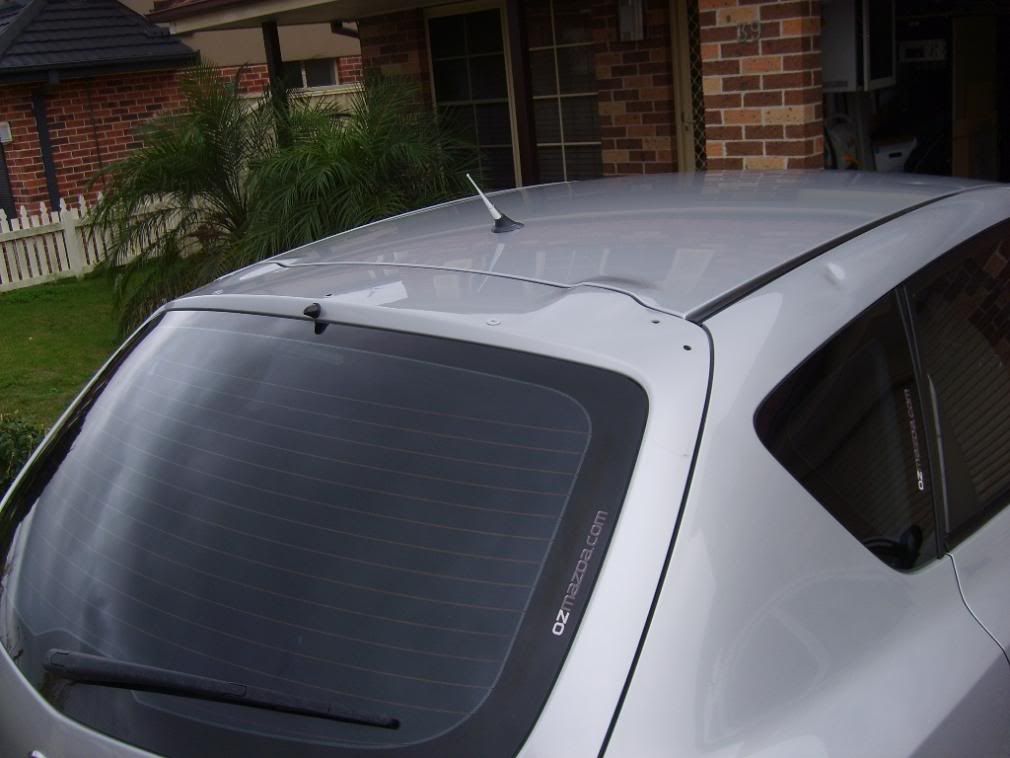 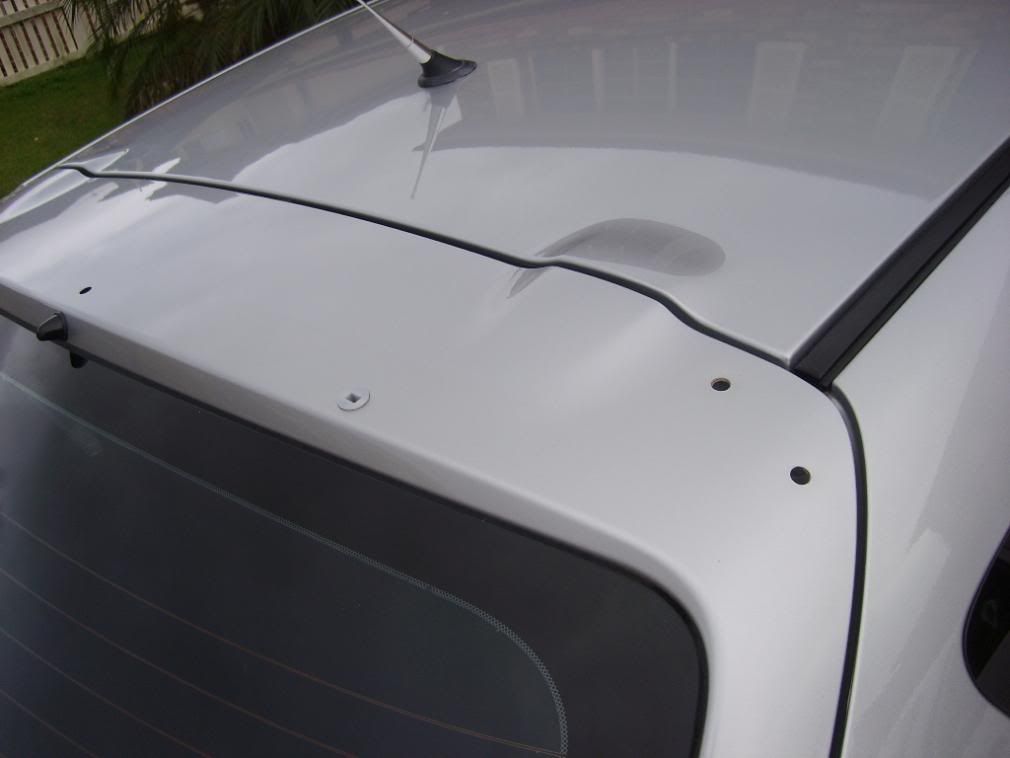 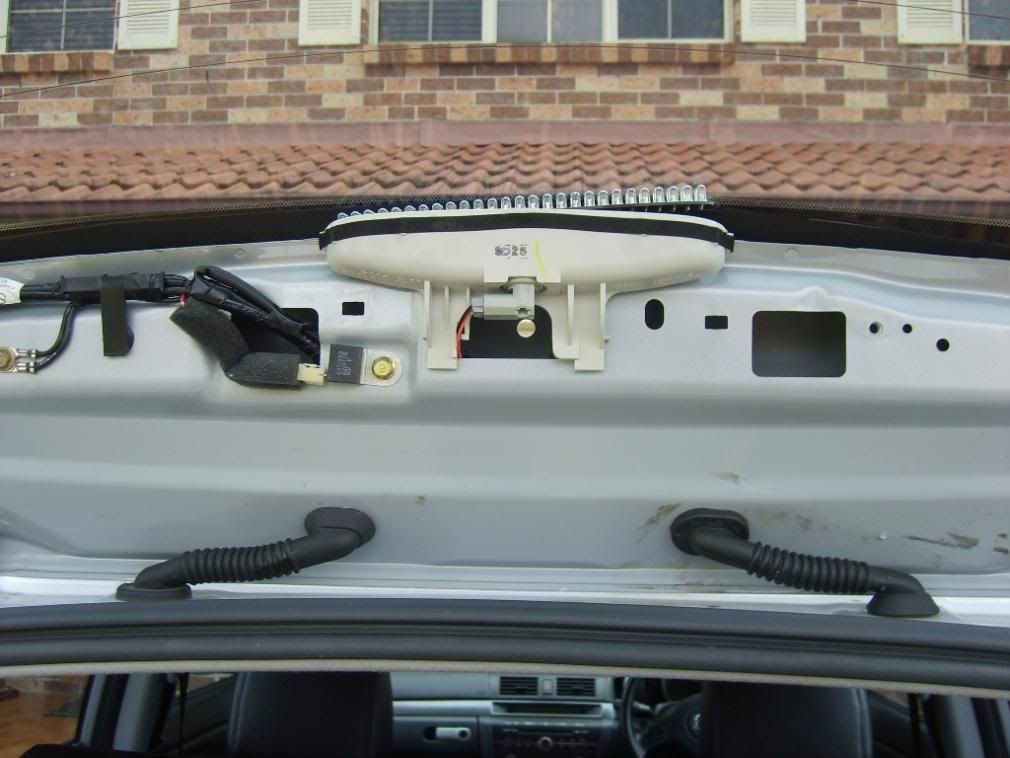 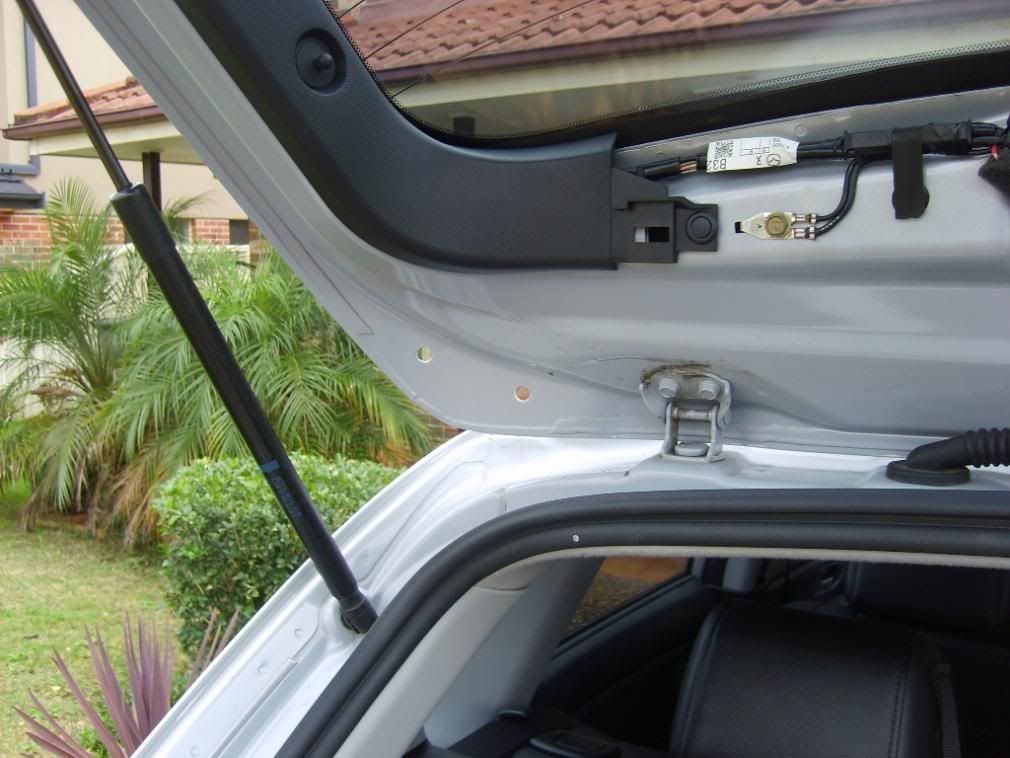 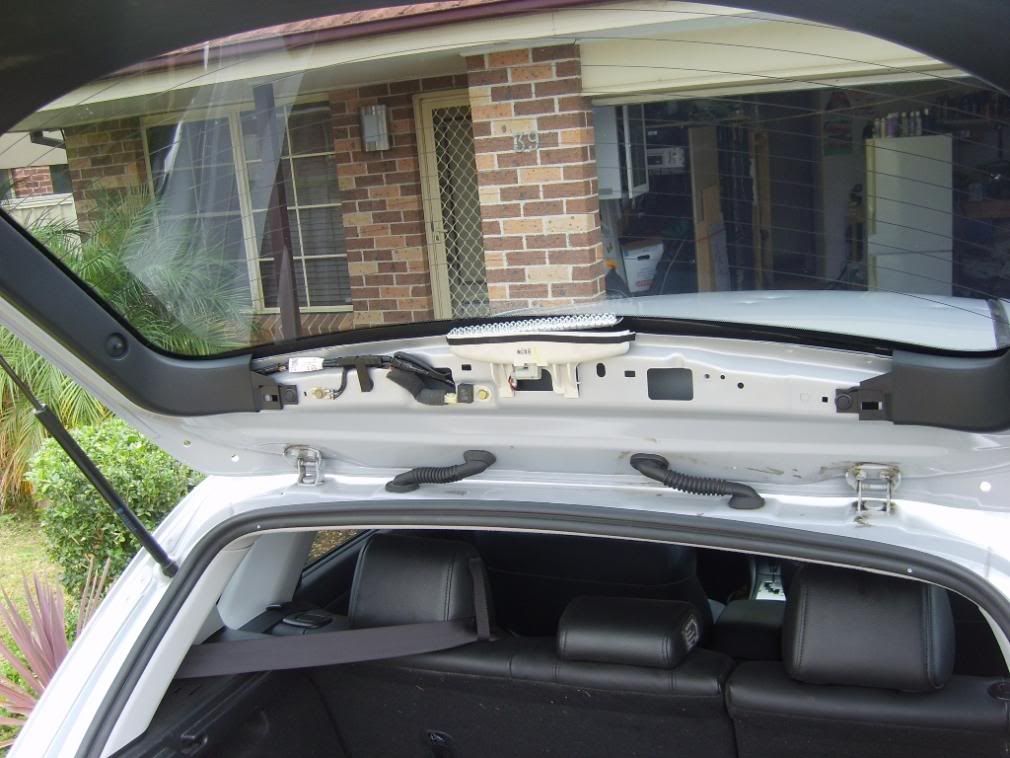  And the final look after installation... 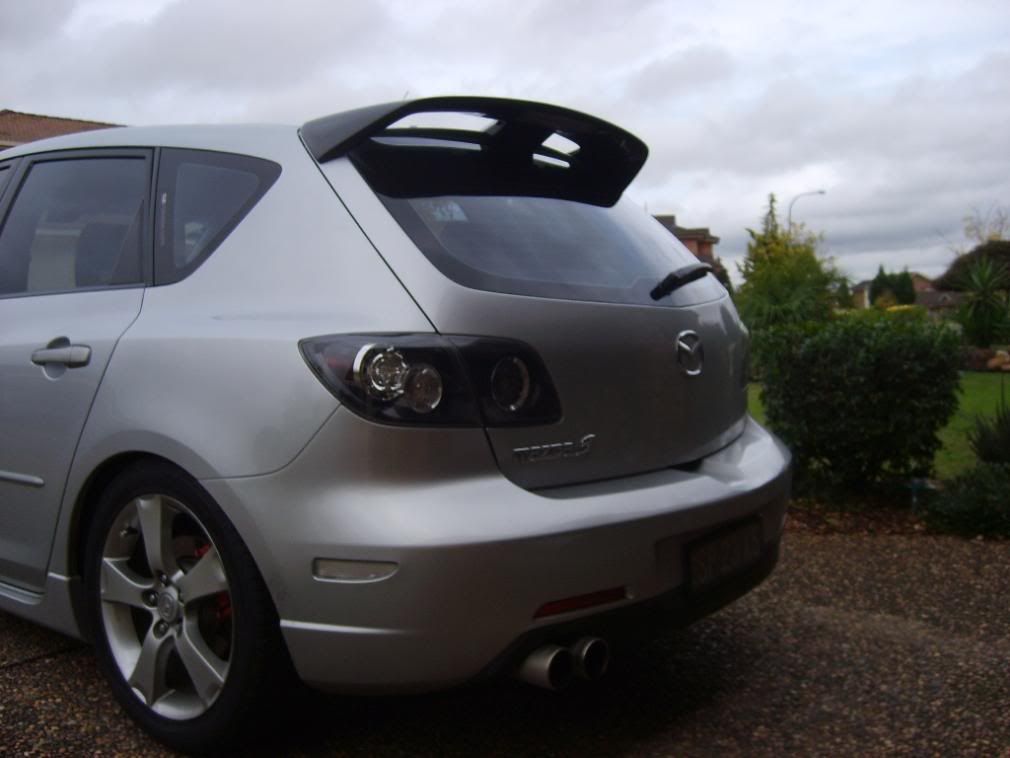 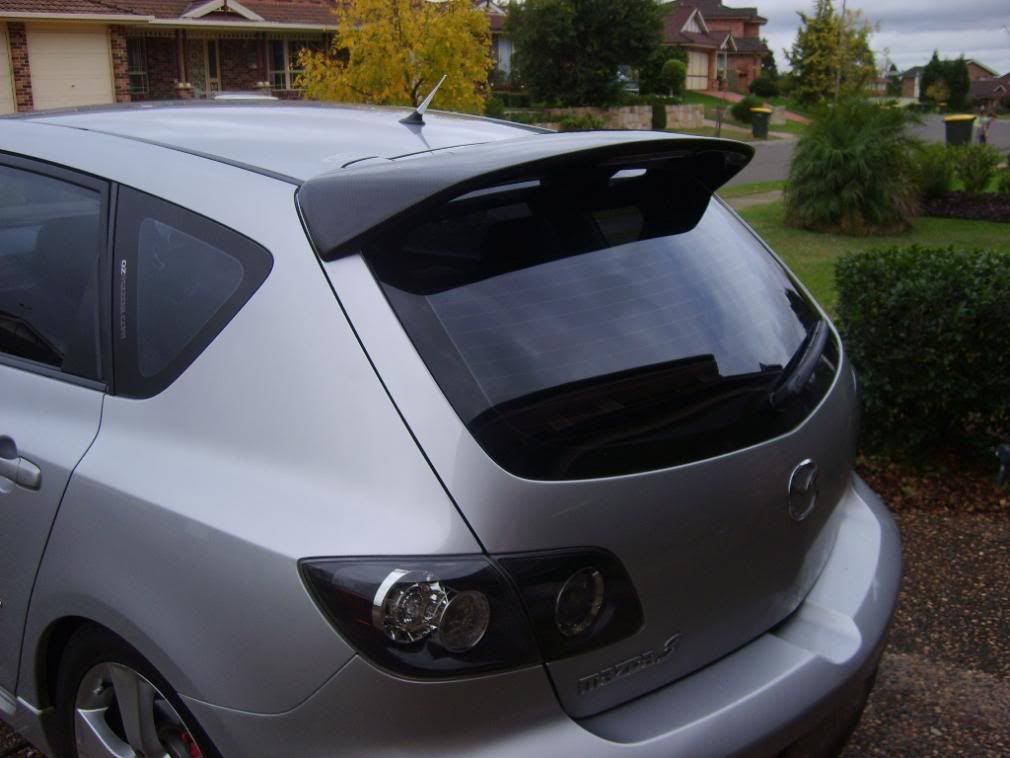 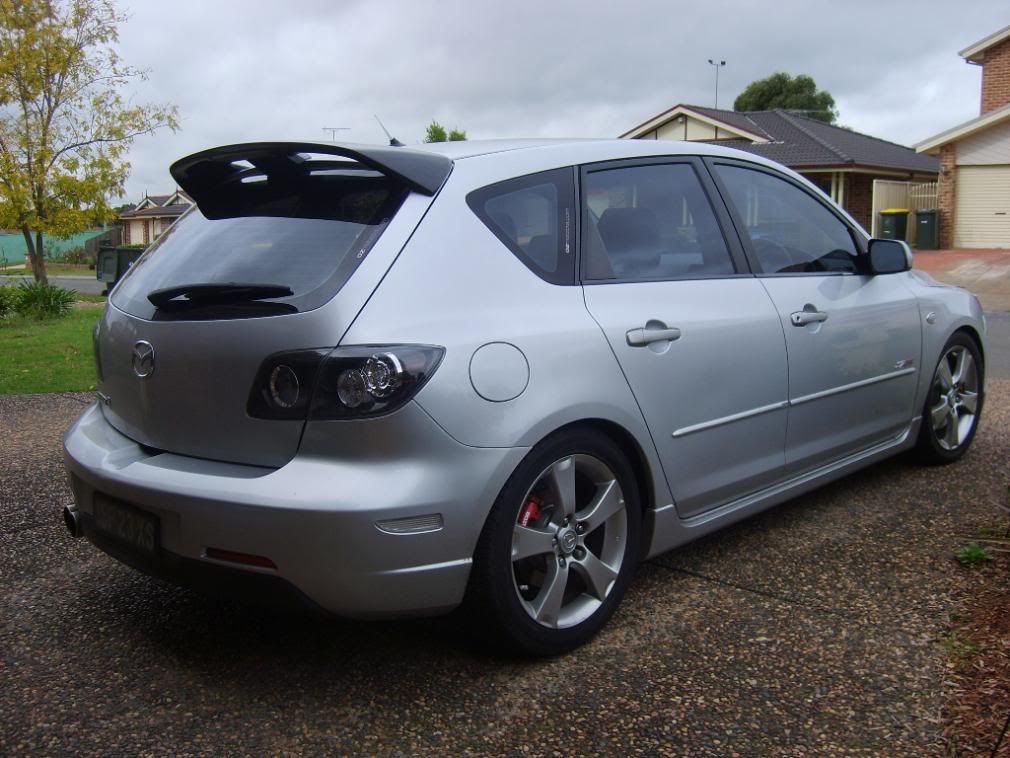 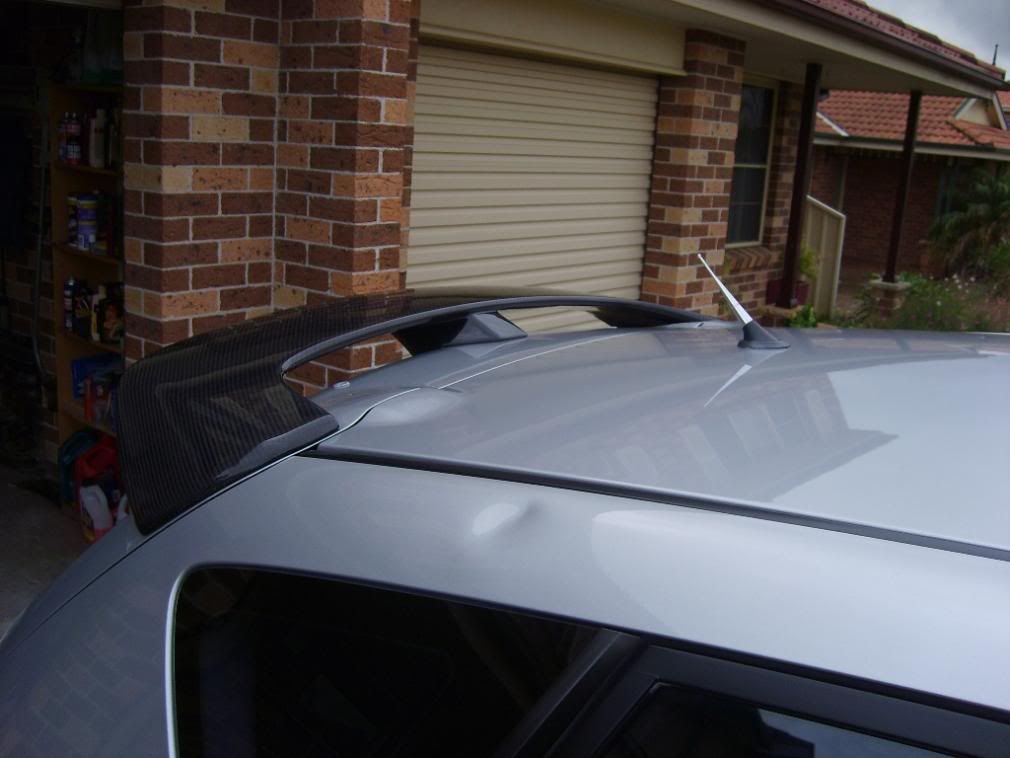 Installation was relatively easy - done in approx 1 hour start to finish. It does leave two holes in the top of the hatch, but these will be removed shortly along with the BLOODY hail dents. You do though need to drill an additional hole for the brake light cables to go through. |
|
|
|
|
04-03-2009, 10:26 PM
|
#6 |
|
AstinaGT Regular
Join Date: Feb 2008
Location: Quakers Hill, NSW
Car: Mazda 3 & BA Astina
Posts: 277
|
MAY 08:
Car was handed over to the smash repairers in late April to finally get the hail damage repaired. Well unfortunately the Microtech won't be in for Dynoday thanks to some very slow hail repair work at the Smash Repairers. I'm now going to be lucky to just have my car in time for the day, let alone have any performance work done to it. But hopefully it will have a totally new look in time for OZMAZDA Dyno Day on the 24/05/08! :thumbsup: Here's a sneak preview: 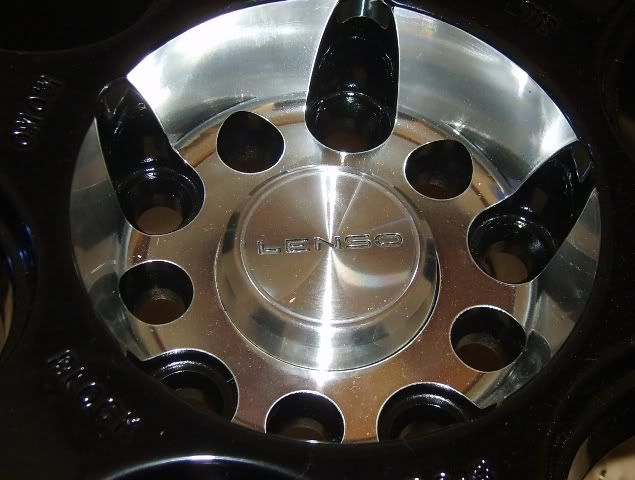 Well at this point something flipped in my head.... The mod bug had seriously bitten this time and big $$$$ spent Anyway I'm still aiming to crack the 120kw at the wheels in the next few months with the end goal to get it up to 130kw using the stock bottom end of the engine. Though I'm not sure how well it will go with the stock compression ratio of 9.2:1 :whistling: This is the plan to hit 120kw @ the wheels (well today anyway lol!!!)
|
|
|
|
|
04-03-2009, 10:30 PM
|
#7 |
|
AstinaGT Regular
Join Date: Feb 2008
Location: Quakers Hill, NSW
Car: Mazda 3 & BA Astina
Posts: 277
|
Late May 08:
Well the new rims are finally on the car. They are Lenso DC6's in Black in 18x8" - 45 offset. Here are some pics from OZMAZDA Dyno Day with the rims fitted: 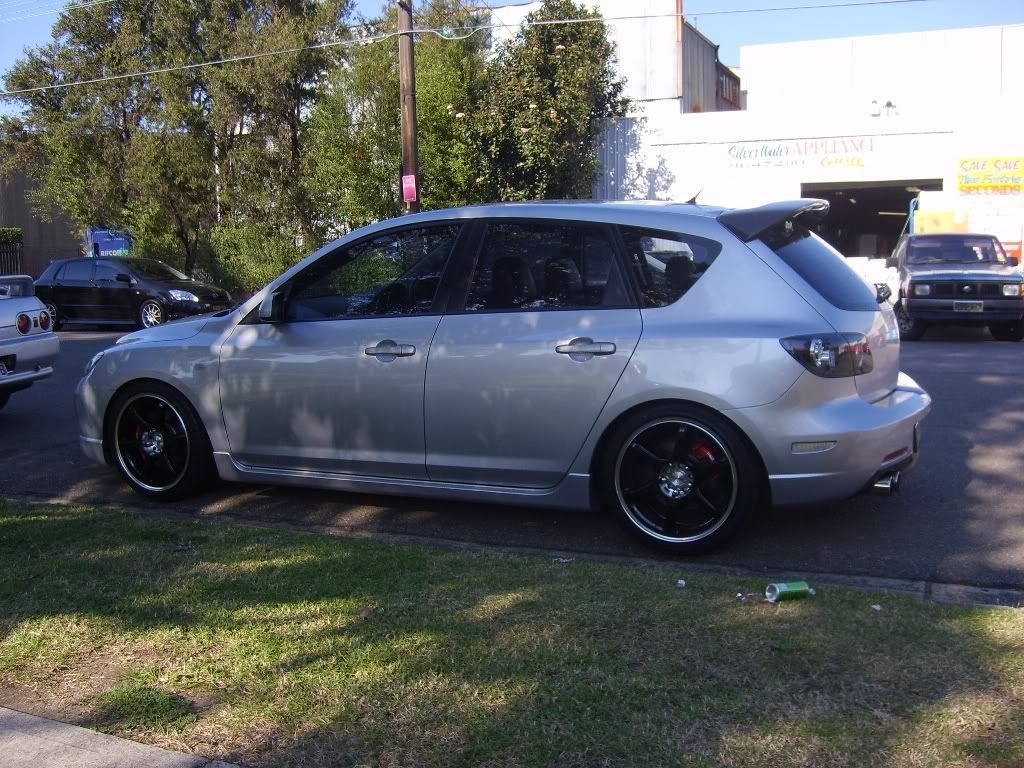   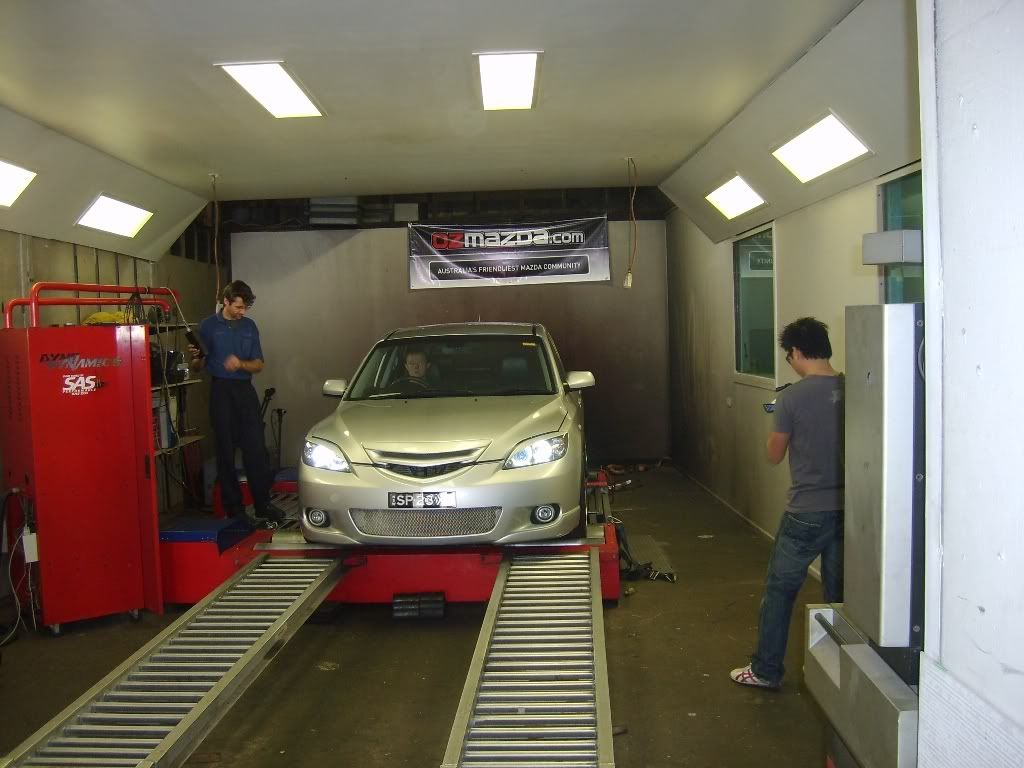 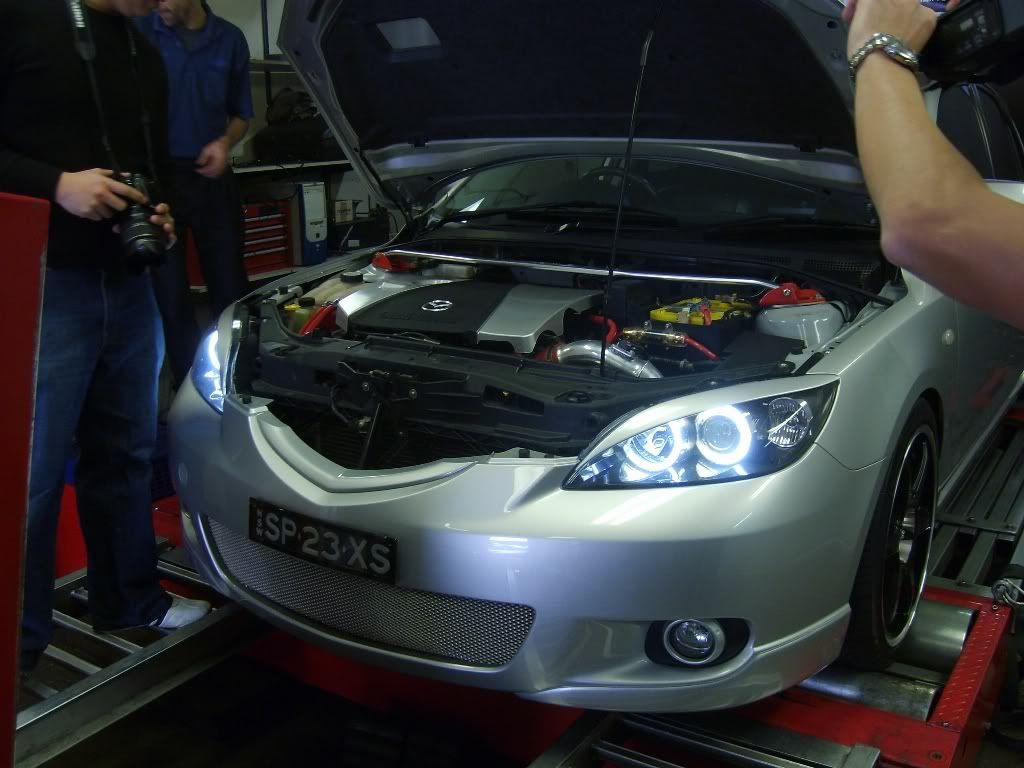   Dyno Results: 97.4kW - MAY 2008 Mods: Bomz 2.5" CAI, 2.5" Headers, Cat and Mandrel Bend Exhaust, Advanced Timing, 100 Octane Fuel + Booster, 18" Wheels 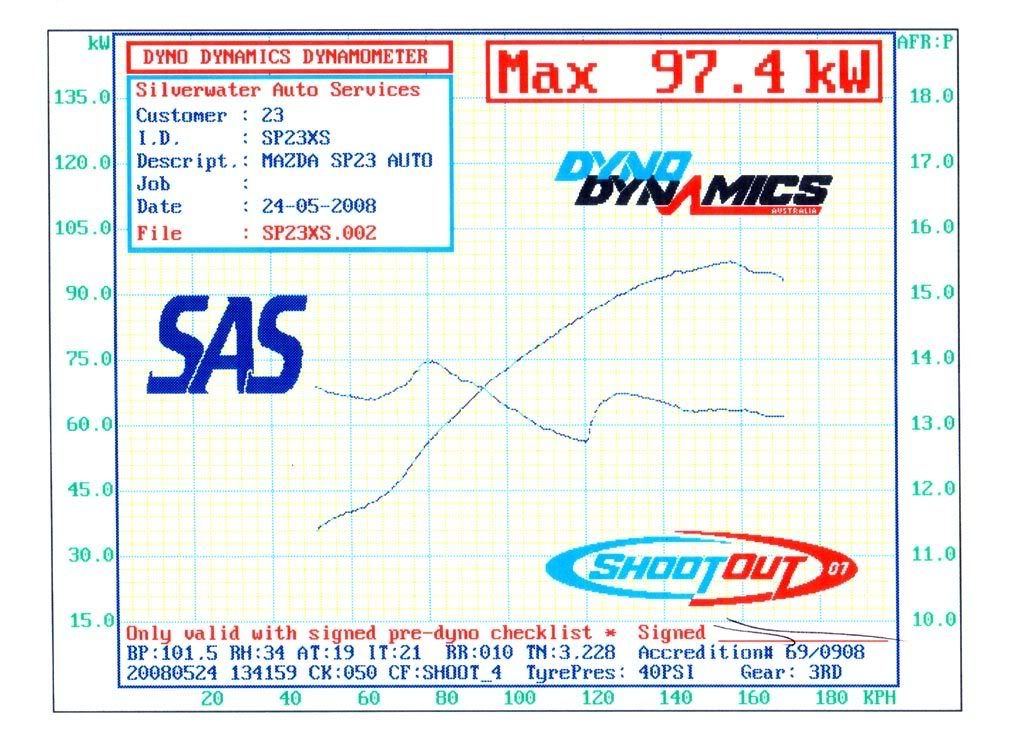 While the car was in the Smash Repairs having the hail damage fixed we also had a few holes in the tailgate welded up and resprayed. The conversion from the SP23 to the MPS style rear spoiler also leaves 2 holes in the roof which were removed along with both mazda badges. The end result is a rather clean rear end..... :tongue: 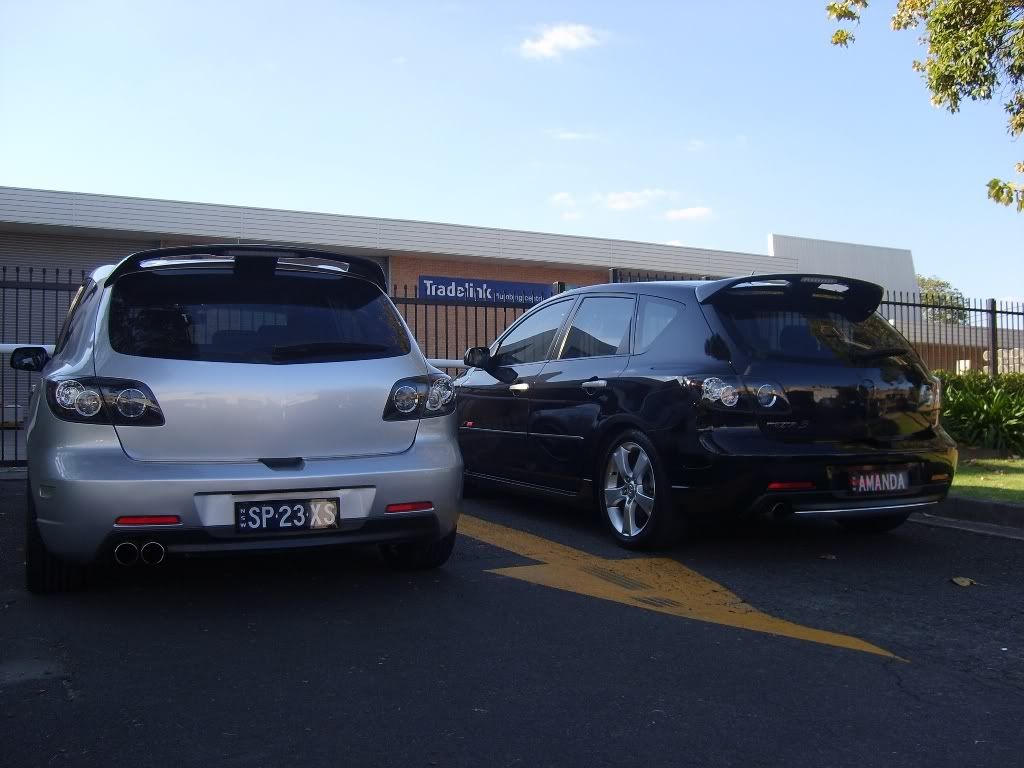 The parts lying around the house waiting to go on the car keeps growing (mainly due to my compulsive spending disorder )
__________________
2005 | Mazda 3 SP23 Hatch | Sunlight Silver [daily driver] 1997 | Mazda 323 Astina Hatch | Fridge White [soon to be daily driver] Last edited by SP BLING; 04-03-2009 at 10:49 PM. |
|
|
|
|
04-03-2009, 10:38 PM
|
#8 |
|
AstinaGT Regular
Join Date: Feb 2008
Location: Quakers Hill, NSW
Car: Mazda 3 & BA Astina
Posts: 277
|
JUNE 08:
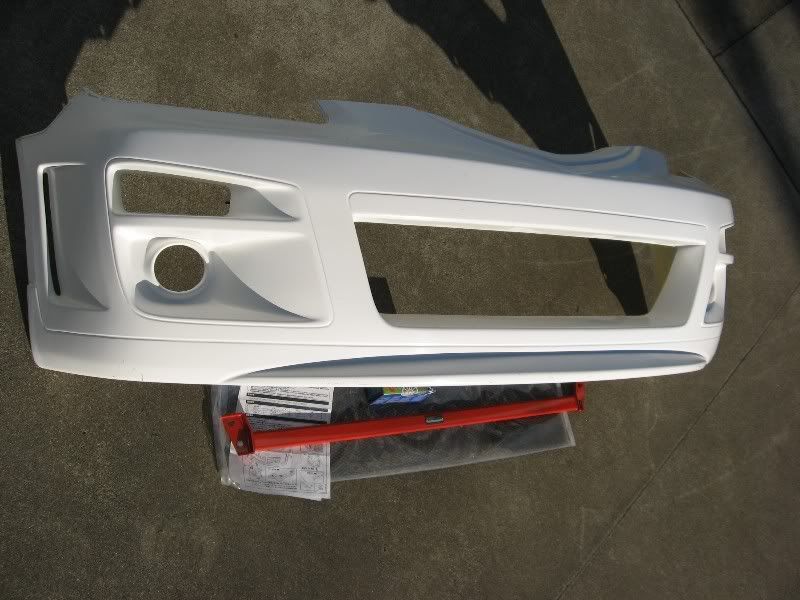
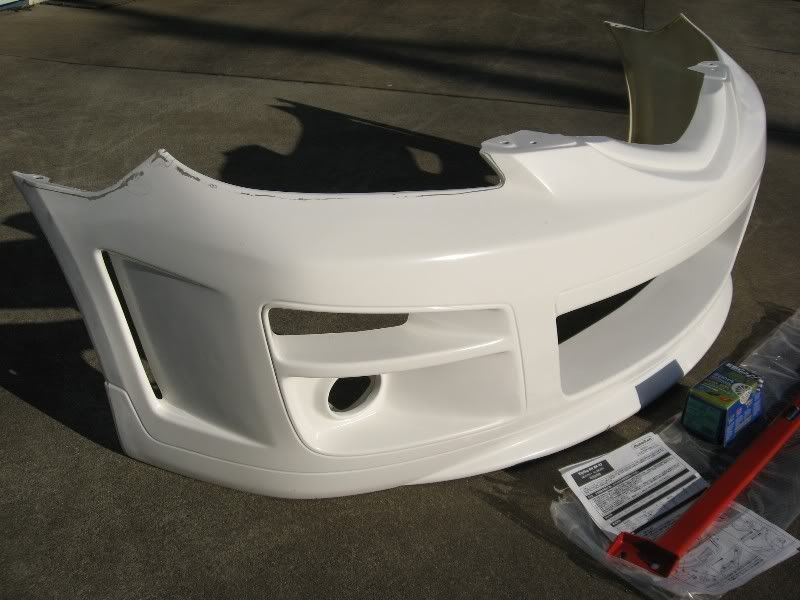
Car was sent back to the Smash Repairers again after it's briefing outing at the DynoDay. The totally screwed up the paint job requiring it to be resprayed. ================================================== ====== Well I finally got the car back tonight from the Smash Repairers. Here's a few dodgy night/raining shots for those who just can't wait...... It looks soooo much better than the photos. The AutoExe front bar has really transformed the car. I likes alot :thumbsup: 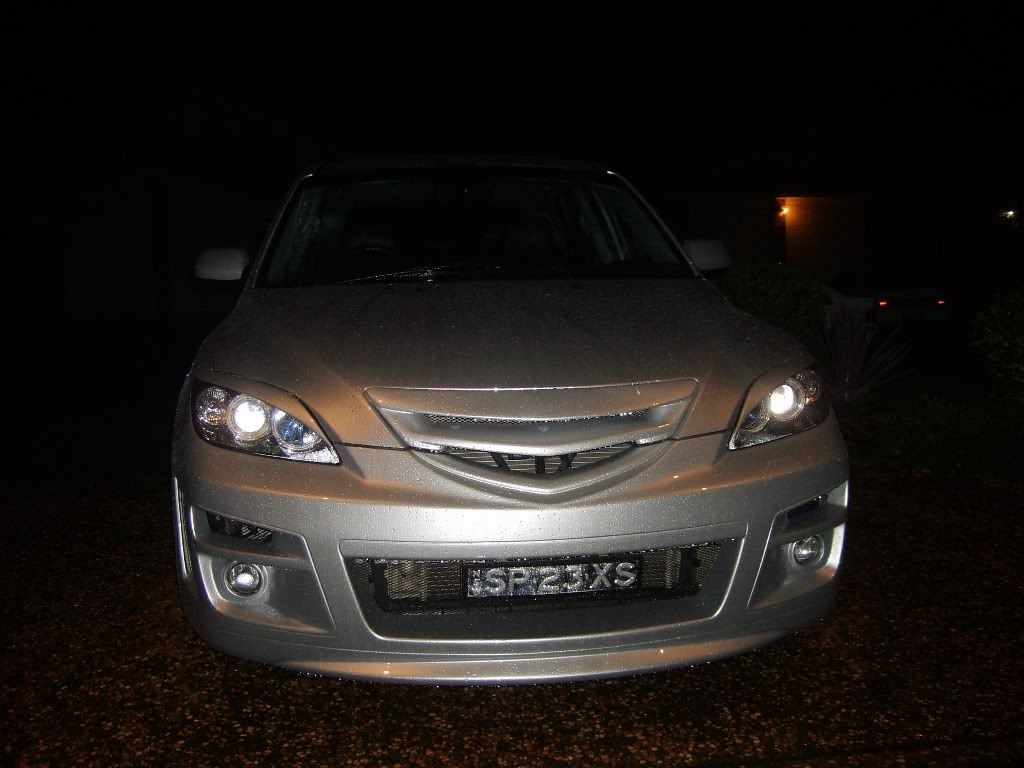   ================================================== ====== Some more pics of the front end... still raining though so you'll have to wait for the proper photos. 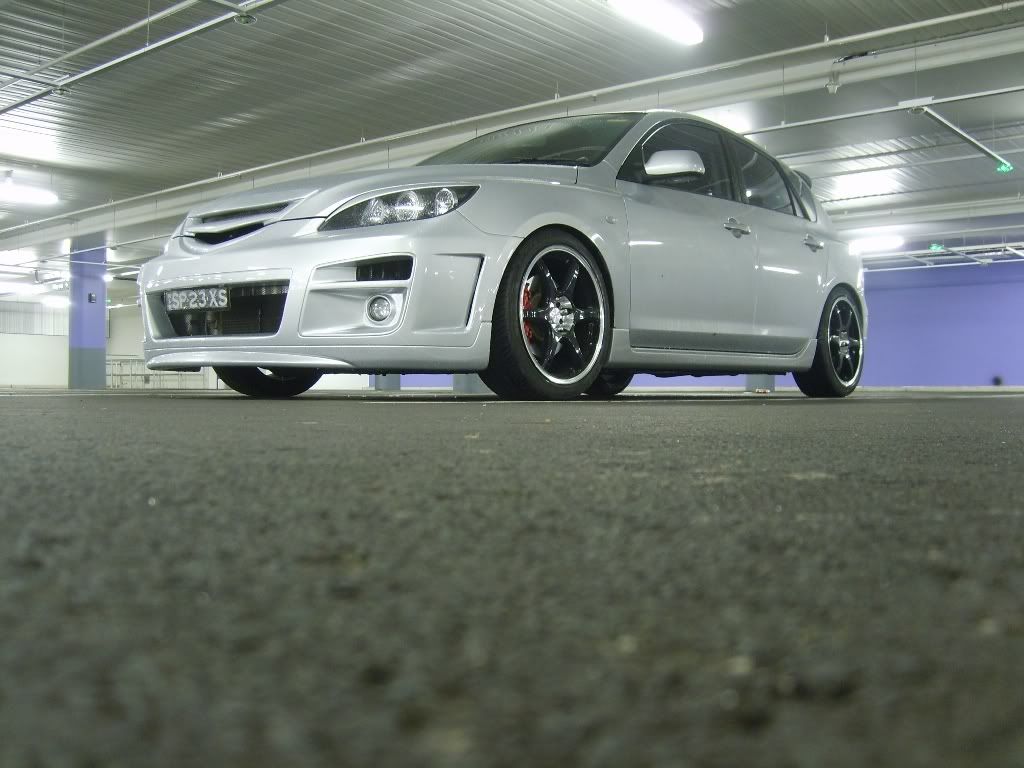 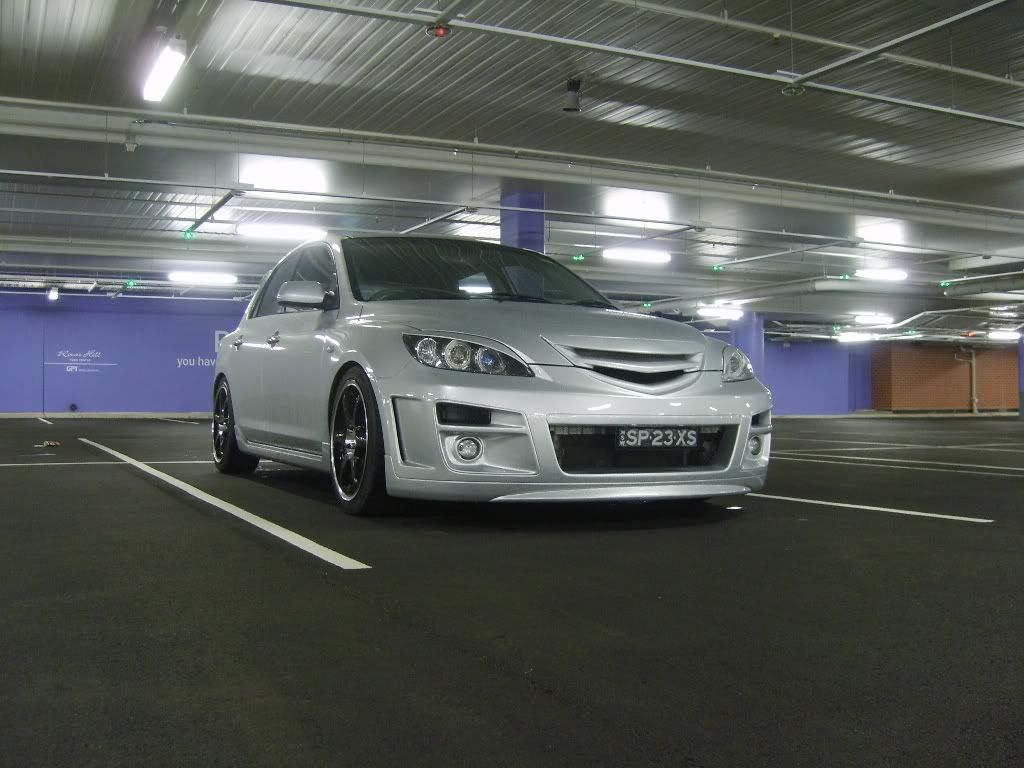  ================================================== ====== More parcels arrived today including my birthday present to myself :whistling: Me and the mailman are on first name basis now...... Cosworth Bling :biggrin: 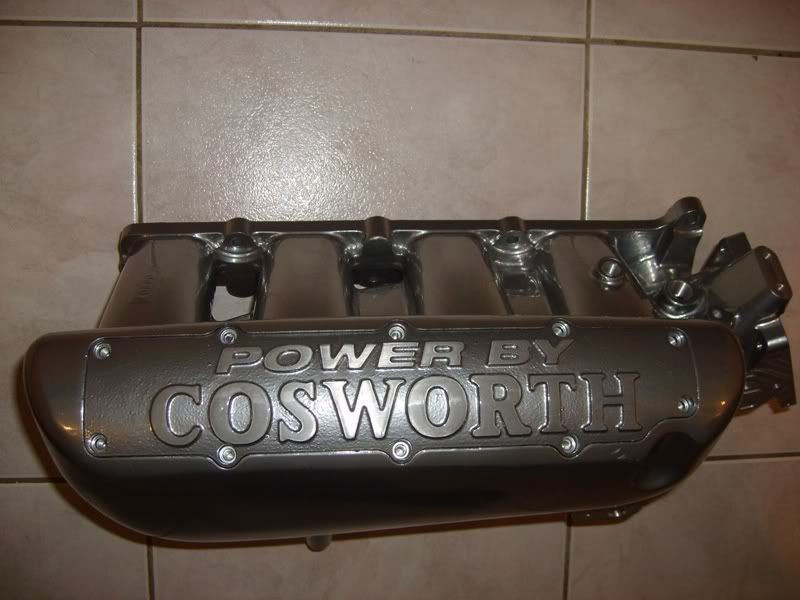  Carbon Fibre Mirror Covers 
|
|
|
|
|
04-03-2009, 10:43 PM
|
#9 |
|
AstinaGT Regular
Join Date: Feb 2008
Location: Quakers Hill, NSW
Car: Mazda 3 & BA Astina
Posts: 277
|
30th June 08:
Well we had out first issue with the car on Saturday morning. One of the auto transmission fluid lines had a bolt work it's way loose (after 60,000km!) and has left a trail of fluid down our street. Luckily not too much had been lost as the dip stick was still just on the low level indicator. No damage to the tranny luckily! To add to my luck, about an hour later after jacking the car up to investigate, a guy turns up with my PWR Oil and Transmission coolers which I ordered off ebay just over a week ago. Bonus! So after working all last weekend on other people's cars, I decided to give the 3 a little modding this weekend! 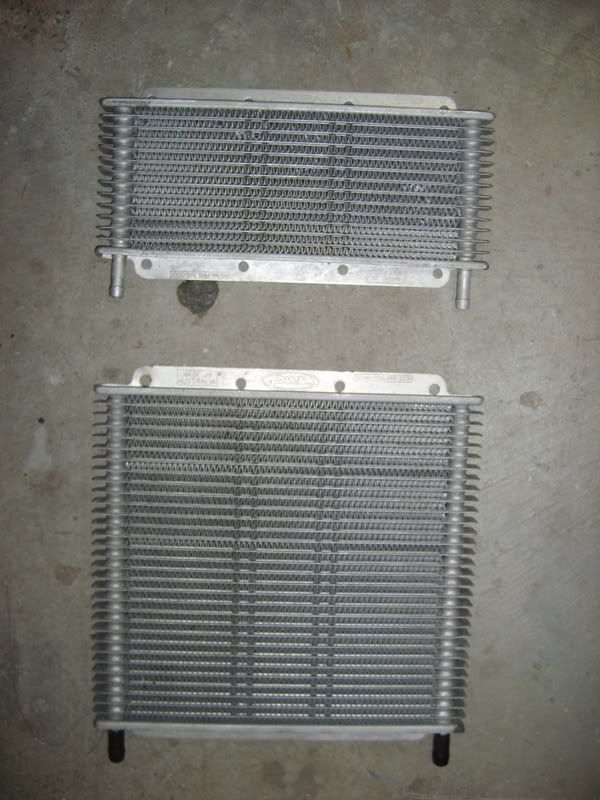 So after pulling the whole front end apart to do the install, the transmission cooler has now been installed, plumbed in line with the factory cooler with the fluid all topped up again.  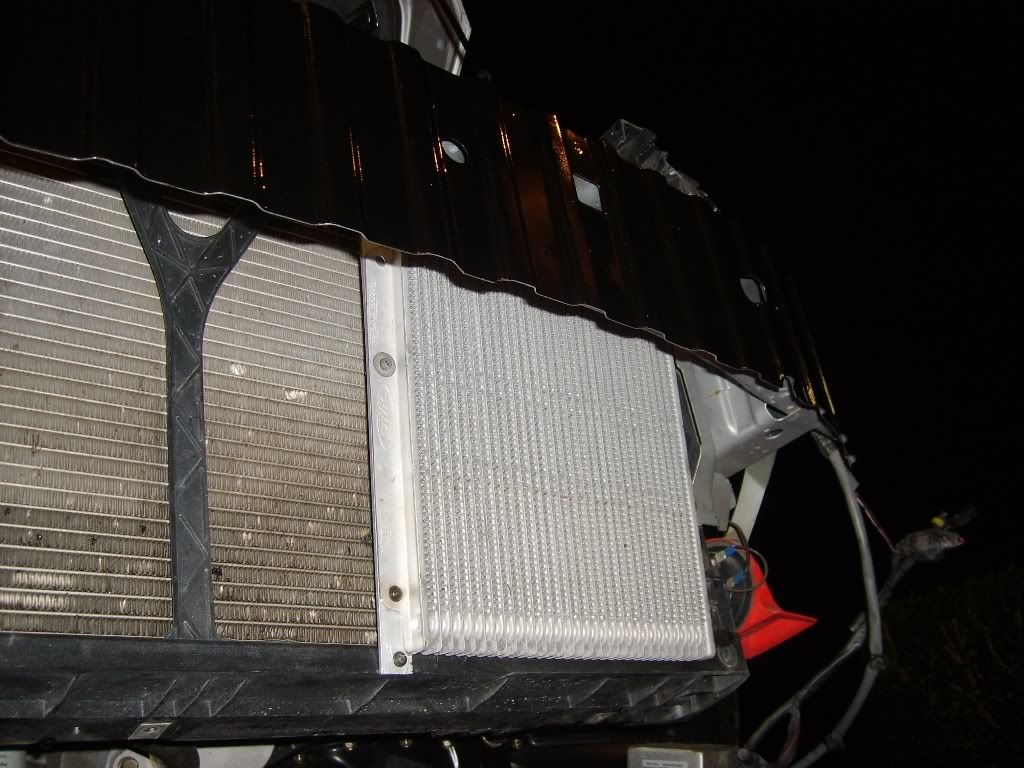 The engine Oil cooler will be installed at a later stage once I pickup a thermo oil sandwich plate to be able to plumb it in properly. Since it was a beautiful sunny winter day today I cranked up the spray gun and painted the front crash bar black so as not to see silver while looking through the front bar, as the opening on the autoexe bar is much larger than the stock bar. Also got in and painted my Redline bonnet strut brackets in Sunlight Silver, instead of the supplied black to help blend them in a little easier. Hoping to get these installed next weekend. EBC Greenstuff Front pads also arrived in from the US last week. Just need to find some time now to take the car off the road for a day while I have the discs machined before installing the new pads. Nearly ready for TRACK TIME!!!!! The first of the power mods (Cosworth Intake manifold and Focus throttle body) should be one the car in a few weeks time once I purchase a new accelerator cable from Mazda ($145  ) and have it modified to suit the Focus throttle body. I managed to find 2 companies in Sydney that specialise in Automotive gauges, cables and custom work. Purchasing a second cable will allow me to revert back to the stock throttle body should the need arise and also means the car won't be off the road for several days while they modify the cable. I could get them to make a custom cable from scratch much cheaper than buyer a factory cable, but they would need my existing cable for several days to use as a template. ) and have it modified to suit the Focus throttle body. I managed to find 2 companies in Sydney that specialise in Automotive gauges, cables and custom work. Purchasing a second cable will allow me to revert back to the stock throttle body should the need arise and also means the car won't be off the road for several days while they modify the cable. I could get them to make a custom cable from scratch much cheaper than buyer a factory cable, but they would need my existing cable for several days to use as a template.================================================== ======= July 4th: New throttle cable from Mazda has arrived in Sydney. Going to pick it up tomorrow and drop it off at Consolidated Wire @ Milperra to have it modified to suit the Focus throttle body!!!! Nearly there!!! |
|
|
|
|
04-03-2009, 10:46 PM
|
#10 |
|
AstinaGT Regular
Join Date: Feb 2008
Location: Quakers Hill, NSW
Car: Mazda 3 & BA Astina
Posts: 277
|
20th July 08:
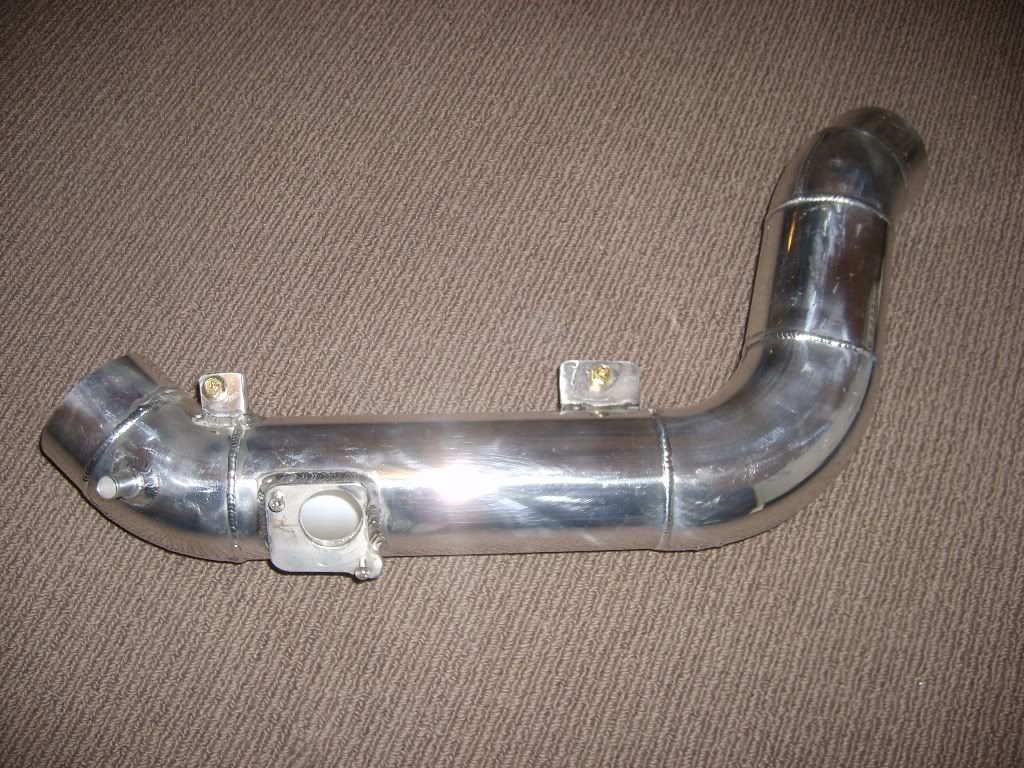
The Hoover has officially left the building!!!!!! That's right, no more Hoover sound anymore as it's been replaced by the sound of induction. Yep Stage 1 was completed today with the Cosworth Intake manifold and Focus 65mm throttle body successfully installed. But it was only possible thanks to Rob! (I secretly wish I had smaller hands like him!!!!) The install was semi straight forward taking approx 7 hours for the 2 of us. I had purchased a new accelerator cable from Mazda and had the throttle body end of the wire shortened approx 30mm and had a eye/ring fitted, instead of the ball. This was done to mate the Focus throttle body to the Mazda pedal assembly. The removal of the old throttle cable was easy, but trying to get the new one back in was fun as the hole through the firewall is located behind the brake booster.... literally! A word for the wise - Installing the accelerator cable is a pain in the a$$!!!!!!!!!!!!!!!!! Something I hope I never have to do again. 2 hours after starting and the plastic inlet manifold and throttle body was removed from the car. After a quick test fit of the new manifold we discovered that the injectors will also need to be removed in order to squeeze the new one in without damaging it, so out they came as well. We had a little trouble fitting some of the larger nipples on the inlet manifold as we had to re-tap two of the holes somewhat due to the ceramic coating used on the outer shell. We also had a plug a couple of holes in the inlet manifold due to the differences between the Focus and the Mazda..... Rob's bolt bucket to the rescue again! Some 3+ hours later..... and it was ready to fit with all sensors swapped over (map, throttle position etc) and new o rings fitted. Rob even managed to polish up the Idle Air Valve to match the rest of the bling. The accelerator bracket needed a lot of special touches to make it fit. The tab to hold the wiring loom in place had to be hack sawed off and the whole bracket is now sitting 10mm higher to clear the throttle body and the manifold. I thought it would be a straight swap over, but it was so close. I will try a source a focus one to replace it for the long term. But nonetheless it is in and holding the cable in the right spot. The look on our faces was priceless when we started the car as it actually ran and idled perfectly on the first start! Best of all - NO CELS!!!!!!!!! Of course a few revs later and we were really starting to smile... Well me anyway! No hoover sound anymore, just lots of induction noise. Sounds like a quad throttle body setup at idle gasping for air - Me Likes! The test drive..... (BTW - I'm still smiling now as I type). There is nothing like 3 blokes piled in a car doing happy laps just to listen to the induction roar..... And what a roar it is! I was seriously expecting to have a little growl from it, but it seriously sounds like a highly tuned VTEC. Once you hit 3,500rpm, the growl begins and when you open the throttle full it roars. The car now pulls all the way to 7,500rpm (that's 1,000rpm past the stock redline) and would probably keep going, but I'm not that game until the head of the engine receives some special attention. Bum Dyno - At least 5kw or more in it as I can really feel the difference right across the whole rev range - even in the lower band which I though I might loose a bit from. The car is also much more responsive now with the larger throttle body allowing better air flow - Really jumps off the line now. Seriously, I wish I had done this much sooner!  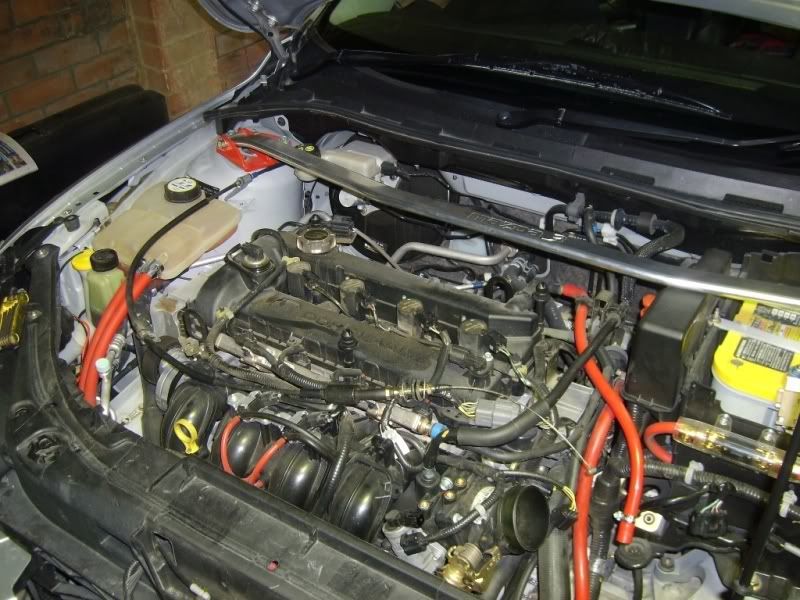  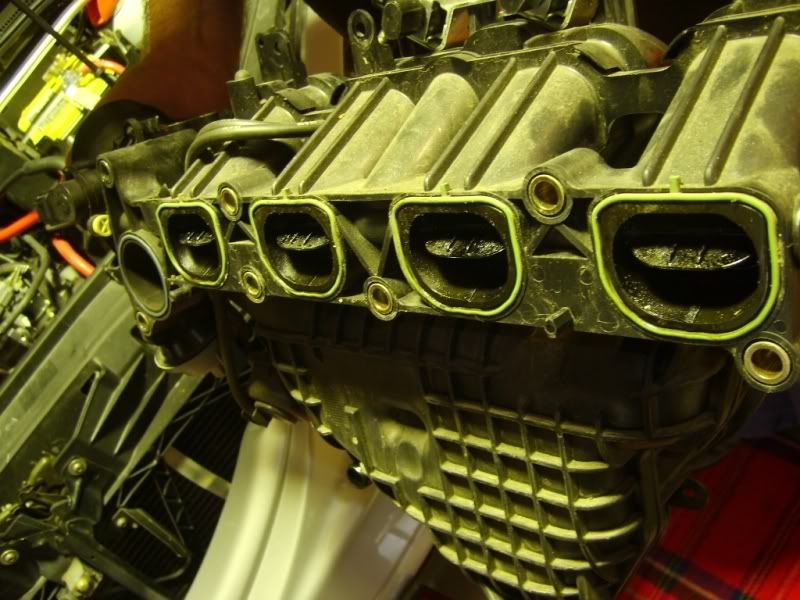 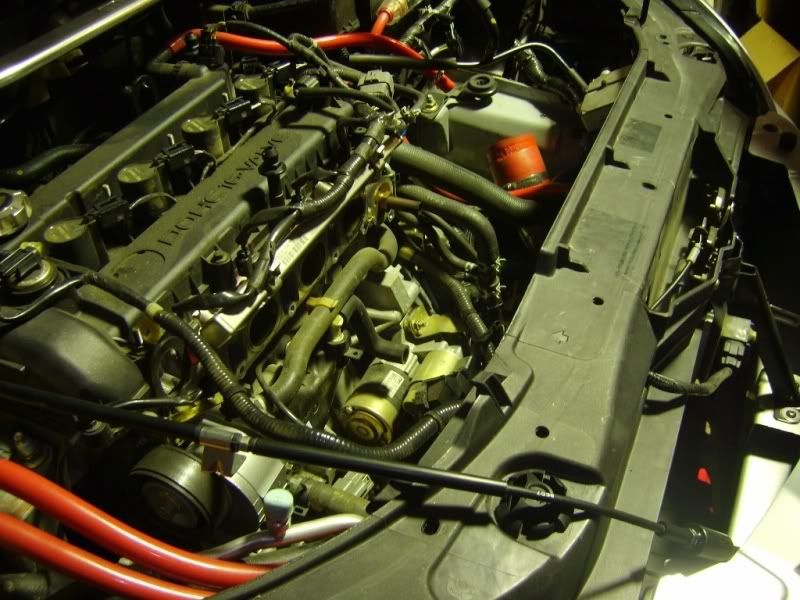 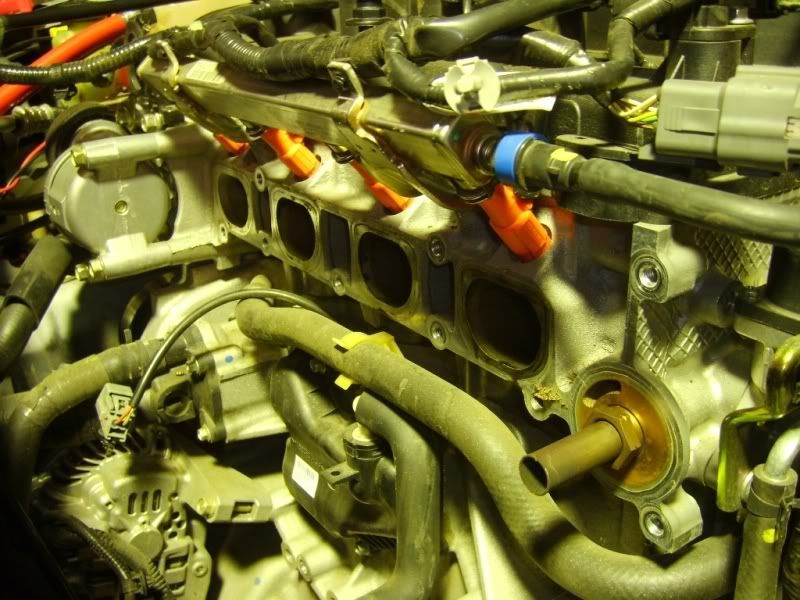 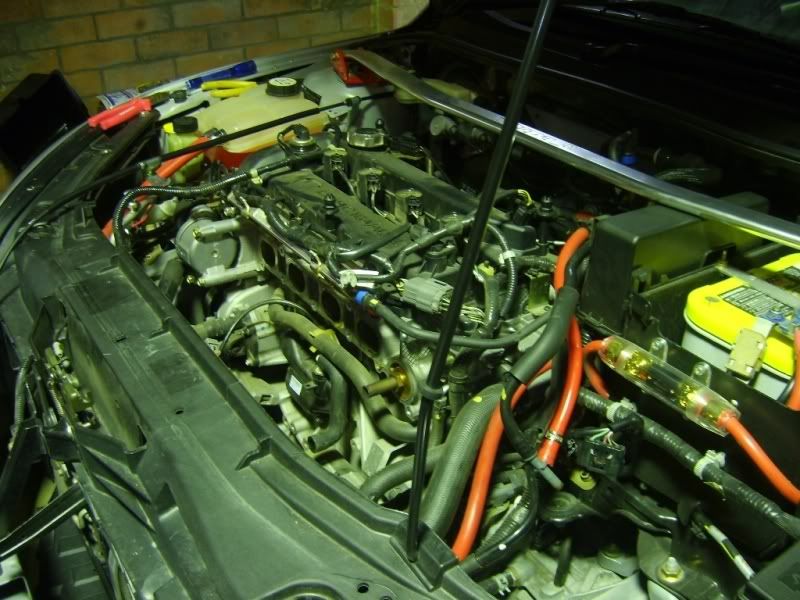 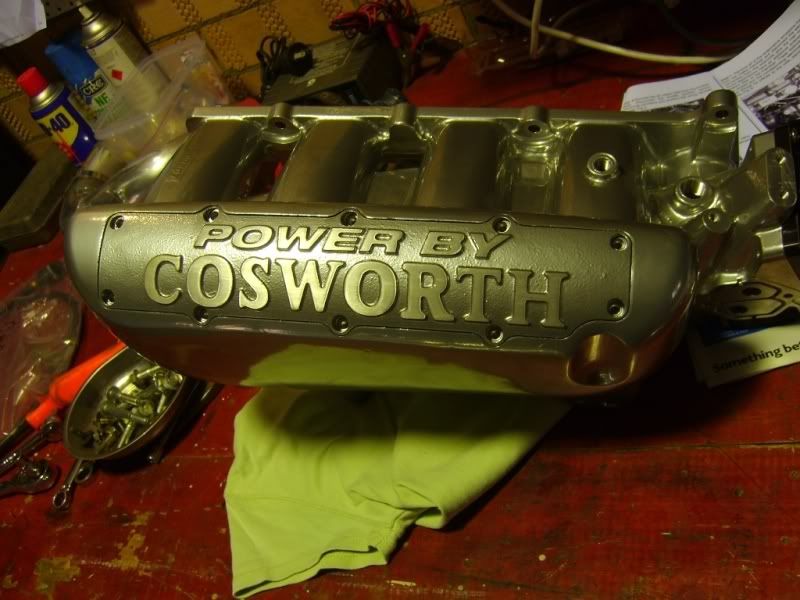  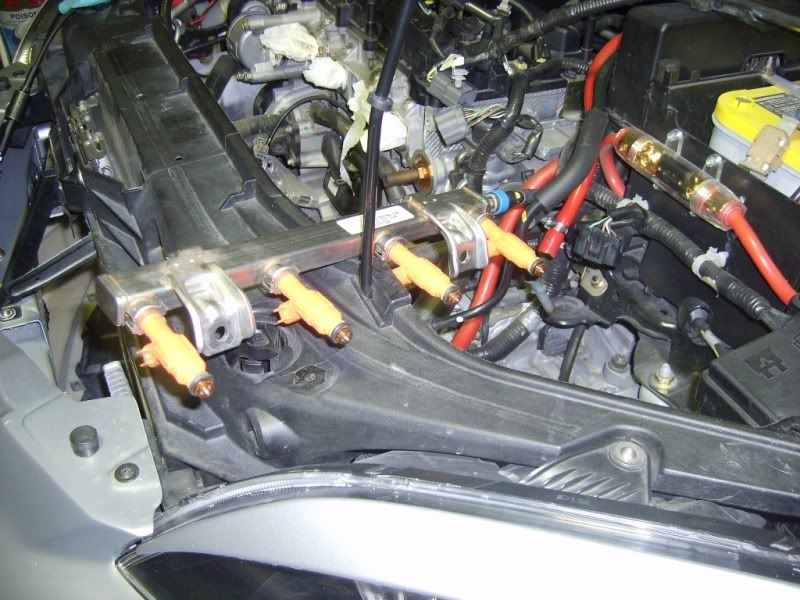   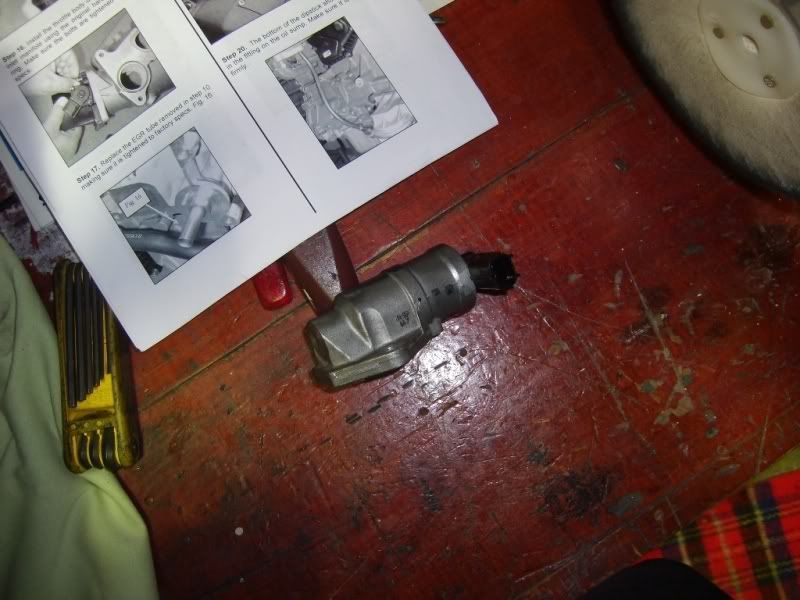 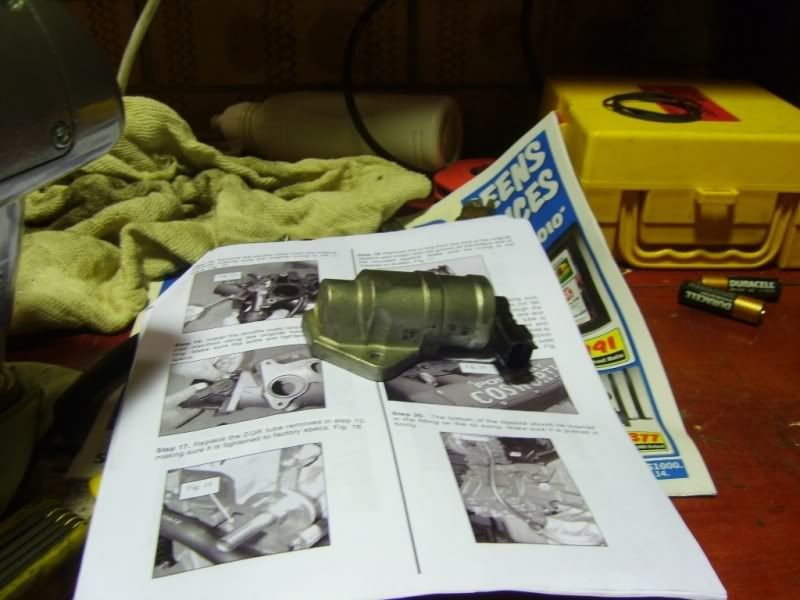 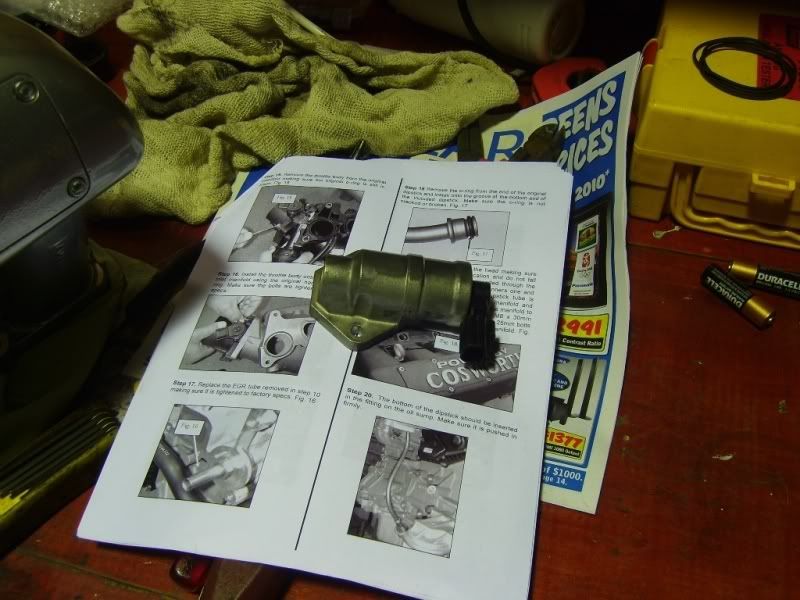 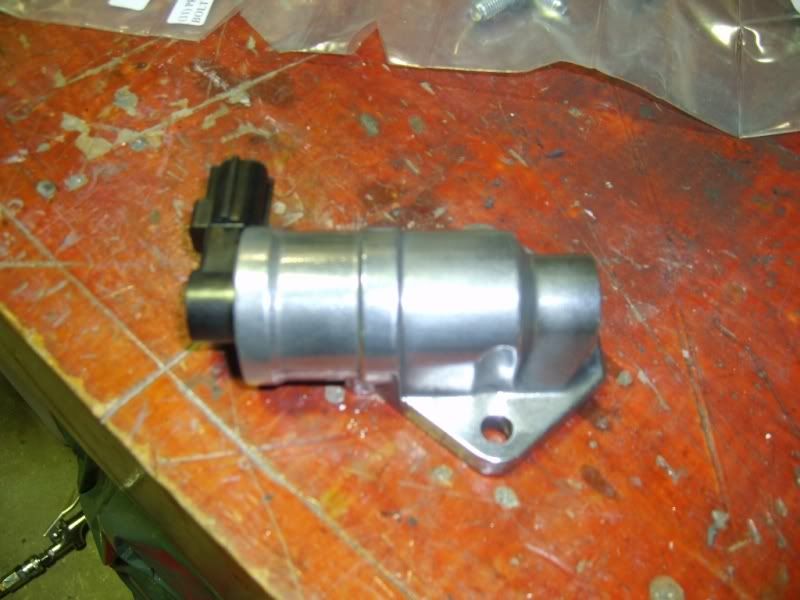 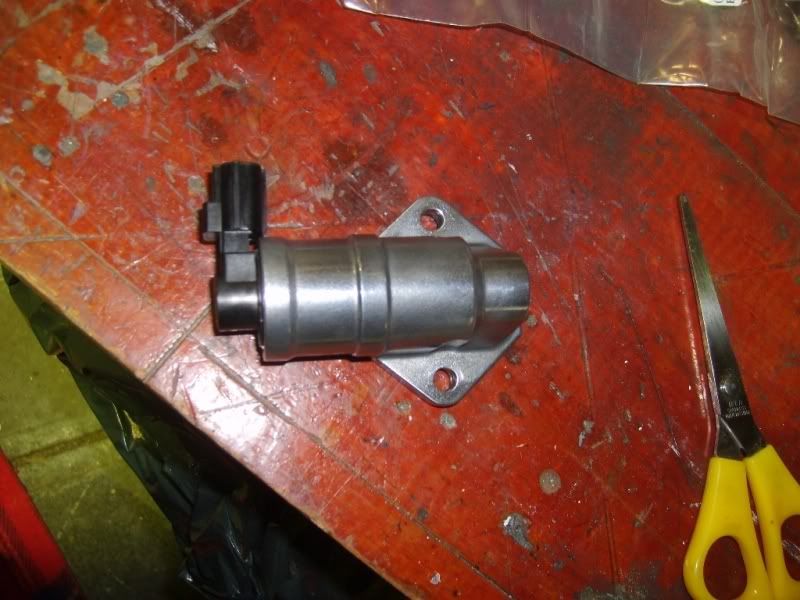 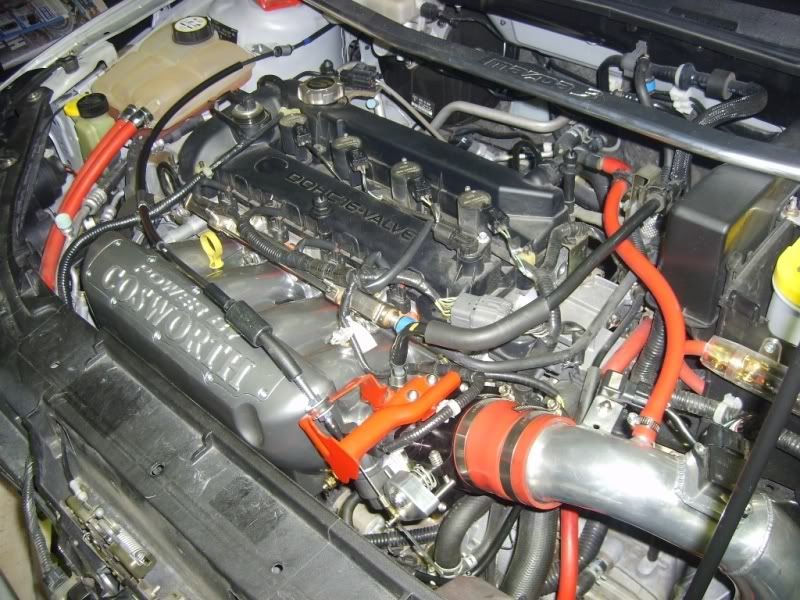  Also have managed to crack the exhaust piping right at the main muffler (stock Mazda weld). Most probably due to having not enough flex in the headers and not having a rear engine mount installed. Anyway we had this re-welded and braced. 7,500rpm would've have helped this in any way Now for Stage 2! |
|
|
|
|
04-03-2009, 10:53 PM
|
#11 |
|
AstinaGT Regular
Join Date: Feb 2008
Location: Quakers Hill, NSW
Car: Mazda 3 & BA Astina
Posts: 277
|
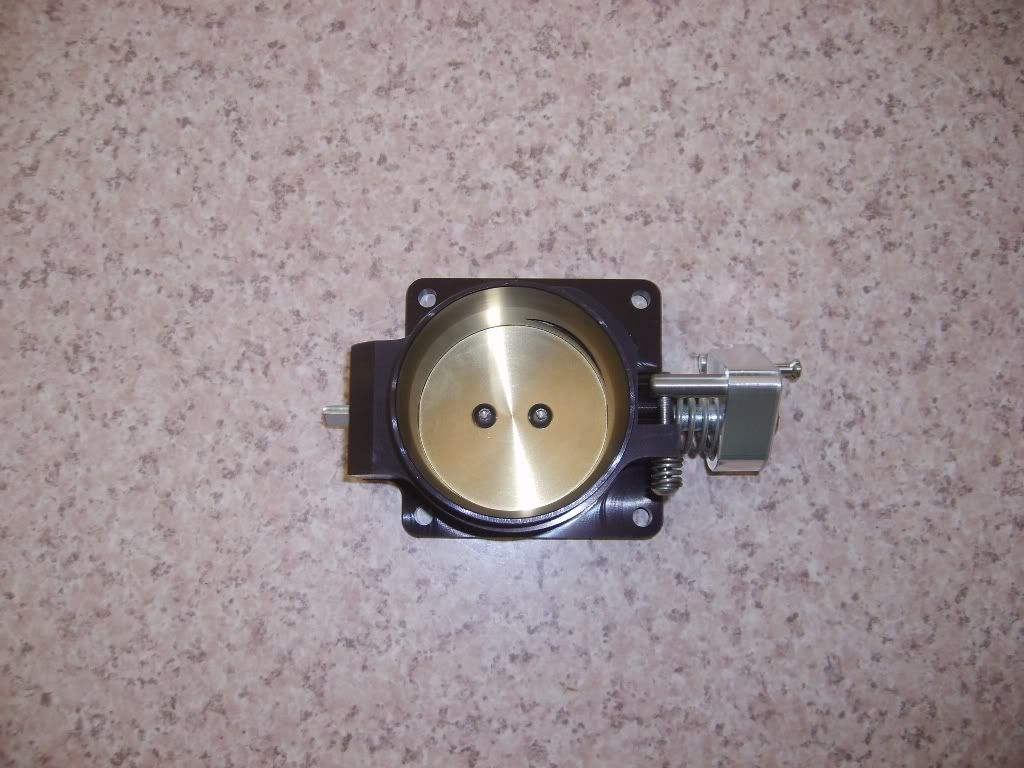
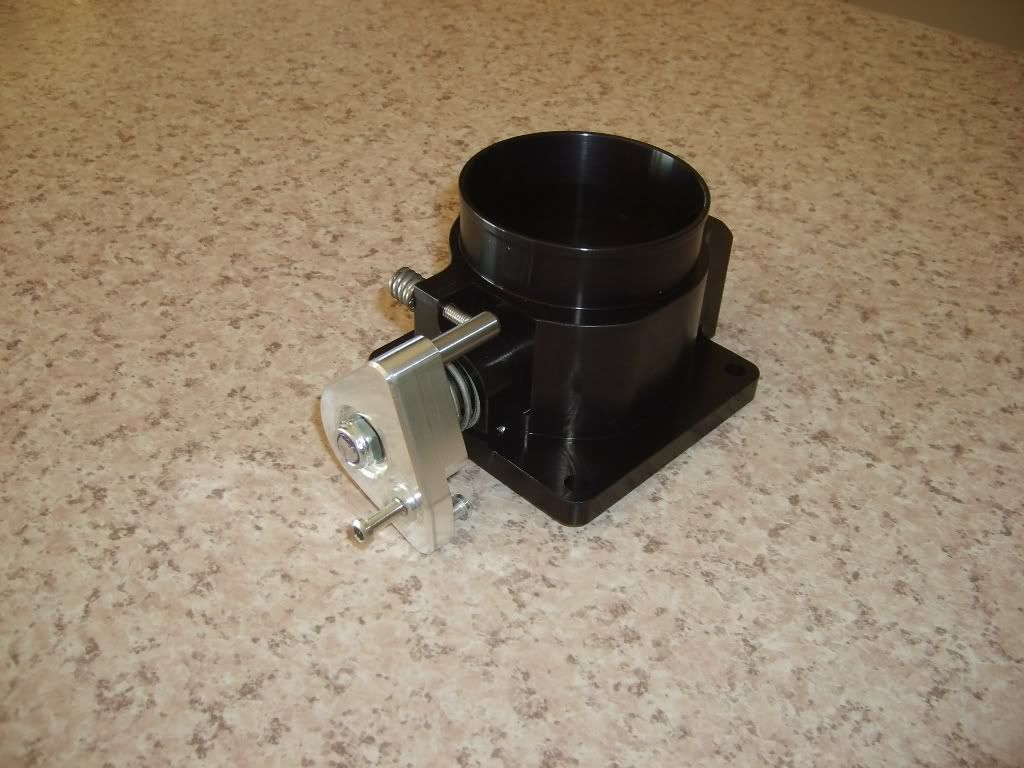
22nd July 08:
Pics of engine bay once cleaned up :whistling: 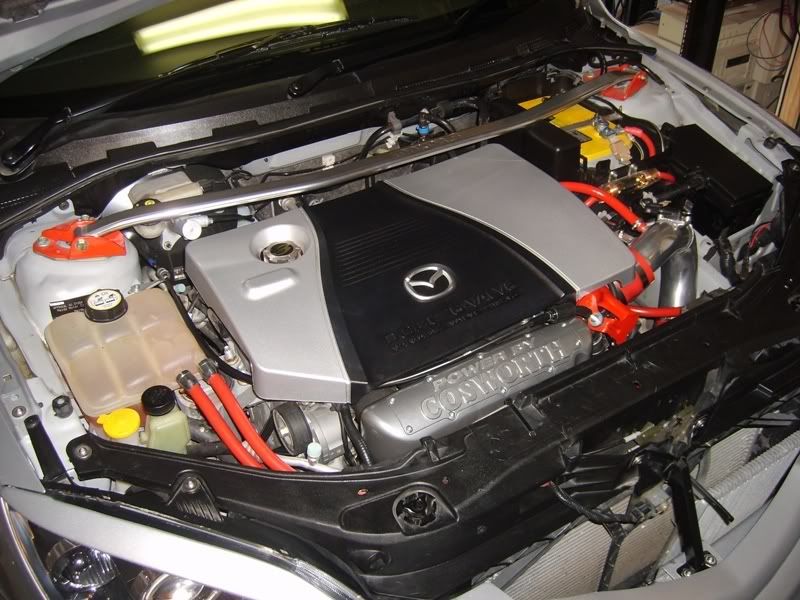 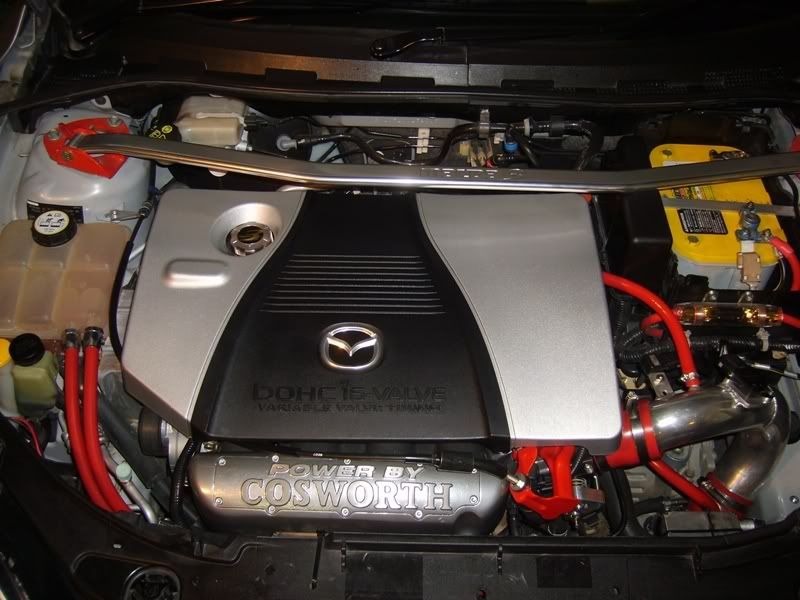 Close ups of Throttle body and linkage 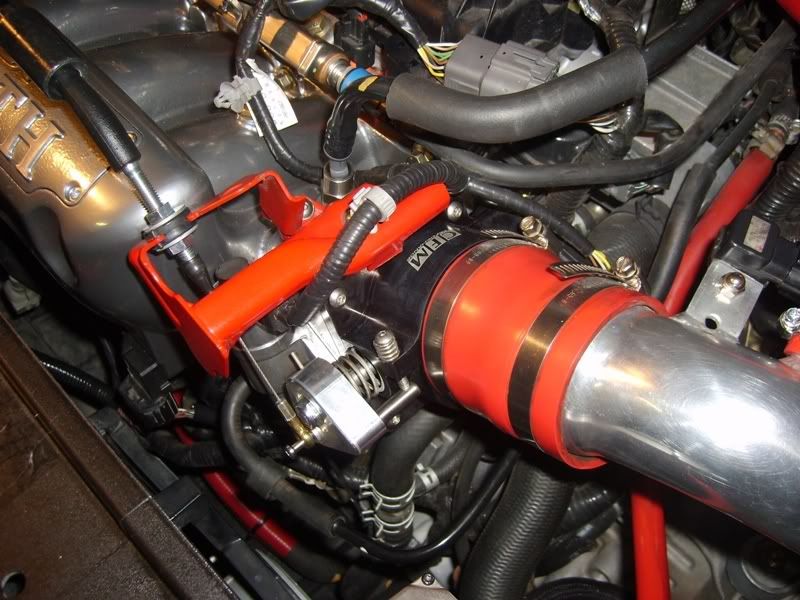 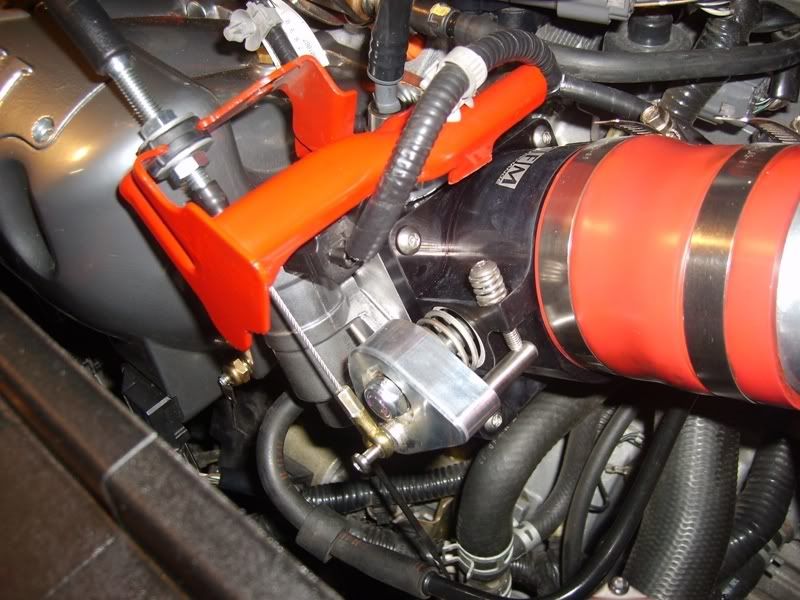
|
|
|
|
|
04-03-2009, 10:58 PM
|
#12 |
|
AstinaGT Regular
Join Date: Feb 2008
Location: Quakers Hill, NSW
Car: Mazda 3 & BA Astina
Posts: 277
|
11/12th August 08:
Here's some pics of the Carbon Fibre mirror covers that were fitted several weeks ago. They were fitted over the top of the mirrors and held in place with Sikaflex (i.e. will never come off again!!!)  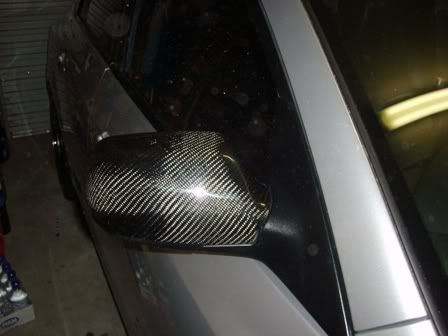 Redline Bonnet Struts finally installed. I painted the mounts to match the car colour, instead of the black powder coated items supplied. Redline stickers were also removed from the struts to give that clean shiny look. Also commonly known as BLING :biggrin: 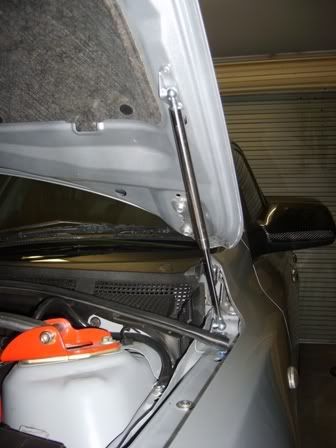 Driveability of the car has been fun of late, due to splitting the rubber crankcase ventilation hose that connects to the intake manifold. I've sourced a new silicone hose to replace the rubber factory item and I'm currently fitting a Oil Catch Can which will be plumbed in when I actually get around to replacing the hose. And yes it's shiny :thumbsup: 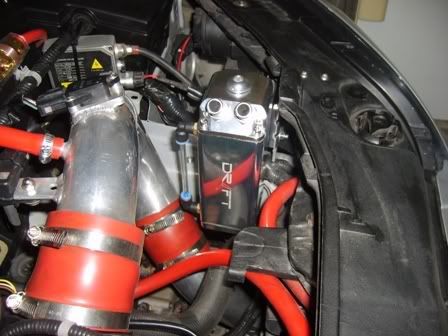 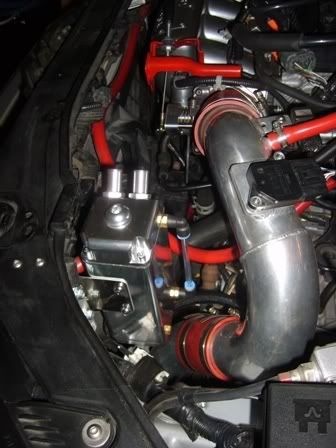 Got the Dyno Power Run this afternoon - 102.5kW (up 5.1kW from previous run in May of 97.4kW). Max Torque of 160Nm was achieved at 3,500rpm, not bad considering the stock figure of 130Nm at the wheels at 4,500rpm (203Nm at the flywheel). Still pretty good for an AUTO :thumbsup: Still on the same oil since May, so the only change from the previous run is the Cosworth Intake Manifold and the 67mm Throttle Body. Max power was made at 6,900rpm, but I think it still has lots more in it. As per the last dyno run, air/fuel ratios are still messy, but better than last time. Starts off with an even 13.0 until 4,000rpm where it starts to richen up to a 11.7 at 5,000rpm, then swings the other way and slowly leaning out to 13.5 at 7,200rpm. Dyno Results: 102.5kW - AUG 2008 Mods: Cosworth Intake Manifold, 67mm Throttle Body, Bomz 2.5" CAI, 2.5" Headers, Cat and Mandrel Bend Exhaust, Advanced Timing, 98 Octane Fuel, 18" Wheels  Had it done at TODA Racing Australia in Wetherill Park - these guys were awesome. Had 8 power runs (20mins on Dyno) + 3 graphs printed out at all for $50, and during Business Hours! Now for the Microtech! |
|
|
|
|
04-03-2009, 11:00 PM
|
#13 |
|
AstinaGT Regular
Join Date: Feb 2008
Location: Quakers Hill, NSW
Car: Mazda 3 & BA Astina
Posts: 277
|
21st August 08:
Well I kinda got bored tonight, so i decided to finally install some Dynomat... 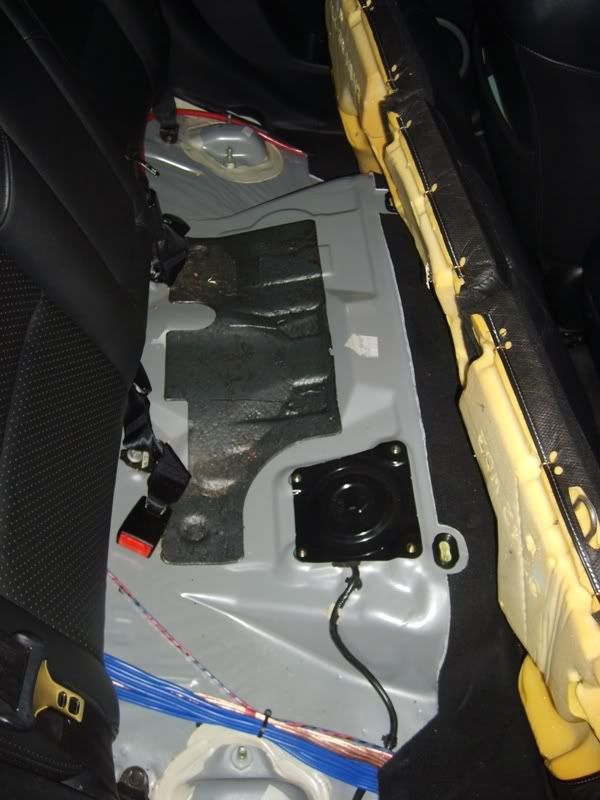 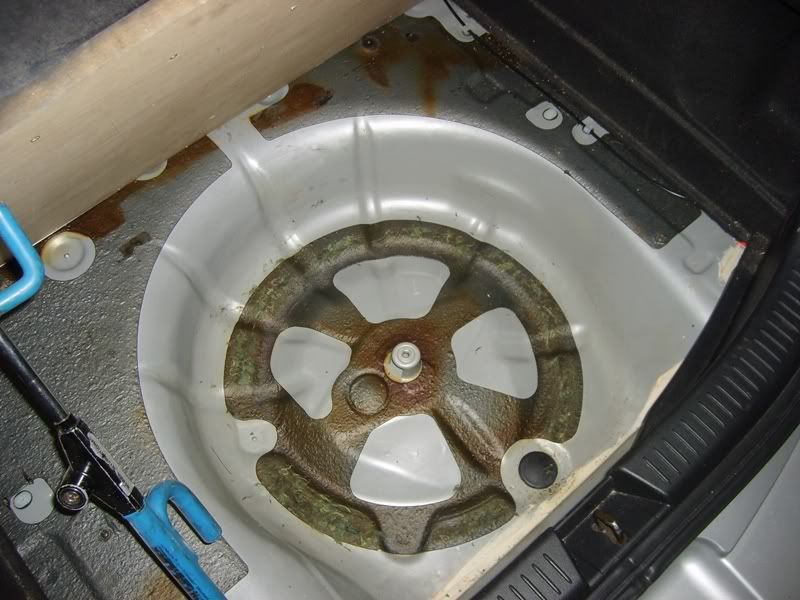 Some 3 Hours and 5 sheets of Dynomat later.... 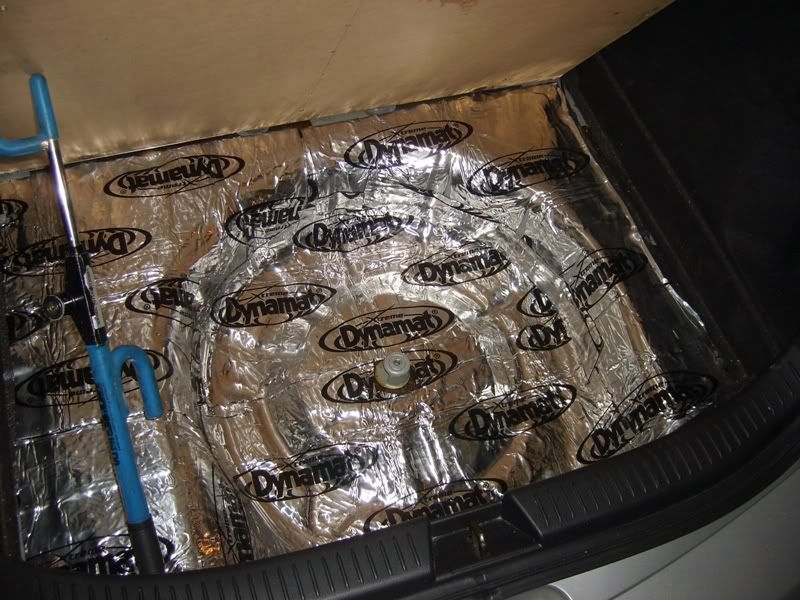 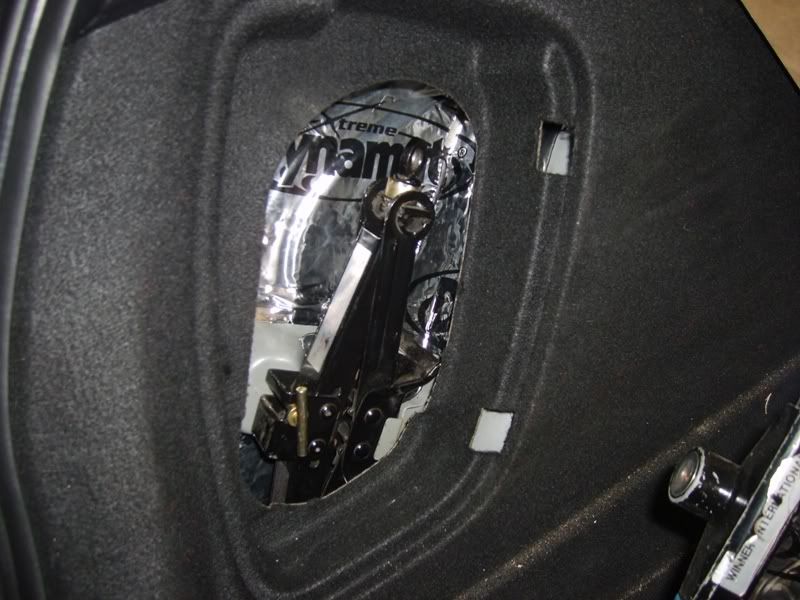 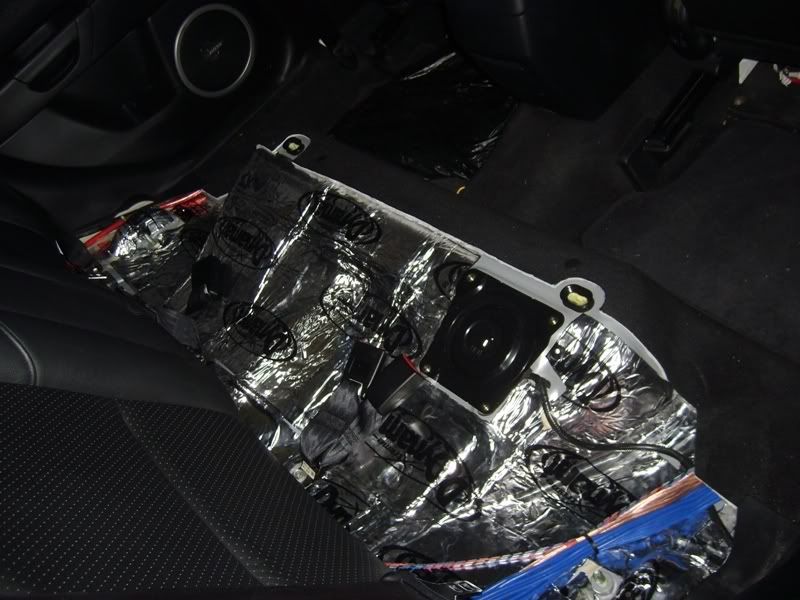 Also some more goodies arrived today 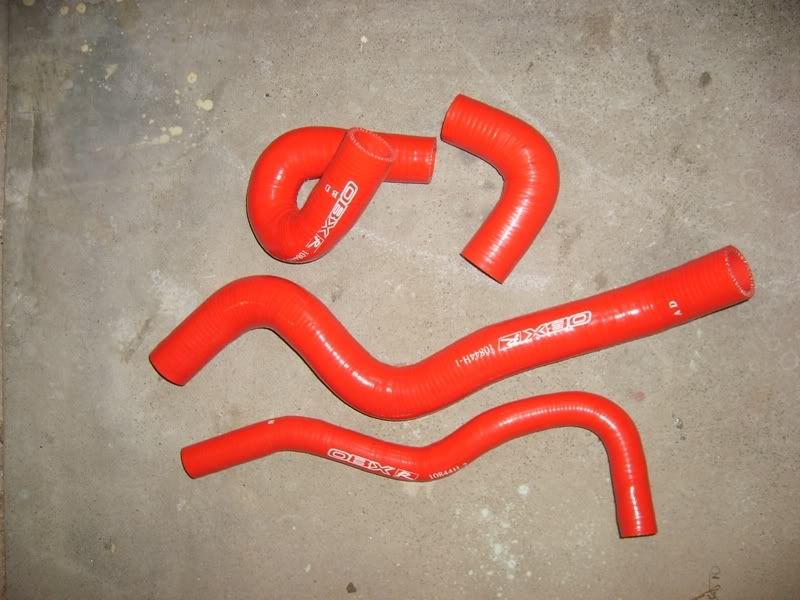 OBX Silicone Radiator hoses in Red of course! 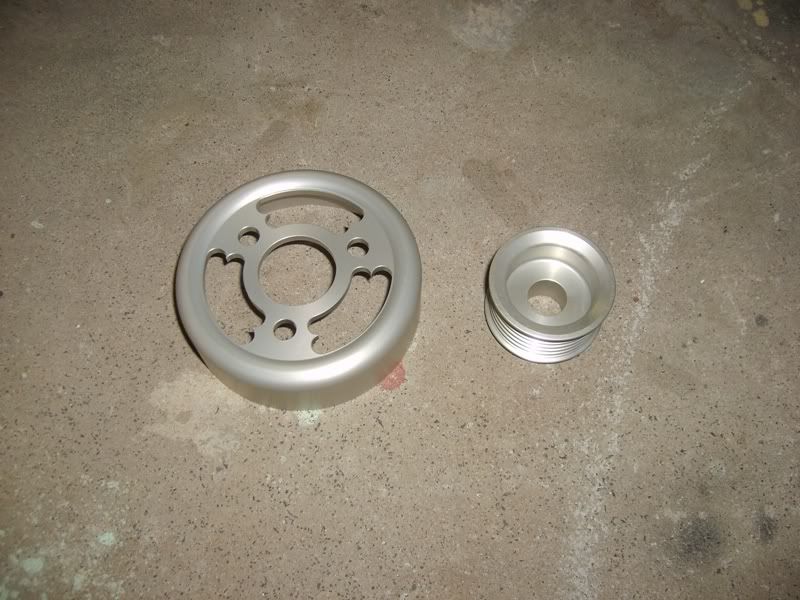 Billet light weight pulleys for the Alternator and Water Pump (Standard size, not underdrive) |
|
|
|
|
04-03-2009, 11:02 PM
|
#14 |
|
The Hairy Mod
 Join Date: Sep 2005
Location: southside ya'll and North Side, Brissy
Car: MINI Cooper S 2003
Posts: 8,110
|
thats bloody awesome dude! so much detail i love it
__________________
 For All your crash repair panels & lights, clear lights contact us at
PANEL HOUSE 45 RANDALL ST SLACKS CREEK QLD 4127 PHONE : 07 3808 8737 FAX : 07 3808 8735 |
|
|
|
|
04-03-2009, 11:02 PM
|
#15 |
|
AstinaGT Regular
Join Date: Feb 2008
Location: Quakers Hill, NSW
Car: Mazda 3 & BA Astina
Posts: 277
|
11th September 08:
Well I got around to servicing the Auto transmission on the weekend with the help of Breno. Quite an easy job really, but you really need the right tools before you start :whistling: We managed to flush 8 litres of fluid through the transmission using the inbuilt pump. Firstly we drained the transmission sump of which only 2 litres came out and re-filled with fresh fluid. Then we just needed to disconnect the transmission fluid hose that leads from the pump output to the factory cooler and re-route it through clear hose into a oil pan. With the car started and put into drive (with foot applied on the brake), fluid was pumped from the transmission sump through the transmission and out into the pan. Once 2 litres was pumped out, we stopped the car and re-filled the sump with fresh tranny fluid before starting the flush again. It took all up around 90 minutes to do and the results are worthwhile. Where gear shifts in the high rpm area required you to lift of the gas pedal while changing, now you can flat stick it through without slippage of the auto trannies clutches - even at 7,000rpm!!!! The car was also booked in today for a full Dynotune on the 8/9th October. Just need to arrange a hire car now to use as a daily for the week preceeding while the 3 is off the road having the engine re-wired for the Microtech. Full steam ahead :banana: Also some more suspension tweaking will be done to fine tune the handling a little more. A crappy tyre on the rear that had a puncture and was repaired is giving me the poo's at the moment as the back end of the car is really suffering because of it. Feels like jelly when swinging the car side to side at the moment. As we didn't notice or feel the puncture after nearly an entire day of driving, I think the side wall of the tyre has been severly weakened. Hopefully getting a new tyre to replace it tomorrow. I hate Nankangs..... Even so.....I'm still on track to have the car ready in time for Albury and DECA in OCT!!!!!!! Bring on the Mexicans |
|
|
|
|
04-03-2009, 11:05 PM
|
#16 |
|
AstinaGT Regular
Join Date: Feb 2008
Location: Quakers Hill, NSW
Car: Mazda 3 & BA Astina
Posts: 277
|
21st September 08:
Modifications #659, 660 & 661 Completed today (and no I'm not actually counting lol!) Thnaks to the help of Rob, Sanzy and m0nkeib0i888 we managed to get a fair amount of work completed today on the Bling mobile. Balance Shaft The 8.2kg lump of rotation mass in the sump has now been removed - known as a Balance Shaft and only found on the 2.3L to stop engine vibrations. It's a real messy job and consumed several hours. I had purchased an SCI (Sport Compact Industries) Balance Shaft Delete kit almost 2 years ago, but haven't had the want/need to fit it until now. The kit simply contains a plug for the oil gallery feeding the balance shaft and a plate to secure it in. So people say that alot of vibrations are felt once you perform this mod, but after taking the car for a spin......Wow! The only vibrations are felt through the actual pedals and no where else. Vibrations only occur when revving on course, but I really like it as I can feel the engine revving now. During the last oil change back in May 2008 ~ 5,000km ago, I fitted a magnetised oil sump plug. Well it actually works! No large metal shaving were found, but there was a bit of crud attached to it. Well worth the $15 if it'll keep collecting the minute metal shavings. We also cleaned out the bottom of the sump as well and removed all the traces of the old oil and oil pan sealant. 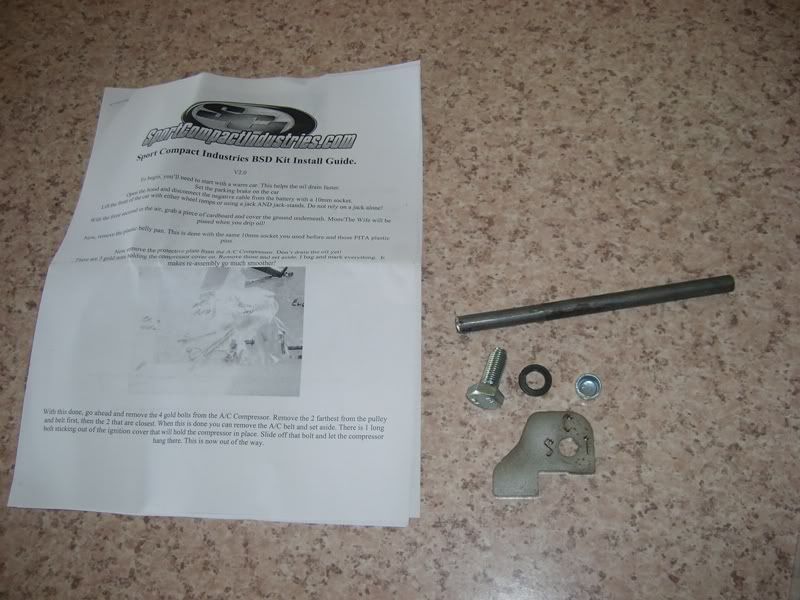  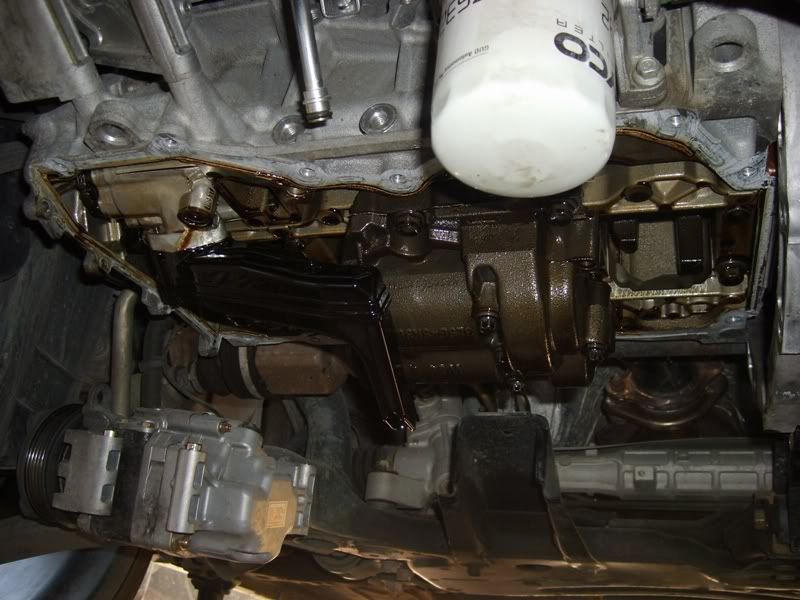  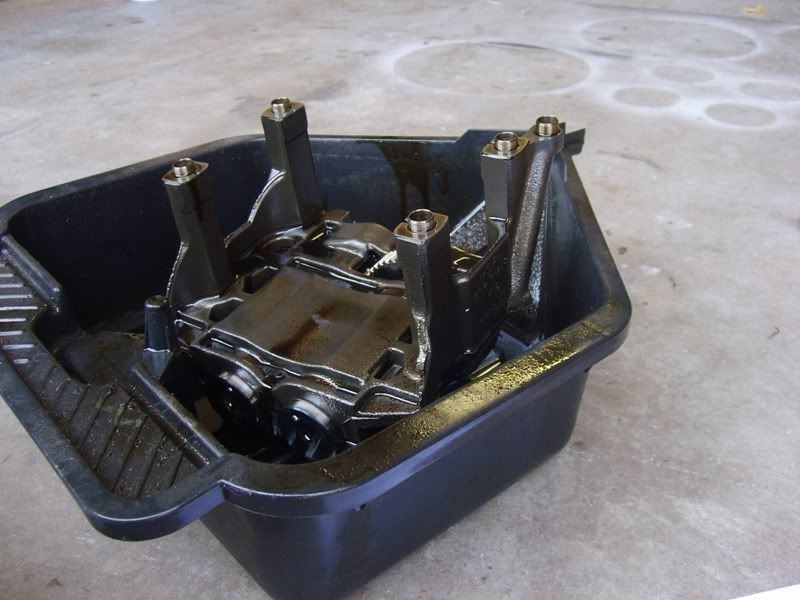 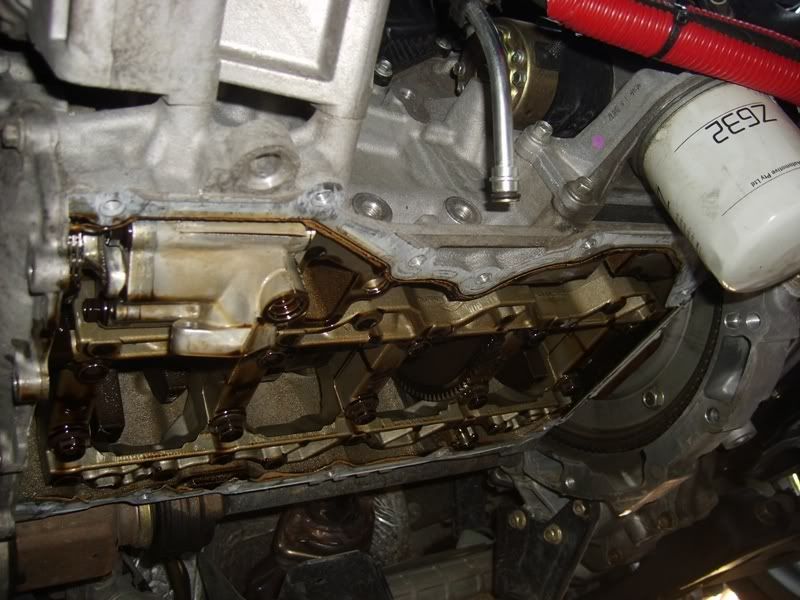 Lightweight Billet Pulleys The pulleys are made by Medieval in the US and offer a weight saving of 292grams over the stock items. I purchased a 2 piece kit which replaced the water pump and the alternator pulleys. These are standard size pulleys, not underdrive, so the stock belt fitted straight back on. 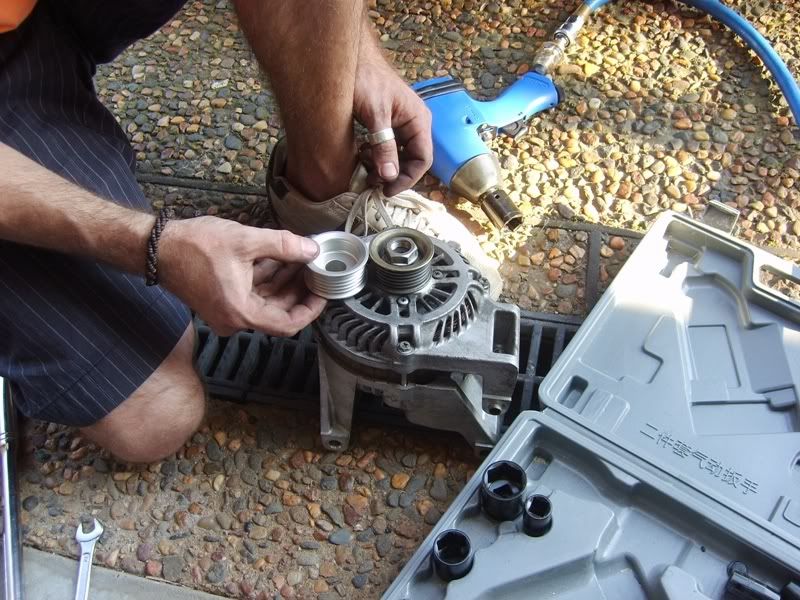 Silicone Radiator Hoses Yep to add to the show effect, we also fitted a set of RED silicone radiator hoses made by OBX. No real function apart from being stronger than the OEM rubber ones and it looks good! I get some pics up later. Overall the car is defiently much more responsive and I can feel that a little more power has been gained, but maybe only a couple of kilowatts. Still good enough to give a little grief to a turbo'd MX5 tonight as he couldn't loose me along the straights 
|
|
|
|
|
04-03-2009, 11:07 PM
|
#17 |
|
AstinaGT Regular
Join Date: Feb 2008
Location: Quakers Hill, NSW
Car: Mazda 3 & BA Astina
Posts: 277
|
22nd September 08:
Latest pics from a couple of weeks ago for a photoshoot:  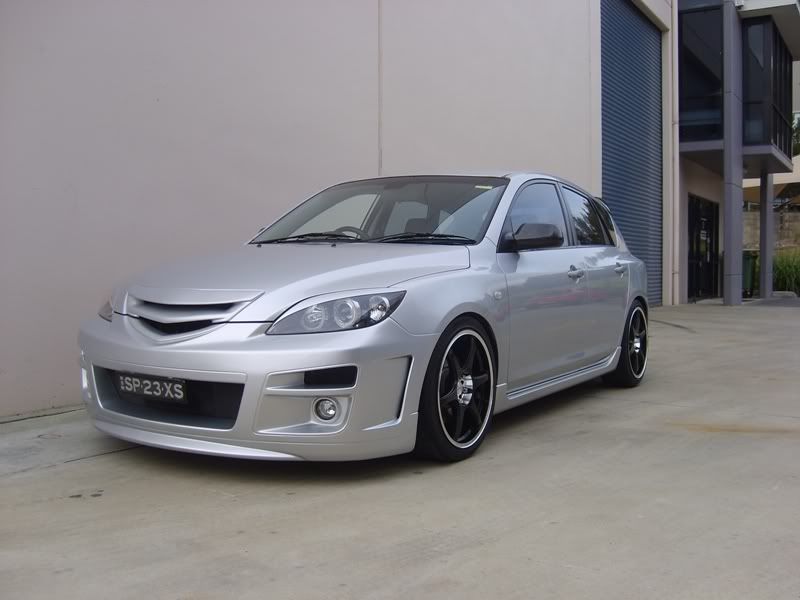 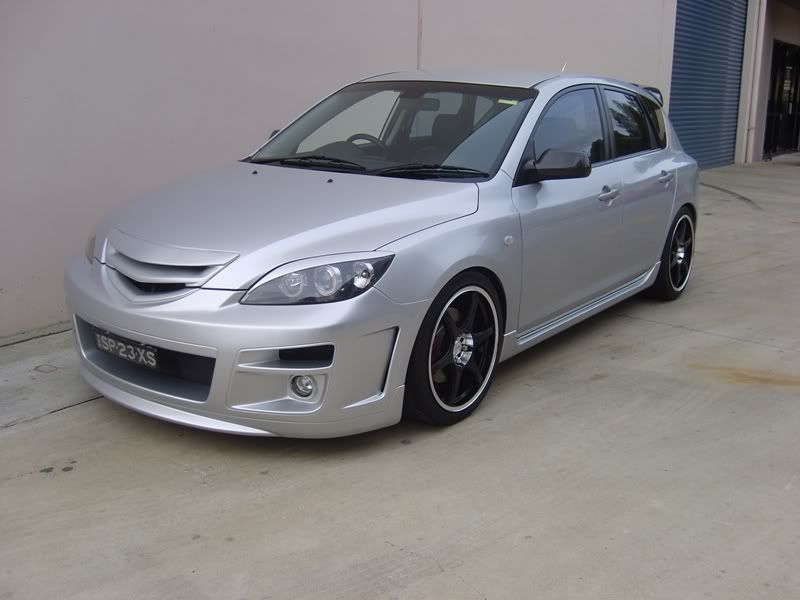 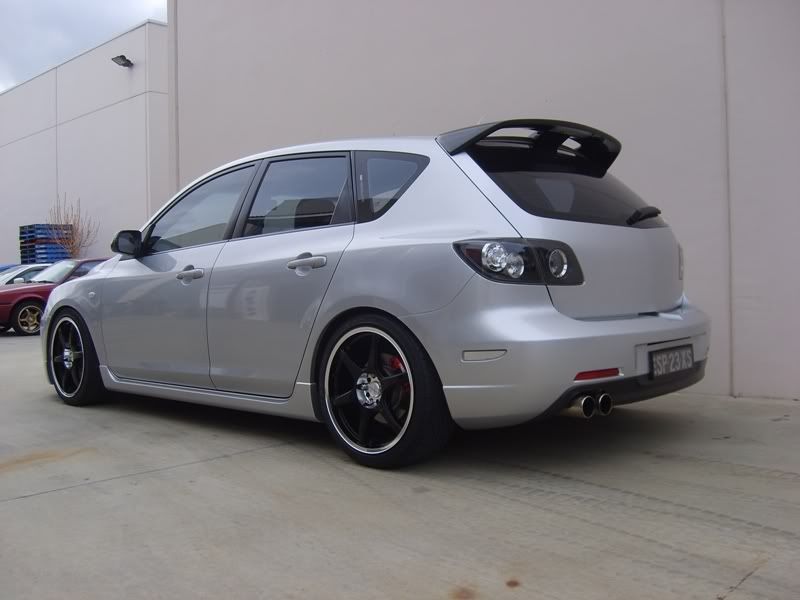 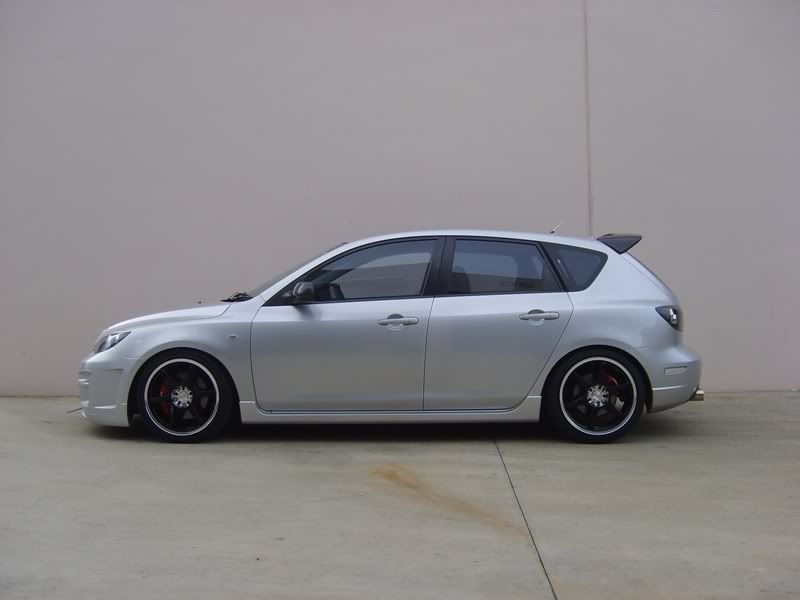 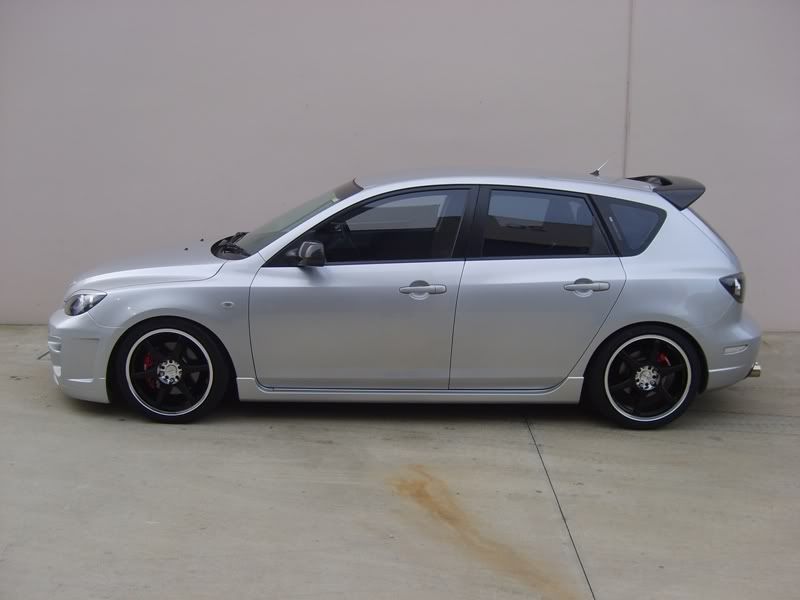 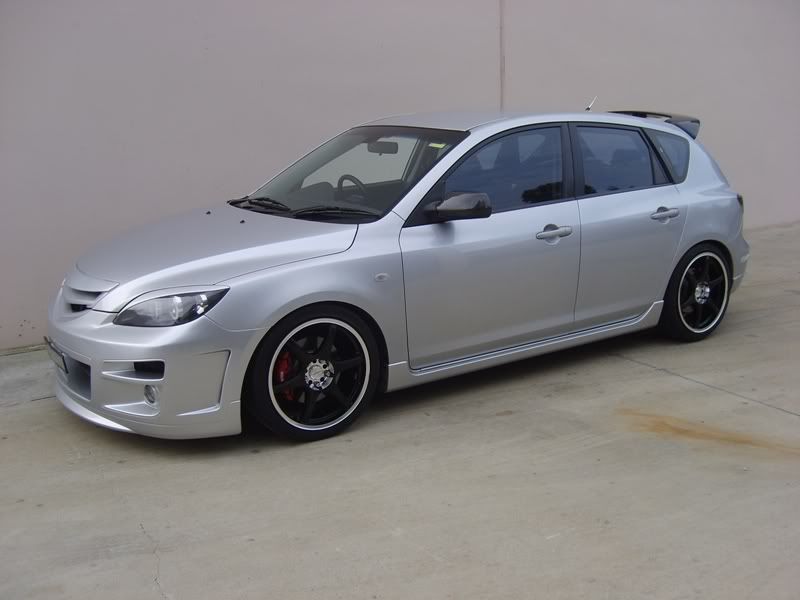 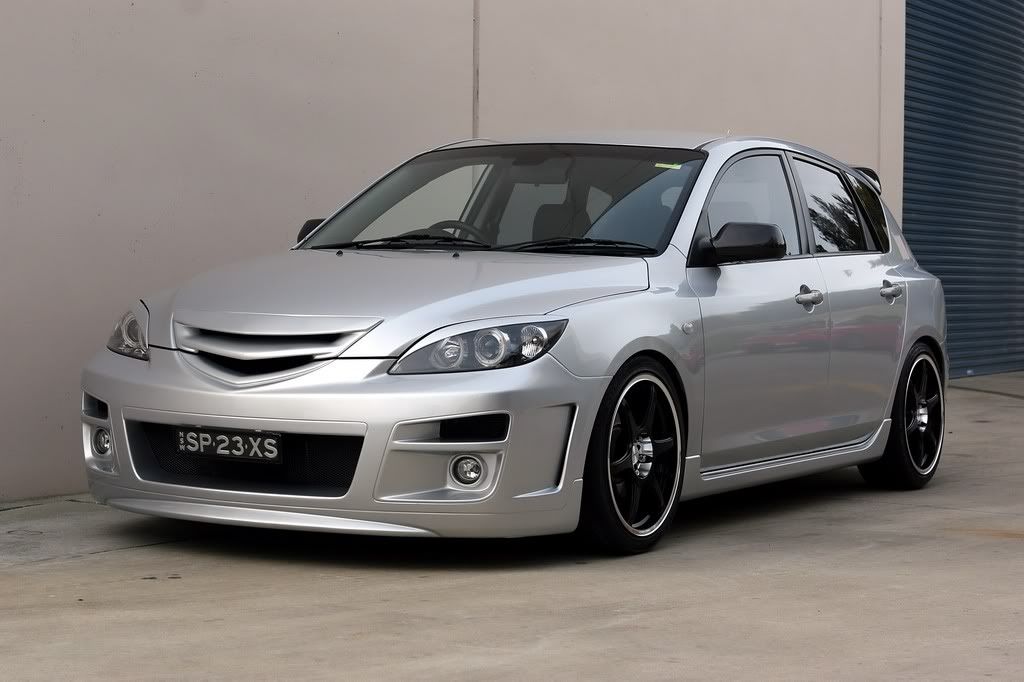 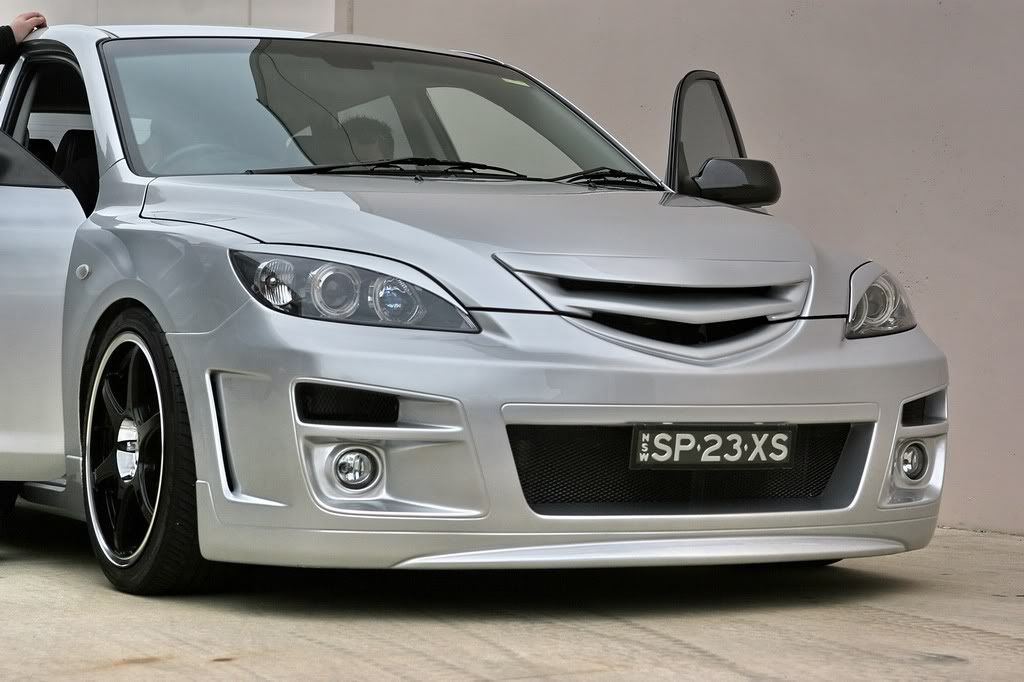 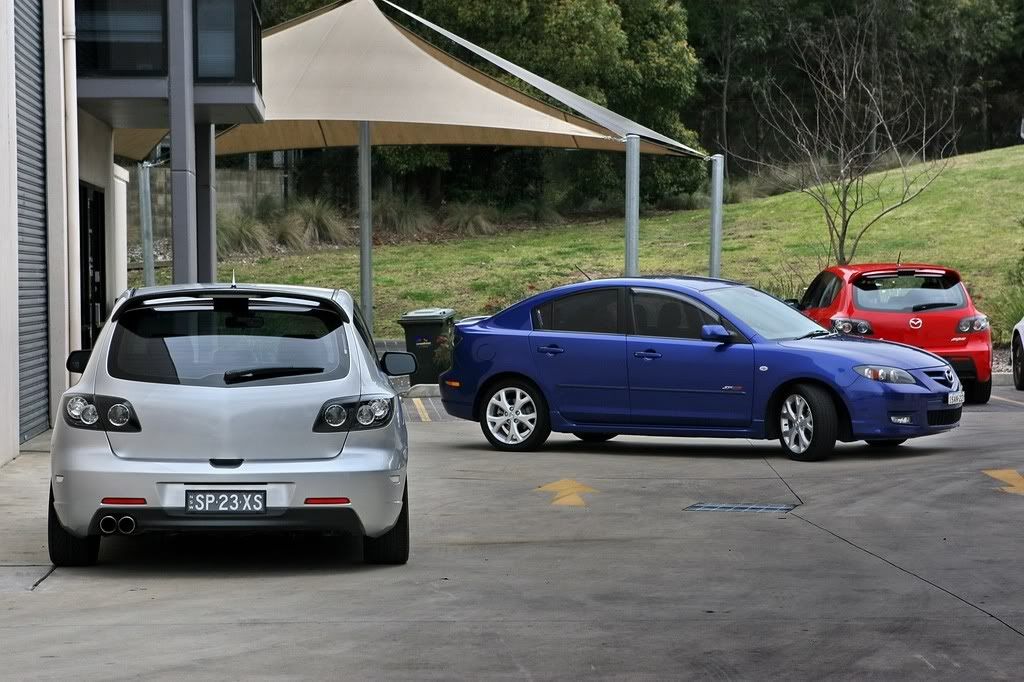 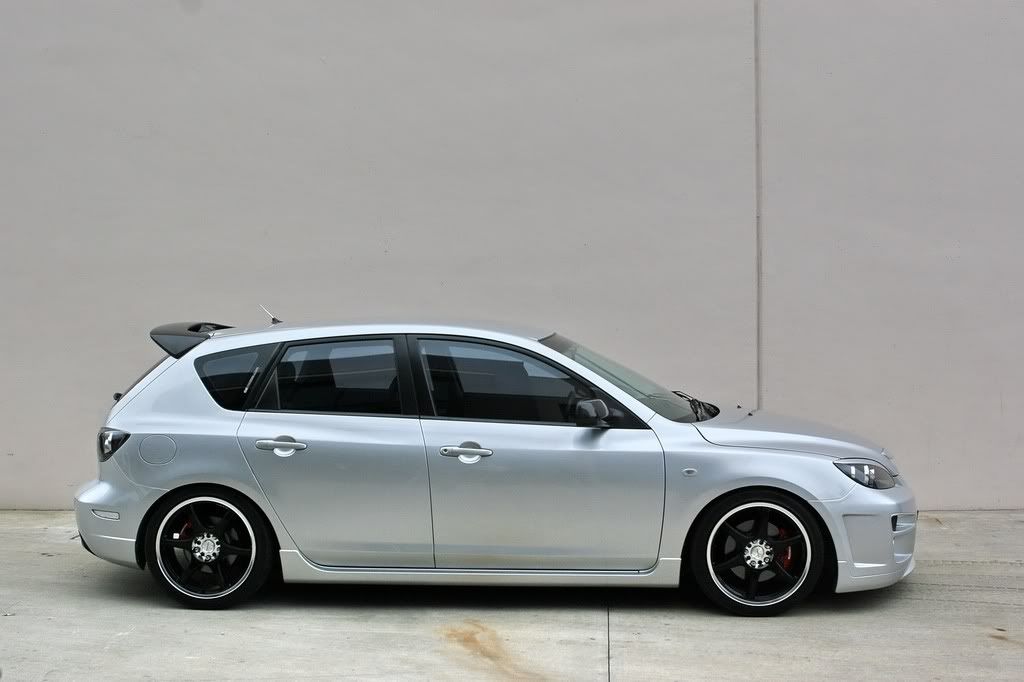
|
|
|
|
|
04-03-2009, 11:10 PM
|
#18 |
|
AstinaGT Regular
Join Date: Feb 2008
Location: Quakers Hill, NSW
Car: Mazda 3 & BA Astina
Posts: 277
|
29th September 08:
Latest purchase: Adjustable Swaybar end links: 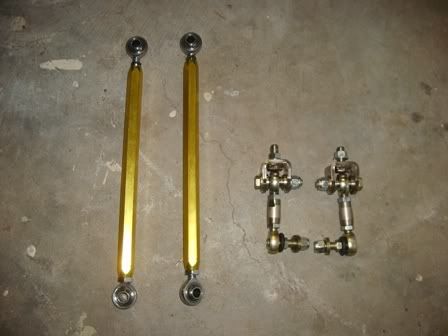 Front: Whiteline Heavy Duty Adjustable (Gold long ones pictured) Rear: AWR Heavy Duty Adjustable (Short ones pictured) I'm hoping to get these installed next week to complement the Whiteline rear swaybar so I can try and relieve some of the tension/loading off the swaybar due to the lowering of the car. Going to be a bugger to adjust with the car on the ground though.... :biggrin: But I think overall it should help to stiffen it up a little more as the stock endlinks look like match sticks in comparison to these bad boys! :ninja: ================================================== ======= 3rd October 08: BSD & Pulleys - Absolutely loving the car now. It revs so easily now and I love the small vibrations coming through as it feels like a proper car, not a new car where you feel absolutely nothing from the engine. All set for wiring the Microtech tomorrow Have even picked up a set of new spark plugs (1 step colder just in case).Hired a Toyota Yaris this morning to drive around in for the next week while the car is off the road undergoing works. Going to have a little fun there me thinks Hopefully the car should come back to life before tomorrow night...... I hope! Then it all steam ahead - tuning, brakes and suspension tweaking before DECA in 3 weeks
|
|
|
|
|
04-03-2009, 11:14 PM
|
#19 |
|
AstinaGT Regular
Join Date: Feb 2008
Location: Quakers Hill, NSW
Car: Mazda 3 & BA Astina
Posts: 277
|
5th October 08:
Well after a long day the Microtech ECU has been installed. I drove the car out of the garage this morning on the stock ECU and drove it back in tonight using the Microtech. It's not exactly streetable yet, but does start and holds idle (just). Haven't adjusted the base tune as supplied with the ecu as of yet. Wiring was spot on first go, but had a few embrassed looks when I forgot to plug the main engine's loom back in properly before trying to start the car for the first time :whistling: That one managed to waste a good 20 minutes lol!!!! Just need to tidy up the wiring and secure it all away. The only issue that we had was with the stock Water temp sensor as it seems that it isn't compatible with the Microtech. I need to hunt down another sensor to replace the OEM one that works on a different tempature scale. This isn't helping the car start as it thinks the coolant temp is -22 degrees and is trying to compensate for the sub zero conditions.... ================================================== ====== 6th October 08: We managed to "fine" tune the car a little more today and even took it out for a little drive. It's running a little lean in places, but that'll be sorted by the tuning. So far I've had to replace the Water Temp Senor and the O2 sensor out for different units that were compatible with the Microtech. As such I still need to re-mount the stock water temp sensor into the thermostat block so the water temp gauge on the dash works again. Still got to clean up the wiring nightmare and connect a few little extras up to the Microtech, but overall ready to be tuned. I even manged to install the 3" CAI I had made a while ago since the MAF is now no longer in use. 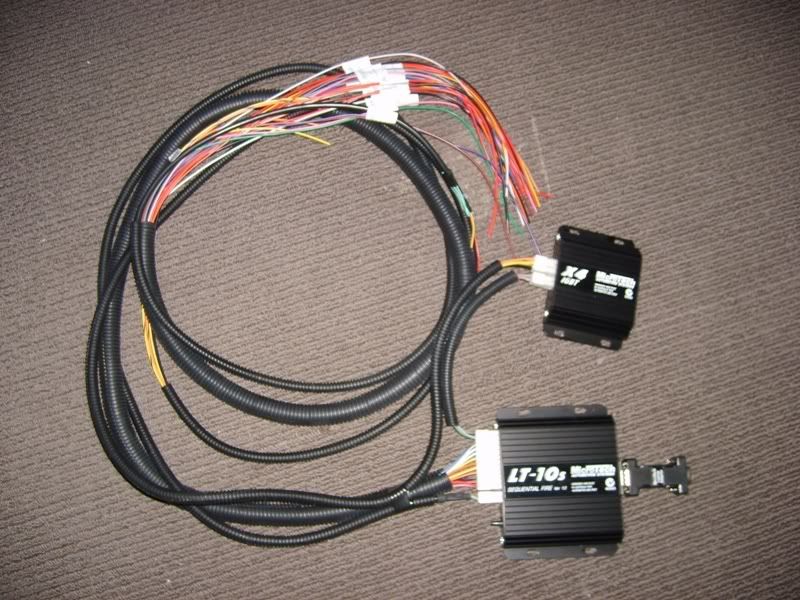 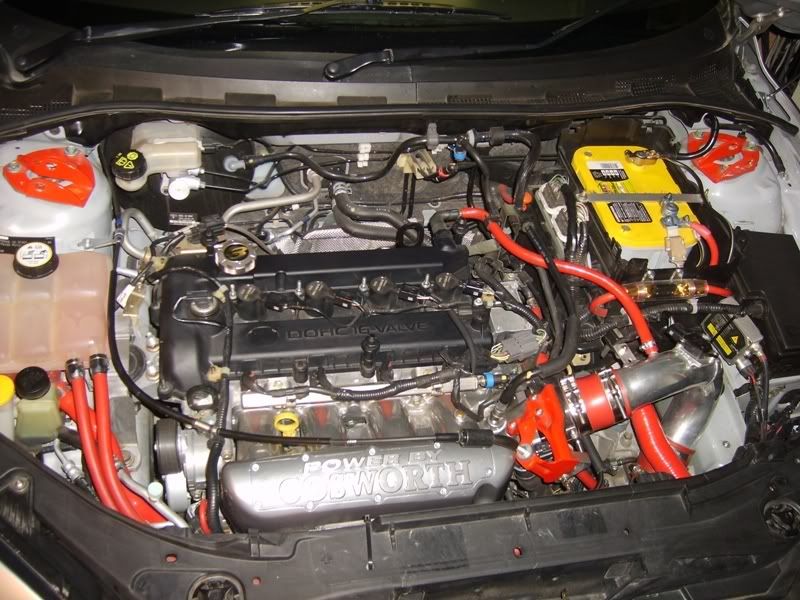 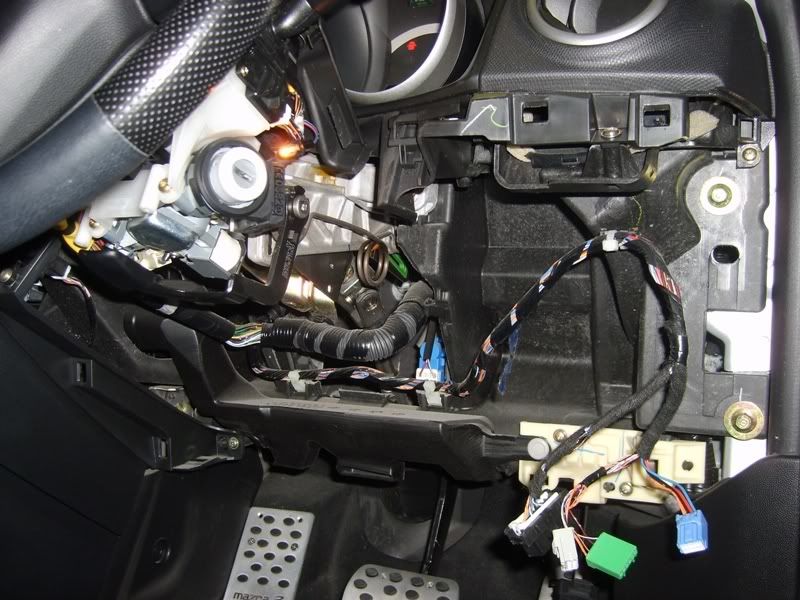   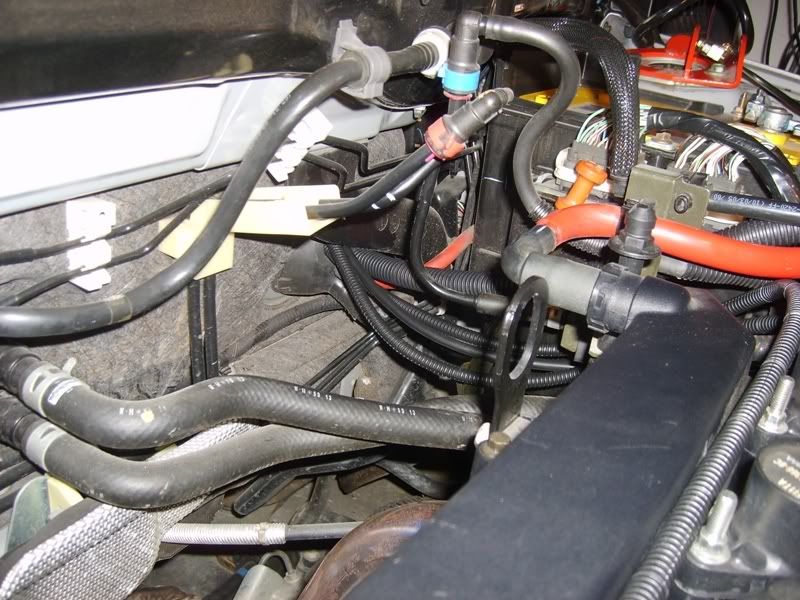 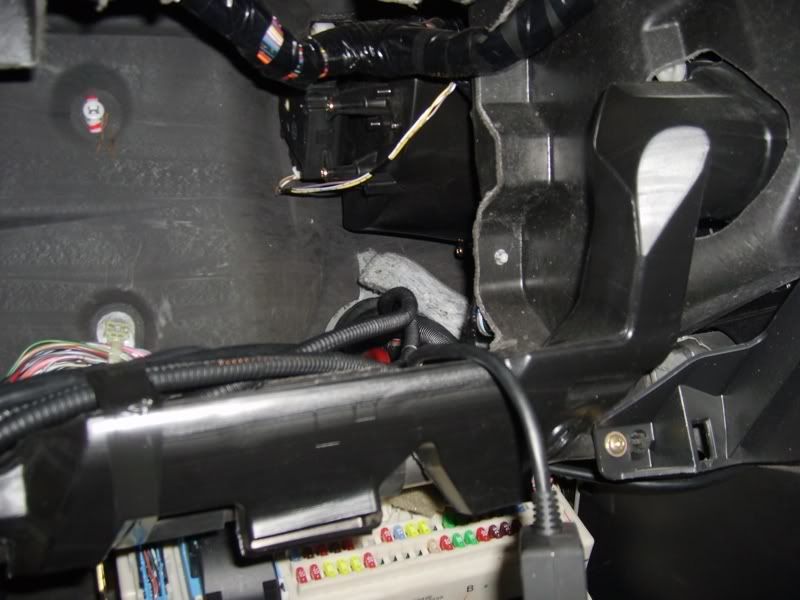 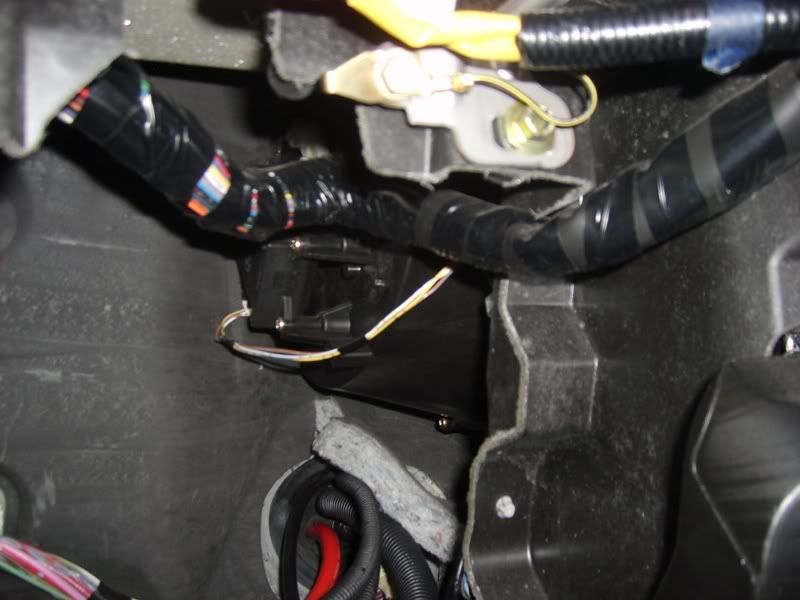 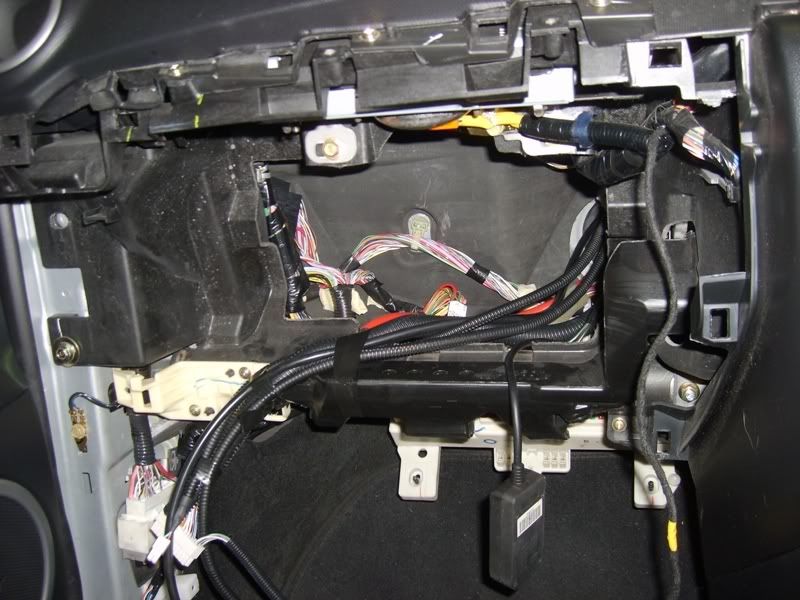   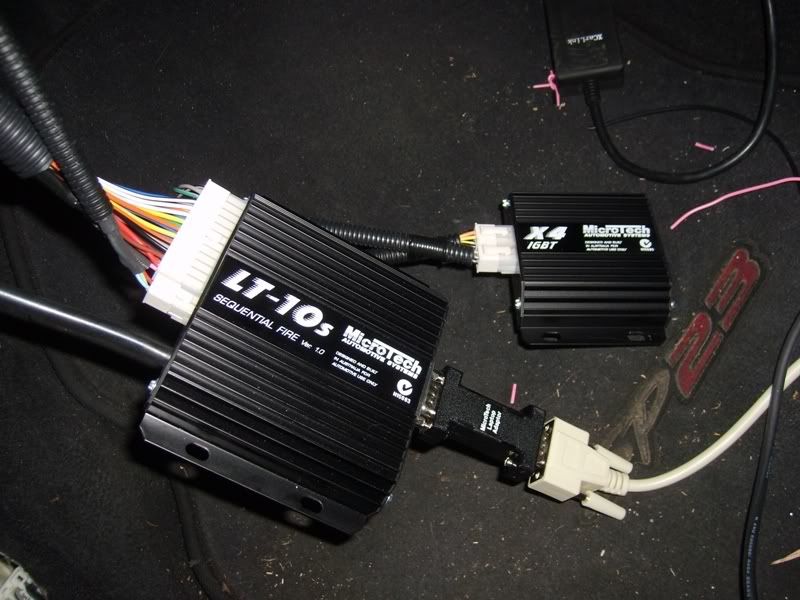 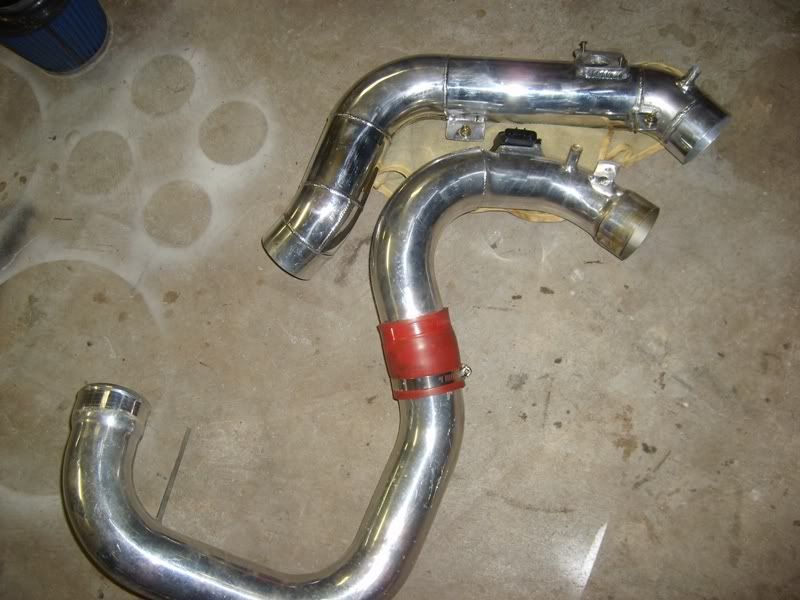 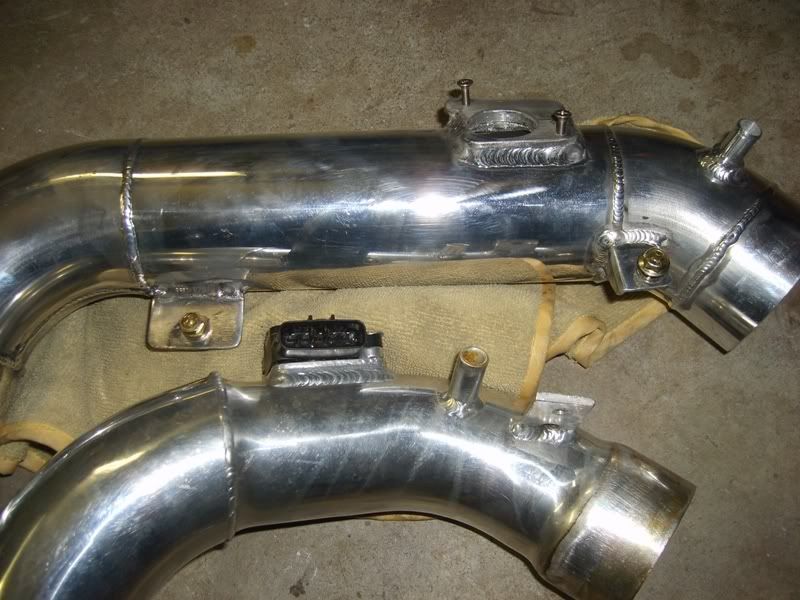 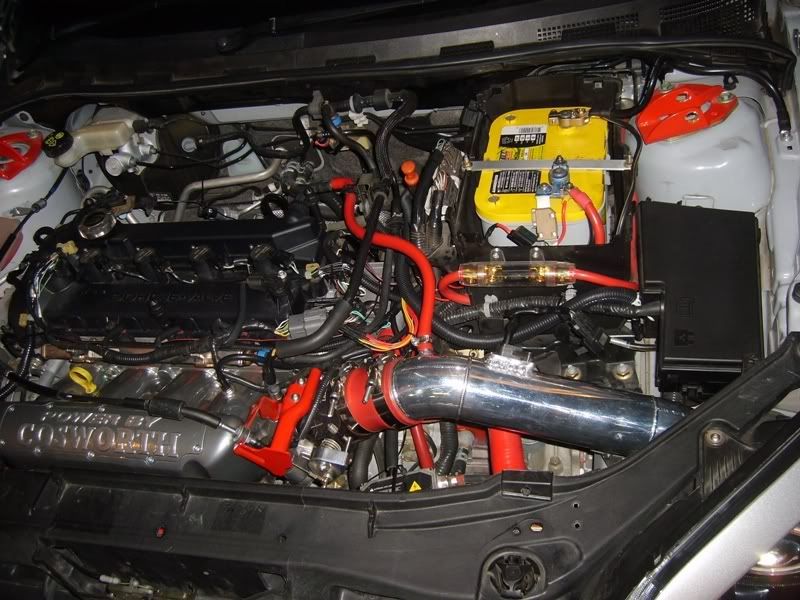 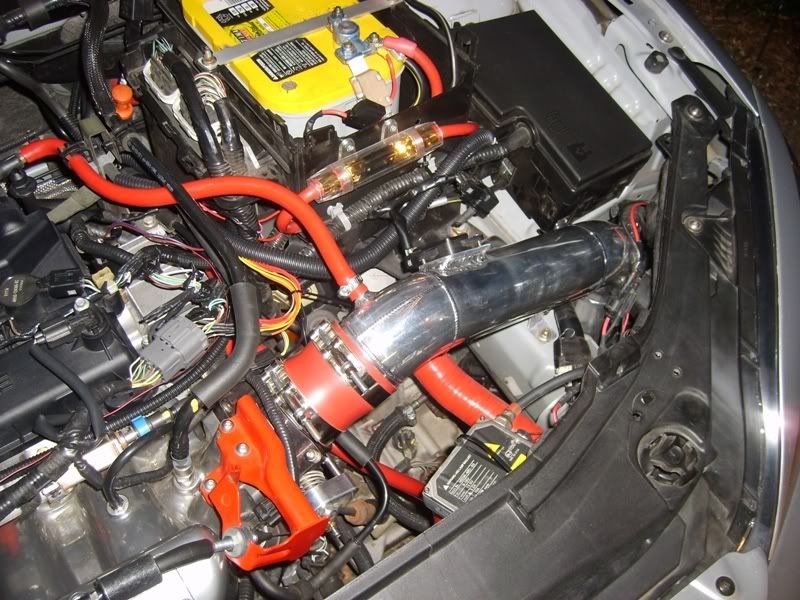 Tuning is booked in for Wednesday & Thursday (Thursday for cold start tuning), so won't know how good it goes until then. Until then, back to driving the crappy Yaris around! BTW - Handbrake works well..... |
|
|
|
|
04-03-2009, 11:20 PM
|
#20 |
|
AstinaGT Regular
Join Date: Feb 2008
Location: Quakers Hill, NSW
Car: Mazda 3 & BA Astina
Posts: 277
|
10th October 08:
Update: Tuning of the Microtech was completed yesterday. I didn't get the result that I wanted, but then again you never really do! Total power is now 106 kW @ the wheels, with just over 170Nm of torque. It doesn't look like much on paper, but the car runs so much better now. The car is making the same power as it was on the stock ECU 500rpm earlier now, with peak torque from 2,500rpm!!! Throttle response is also remarkedly improved and it is much better to drive with smooth transition instead of an on/off switch due to the larger throttle body. The Microtech is fully controlling the engine, with the stock ECU still running the Idle Air Control (IAC), Variable Cam Timing (VCT), the Dash and the Gearbox shifts(auto). We spent a few hours playing with the Cam Timing, but the stock ECU does just a great job of controlling it. With VCT disabled, the car lost power throughout the middle rev range, but still made the same peak power. It still needs some more fine tuning, but that'll happen over time. 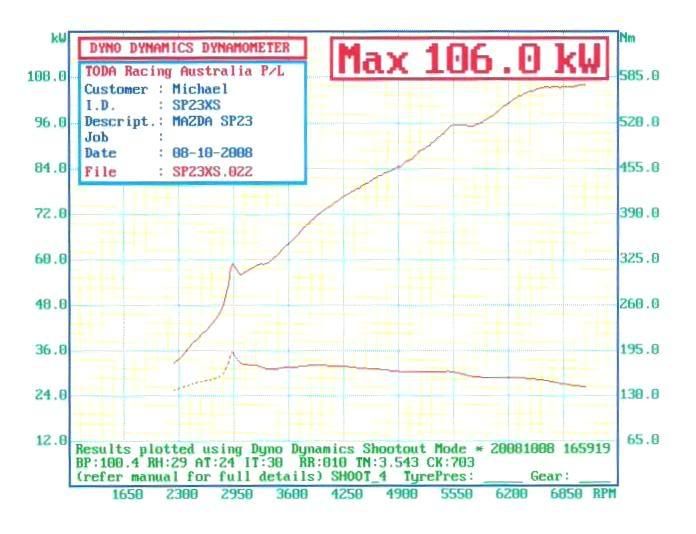 ================================================== ======= 17th October 08: All is looking well for DECA on the 26th. Front and rear brake discs are being machined today, EBC Greenstuff pads being fitted along with a brake fluid flush. This should provide some much needed stopping power. Guards are booked in to be rolled on Saturday to allow some larger tyres to be fitted - 225/235 instead of 215. My suction camera mount arrived the day from the US. I wasn't really sure wether it would be good enough or not for the track, but the quality is really impressive on it. It can hold a camera up to 3.5kg in weight, so my little cheap made in China video camera that weighs next to nothing should be sweet as! I wasn't sure how well it would fair with driving and bouncing around in my car (it ain't that smooth!), so I gave it a little test out. Here's a little video sample from this morning: http://www.youtube.com/watch?v=PeT3vJ5Bceg I'm really impressed with the result. Not bad for a $250 investment in camera and mount. ================================================== ======= 19th October 08: I rebuilt the front drivers side strut today. It has been making noises ever since I installed the Pedders springs 6+ months ago and it has been giving me the sh1ts lately. I picked up a new strut top ball bearing plate for $40 from Mazda and swapped out the old one and now.... No more noises when turning the wheel!!!!! I also fitted up the Whiteline Front Swaybar endlinks today while the car was up on stands. These endlinks are so much beefier than the stock units. As always liberal amounts of loctight was applied to the locking nuts as well. No noises from either the front or rear endlinks at the moment.....but give it some time :whistling: Still got a few more things to get done before we leave for DECA on Friday morning  hmy: Looks like it going to be a long week! hmy: Looks like it going to be a long week!
|
|
|
|
 |
|
|


 Linear Mode

