|
|
 21-01-2010, 10:19 PM
|
#41 |
|
AstinaGT Regular

Join Date: Feb 2008
Location: Quakers Hill, NSW
Car: Mazda 3 & BA Astina
Posts: 277
|
On with the progress!
22nd July 09 Grabed a few fuses this morning from the wreckers and tried again connecting up the battery negative terminal last with ignition key off and it still blew. After a quick look through the Electrical diagrams, the only device functional through the Main fuse with the ignition off is the Alternator. After a quick look from underneath, we had connected up the main positive lead minus the plastic spacer meaning that the cable was grounded to the alternator body causing a dead short. We quickly made up a spacer and get it all sorted! No more shorting out anymore. After 3 attempts at cranking, the car finally got enough fuel (fuel rail was empty) and it roared to life!!!!! Couldn't believe it started so easily after 18 months. So after a quick timing check, we held 2,000rpm for the next 20 minutes to bed the new lash caps and camshafts in. This allowed enough time to burn all the residue off the engine paint etc as the engine got up to proper tempature. Quite smelly really.... The only issue discovered was a tiny coolant leak from a heater hose. Brakes and clutch are very weak as the fluid drained down past the minimum level, so we'll get these bled first thing tomorrow night and hopefully take it for a quick spin. -------------------------------------------- 24th July 09 Well I got a bit more work completed last night & tonight including:
I checked the spark plugs afterwards and we are getting a perfect burn - so all good! At least I can now drive it in and out of the garage!!!! Now I just need to finish assembling the panels and the bumper on the front end of the car and finish the body work off. -------------------------------------------- 29th July 09 Well we've come to a little stand still at the moment with the build.... The radiator has absolutely shat itself - coolant is slowly weeping out of it everywhere. That's what happens when you get a second hand radiator and leave it for 12 months :russian_roulette: . Not sure if it's a coolant issue, but the engine is now blowing smoke.... Going to replace the radiator first and see what happens as I think the radiator may be blocked as well. The spark plugs (although checked previously and showed a perfect air/fuel mixture) and now very black indicating that the car is running very, very rich. Although I'm not sure if it's fuel/oil or coolant causing the smoke just yet. A compression test of the engine produced excellent results: Cylinder 1: 195psi Cylinder 2: 195psi Cylinder 3: 185psi Cylinder 4: 190psi So that at least concludes that the rings are still ok. Engine timing, idle rpm and camshaft settings still need to be tweaked to get it to run properly on the standard ECU. All panels have now been fitted as a trial. Very multi-coloured at the moment! The Mazda badge on the front bumper is being removed/filled in as well for a clean look. 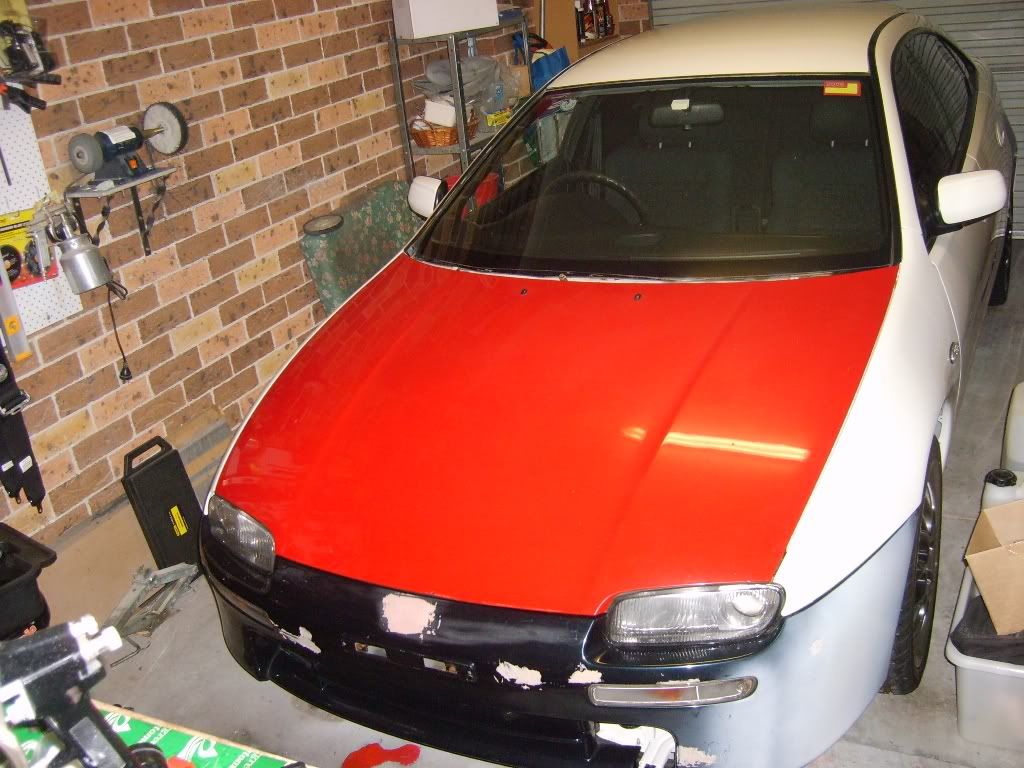 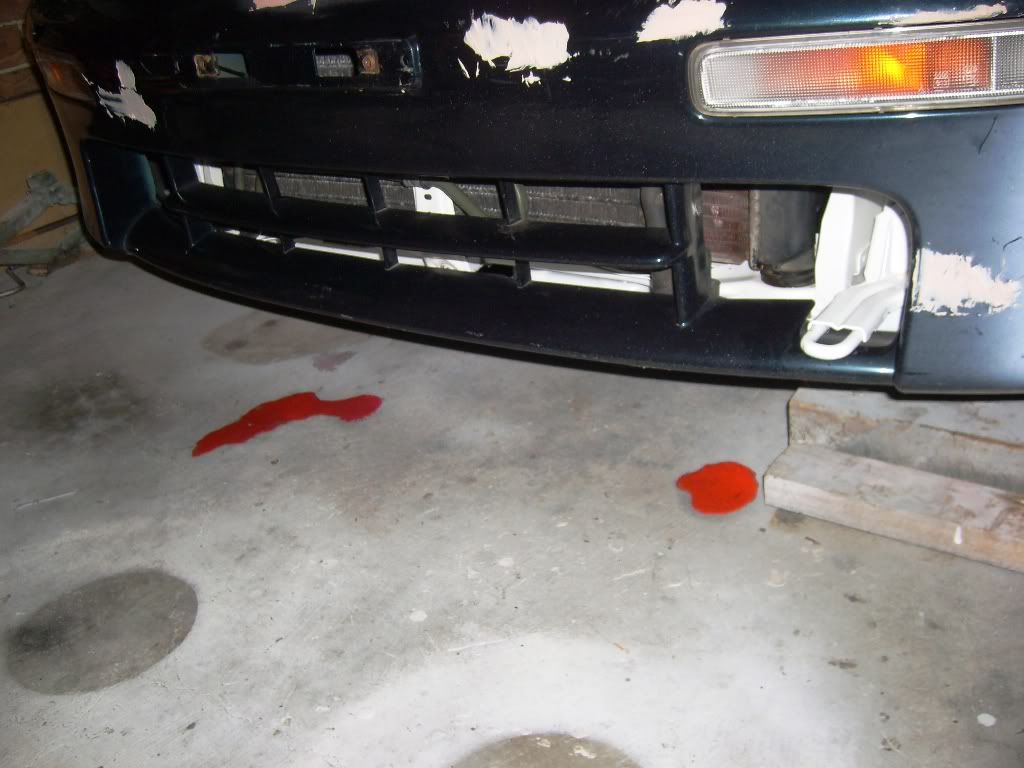 Exhaust manifold heat shield has now been polished as well. A little bit wrinkled though from where I knocked the dents out of. 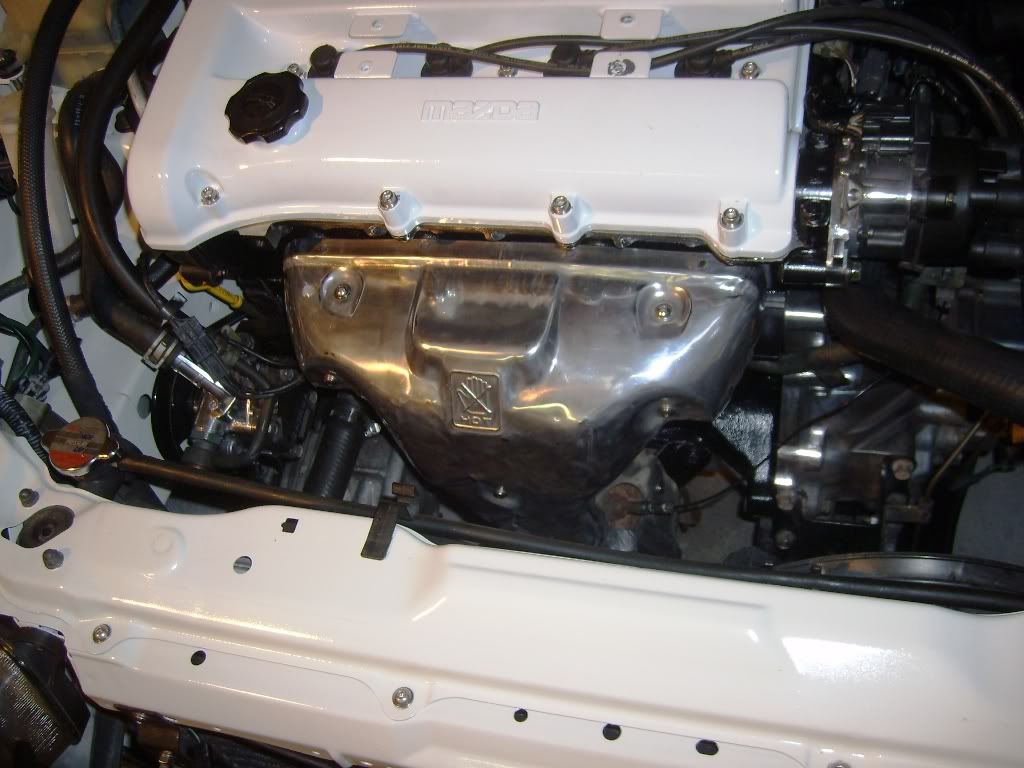 
|

|

|
|
21-01-2010, 10:23 PM
|
#42 |
|
AstinaGT Regular
Join Date: Feb 2008
Location: Quakers Hill, NSW
Car: Mazda 3 & BA Astina
Posts: 277
|
22nd Nov 09
Been a while since the last update....... Radiator was replaced with a new unit ($250) and had the proper hoses fitted this time - no leaks now and we could finally get the engine up to temp enough for the thermo fans to kick in to cool it back down. You can see from the photo just how bad the radiator was.....  The smoking engine turned out to just be bad old fuel. The fuel was at least 18+ months old at this stage, so obviously wasn't in the best condition! We had to drain the tank and re-filled it with 98 octane fuel. Once we got the engine up to temperature we were able to get all the water out of the catalytic converter and the smoke stopped. Managed to take it for a little spin in my street as well to test everything out. Everything seems to be ok, except for the brakes which are a little weak. I think the front pads have glazed over as they haven't clean the front discs up yet removing the rust.     Picked up a genuine Mazda bonnet in as new condition with a few shallow scratches. But as it's still in the black undercoat, these will come out during painting.  Also bought a new toy to make sure the bonnet comes out as good as it can....  ---------------------------------------------------------- 29th Nov 09 I got stuck into the Astina this weekend.... [FINALLY!!!!] The boot panels have now all been put back in and fitted up a new driver's seat. I couldn't resist the temptation any longer and just had to see if this bad boy fitted.. :devil: :devil: :devil: Thankfully I was lucky enough to find some brackets to allow the seat to bolt right in. MazdaSpeed Type F seat in Black Suede   It took me several hours to get the bumper up to this stage. After laying down the primer last night and filling the small holes with stop putty, it had a chemical reaction over night with the paint and I had to sand it all off today and start all over again.... Anyway it's back in primer again waiting for some new filler. Not far away now from being finished  Also made a huge start on the bonnet, with the underside of the bonnet fully sprayed Prior to painting:  After 1st coat of paint:  After 2nd coat of paint:  After 4 coats of white + 3 coats of clear:  It's hard to see the final result from the last picture, but it is really smooth and glossy across 70% of it, meaning that it won't take much to sand it down ready for buffing. I love my new spray gun!!!!! ---------------------------------------------------------- 8th Dec 09 Progress!!! After having a good chat with my local paint guy, I realised that I had used the wrong filler to fill in the badge recess on the Front Bar. I had originally used normally body filler (bog), but as this is stiff and brittle it would soon crack as the bumper is flexible. So I took it all out (very easily I might add) and filled the recess again with plastic bumper repair this time. Once dried it really looked like plastic Body filler removed from badge recess:  Plastic filler mixed up and inserted into recess:  Plastic filler sanded and smooth. Still a few pin holes after 1 coat. I had to apply a second coat to fill the holes:  Final Product - now sprayed in white.  Also got in a sprayed the top side on the bonnet as well. Wasn't my best spray job, but in 40 degree heat, it ain't too bad for a backyard job. It's shiney, but not smooth like glass. Nothing a bit of super fine sand paper and a good polish won't fix. But at least it's sprayed!!!! I hoping to fit the bonnet and bumper this weekend if time allows and I'll take some pics then. Brake pads from QFM were also ordered today. I opted for the AX1M pads which are a street/entry race pad. Not too bad on price either at $120 per pair. These should go nicely with the DBA slotted rotors laying around here waiting to still go on. |
|
|
|
|
21-01-2010, 10:26 PM
|
#43 |
|
AstinaGT Regular
Join Date: Feb 2008
Location: Quakers Hill, NSW
Car: Mazda 3 & BA Astina
Posts: 277
|
13th Dec 09
Repairs to the paint/body work is well under way. Enough so that my finger tips and palms are a little sore from all the sanding..... During:  Awaiting final rub down:  The new bonnet has now been fitted (still needs to be aligned) to allow us to properly wet sand it. After a liberal going over with 2000grit sand paper, the bonnet was polished using a 9" Orbital Polisher with a wool pad and buffed to a shine. I only got 3/4 way finished before I ran out of polishing compound....   The front bar is now 90% complete. The lower grille section was masked off and sprayed in a Black satin finish. The rest of the bar has been wet sanded and is awaiting fitment before the final buff/polishing can occur. Indicators and foglights fitted.  Also picked up the brains for the car as well. It's only a piggyback ECU, put will hopefully have enough adjustment in it to tune the engine properly for the Cams. Picked it up for a bargain as well from my favourite shop - ebay!  I'm getting excited now!!!!! It's soooo close to being finished finally :banana: :banana: :banana: With any luck I'll have the bodywork finished by next weekend and all back together. --------------------------------------------------------------- 16th Dec 09 Bonnet has now been fully polished up using cutting compound. Still needs a little more attention around the edges to get them a little smoother. This is only the first of many coats though as the wool buffing pad always leaves swirl marks.... Here's a daytime photo for you :biggrin:  The remainder of the car is currently being prepared for a complete respray with all lights, door handles etc being removed. We were originally just going to spray the lower half of the car (all the doors) to remove stone chips and scratches etc, but decided yesterday to go all the way. So this involves the removal of the 65 hail dents we found in the roof - No joke!!!!! All except one of them is very small and hardly noticeable. Hoping to have the roof sanded back in a few days in time to spray on the weekend.   Certified Crazy! |
|
|
|
|
21-01-2010, 10:29 PM
|
#44 |
|
AstinaGT Regular
Join Date: Feb 2008
Location: Quakers Hill, NSW
Car: Mazda 3 & BA Astina
Posts: 277
|
21st Dec 09
Unfortunately still going on the bodywork... I got in on Saturday and got all the hail dents on the roof sanded out and smooth. Just needs a coat of primer and a full sand down (wet) to smooth it all off.  But due to crappy weather on Sunday I wasn't able to spray the car, so I got in and installed the new brakes instead. Slotted rotors anyone?? :biggrin: :biggrin: I pulled the callipers apart and re-greased the sliding pin to ensure that they would operate correctly. Especially since they haven't been all that good to date (stock pads/rotors) due the short drives I've taken it on. We also sanded the shocks down and resprayed them black to remove the rust spots showing on them. Hopefully this helps it get through Rego inspection a little easier. The wheel wells also received a little attention with a fresh layer of underbody sealant being applied. BEFORE:  AFTER:  The front end of the car is now all back together ready for the front bumper to be re-fitted (after spraying the car). I was trying to get all the air conditioner lines reconnected, but discovered that the front nose cut that I originally purchased must of been imported from Japan, as the air conditioning condensor and plumbing were different to Australian models. The hoses were slightly larger so I couldn't just connect it all up. So after another expensive trip to the wreckers ($150), I returned back with a new air conditioner condensor and plumbing.  ------------------------------------------------------------- 22nd Dec 09 The car has finally been sprayed!!!!!!!!!!!!!!!! It took 4 hours to mask it all up and another 4 hours to paint it - one big day! It started out a beautiful day weather wise, but I had a thunder storm roll through half way through. Luckily I had just applied a coat a few minutes early and it had time to dry before the rain hit it. Since it was raining I took the time and re-sanded the car down in between to remove bugs/dirt etc that had stuck in the paint for that perfect finish. After a final coat of colour and 2 coats of clear, it was complete! Car masked up with the roof painted in primer:  After 2 coats of colour:  The final product straight off the spray gun:   Just need to give this a couple of days to harden properly, before wet sanding and polishing. This should then bring out a brilliant glassy shine. Now to just reassemble the damn thing..... |
|
|
|
|
21-01-2010, 10:36 PM
|
#45 |
|
AstinaGT Regular
Join Date: Feb 2008
Location: Quakers Hill, NSW
Car: Mazda 3 & BA Astina
Posts: 277
|
31st Dec 09
Here's some shots of the car as it currently stands. Only 1/3 way through wet sanding/polishing the whole car. Only the roof has been completely finished at the moment. Drivers Side/Front Bumper/Bonnet has been wet sanded, cut and buff only, but still produces a killer shine      I'm using a 6 step process:
------------------------------------------------------------- 10th Jan 2010 Well the car is now 100% road registered with number plates fitted! All done in just under 23 months from when I first received it! I took it for a little spin on Friday and it was running very rough. I think the fuel may of gone off again in the tank...... Anyhow I need to install the GReddy eManage asap and get the fuel to air ratios sorted out. 98 octane fuel + octane booster is only just keeping the detonation under control - even with the timing severely retarded. Anyway I managed to knock up a few kays running around and got the Air Conditioning system pressure tested and gassed. Also picked up a Fujitsubo Legalis R cat back exhaust system out of Japan a little while ago which I picked up while in Melbourne. Needless to say that managed to get installed as well :biggrin: . It looks fantastic with the polished stainless steel muffler hanging along the rear of the car. The black taillights have now been installed along with a de-badged and blackened rear panel, and the lower section of the rear bar painted as well. Just trying to find a factory rear spoiler to finish the rear end looks. Of course still slowing polishing the car as well when the weather is good. I'll get some pics up shortly of the nearly finished product. I say nearly finished cause I still need to get it running properly, fit exhaust headers (extractors), modify the airbox, dial the camshafts into their optimum setting and then get it properly tuned on the dyno. The never ending project really ------------------------------------------------------------- 12th Jan 2010 Latest pics:    Not too bad considering this was what the rear end looked like beforehand: 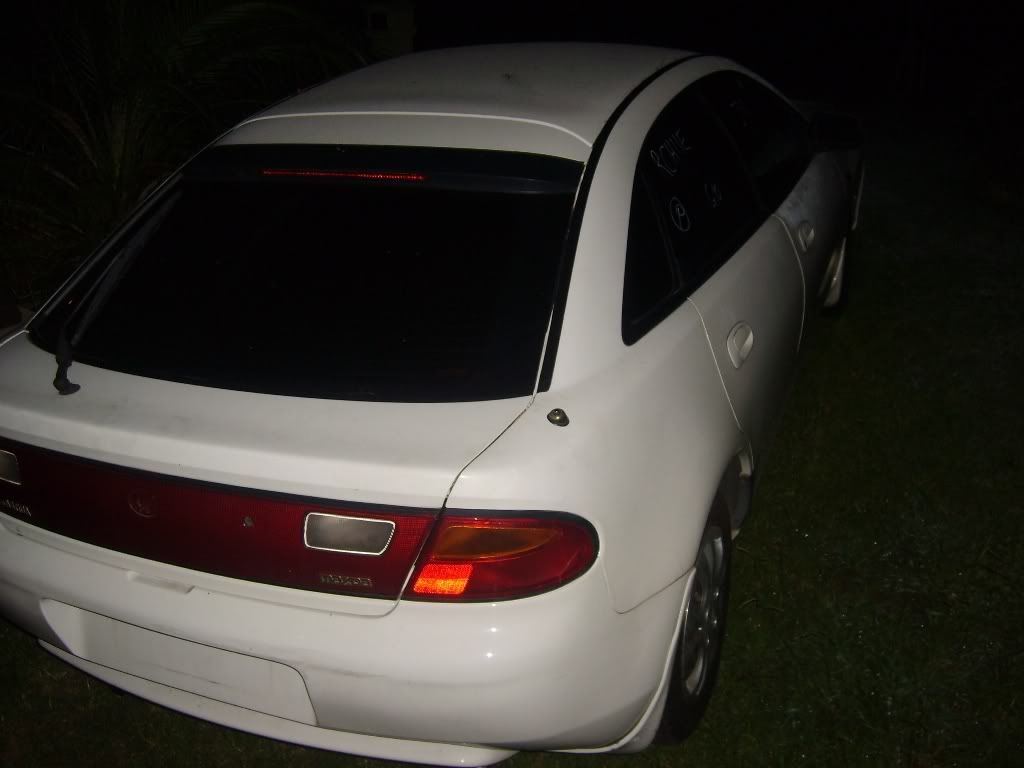 Fujitsubo Legalis R exhaust system - 60mm (2.36") Mandrel bent cat back system. Muffler and tip in Stainless Steel....and of course polished before being installed!  Front Speakers - Installed Fusion 6.5" splits into the front doors. Custom mounts were made from MDF to house the 6.5" woofer into a 5x7" hole. Crossover was dismantled out of it's housing to reduce size (dramatically) and fitted to the inside of the door panel below the power window switches on each side. Tweeters were flushed mounted at the top corner of each door below the mirror.  --------------------------------------------------------- 13th Jan 2010 Anyhow I managed to get the Greddy eManage fully wired/spliced into the ECU harness last night and tested. I thought this would be an easy job seeing as I had full wiring diagrams.....but no! The diagrams I had were for the Series 1 (1994) and the Series 2 (1995-1996) Astinas. Mazda decided to re-wire the ECU for the Series 3 Astina's just to complicate things a little further. Diagrams and manuals are rare for the Series 3 Astina's to say the least... As I got the whole wiring loom package with the eManage, I'm able to adjust the Air Flow meter, extend the Injector duration and adjust the Timing all from a Laptop. Not bad for a piggyback ECU. It's actually simpler to use than the Microtech interface! After the addition of some extra timing at Idle, the car now have a relatively smooth idle without sounding like a bridgeport rotary!! The car is running so much better that I even drove it to work today to give it a run. Pinging has mostly been eliminated now and it's drivable under light throttle use, although still jerking while trying to cruise at 60km/h. As the camshafts haven't been dialled in and the timing is way out, the torque produced from the engine is absolutely shocking. Just need to get the Wideband o2 hooked up now, dial the camshafts in properly and get this thing dyno tuned to produce some decent power! |
|
|
|
|
21-01-2010, 10:41 PM
|
#46 |
|
AstinaGT Regular
Join Date: Feb 2008
Location: Quakers Hill, NSW
Car: Mazda 3 & BA Astina
Posts: 277
|
18th Jan 2010
The Camshafts have now been properly dialled in. We were trying to do it by just using dial gauges, but it was too mathematical challenging for us on a Saturday morning at 10:00am without coffee!!!! So after a quick Google scan, we discovered another method using a degree wheel on the crankshaft. Thanks to Google images we found a nice degree wheel designed for automotive use with TDC (Top Dead Centre) and BTC (Bottom Dead Centre) marked on it - and in high resolution! After printing this out on photo paper we used double sided tape to attach it to the crankshaft lining up 0 degrees at TDC with a coat hanger wire as a pointer. It was 2:30pm at this stage..... With the Camshaft specifications in front of us showing the degrees that the cam will open at 50thou lift, we simply dialled in the camshaft opening degree on the crank and adjusted the cam gears until we measured 1.27mm lift (50 thou) on the of the valve. This process was repeated for the exhaust cam as well. This was a much simpler process than before. In no time we had the rocker cover back on and it roared back to life - on first start! It was 4:00pm at this stage... After resetting the timing back to the standard 10 degrees and a quick check of everything, we set off on a test drive. Power was the first thing we noticed... Still running stupidly rich most of the time as evident from the fresh smell of fuel and black smoke out the exhaust under acceleration, but it's very drivable now. Until the engine warms up and changes maps on the factory ECU, there is no detonation. After then, it's only minor, but I believe this is due to the timing being way off under load. With my mate driving, I was able to adjust the tuning slightly on the road by ear/feel so it's safe to drive. We did reach 6,000rpm quite easily, but backed off from there as a pre-cautionary measure  Needless to say this thing is LOUD and the brakes work very well! I think the exhaust may need to be quietened..... Needless to say this thing is LOUD and the brakes work very well! I think the exhaust may need to be quietened.....So with this work out of the way I set off on Sunday to piece Humpty Dumpty back together again. I still had one wire from the engine bay coming in through the passenger door because I could not find it on the ECU harness. This was the RPM signal that is provided to drive the Tacho. So I got in a removed the instrument cluster and using a multi meter was able to determine which cable I needed within a few minutes. After a simple re-route of the wire up behind the cluster, all the wiring for the eManage was now all complete and tidy. With the dash back together now, I installed the eManage safely under the centre console so it won't move around. I had to cut a hole in the lower plastic covers on the centre console at the driver's feet to allow access to the status/error light and the management USB port on the eManage. I Still have to fit the Wideband o2 in and get it properly tuned - which is now booked in for this Wednesday at Castle Hill Exhaust. I'll try and get a before and after video so you can hear how this thing sounds. Hopefully they can get it to idle and run a little smoother Cam Timing - Dialing in the cams using a dial gauge to measure the valve lift   eManage wiring nightmare!   --------------------------------------------------------- 20th Jan 2010 Just got a call from the Tuner.......Tuning's no good :down: The eManage does not have enough adjustment in the fuel maps (25% adjustment) to cope with the Camshafts and head work.... The car is running lean up to 4,500rpm, before running rich through to 7,000rpm. Standalone ECU it has to be! The Mrs is going to be pissed!!!! If I want the perfect tune and a decent idle with the lumpy cams, the only way is a full standalone. Currently looking at the new Haltech range - Platinum Sprint 500 (RRP $1100) http://www.haltech.com/index.php?option=co...0&Itemid=88 This will also allow me to remove the air flow meter (due to MAP sensor tuning) out of the intake and switch from a distributor driven single coil ignition to a 4 coil direct fire spark setup  Kinda puts a huge hole in the budget though... which is very limited at the moment!  --------------------------------------------------------- 21st Jan 2010 Sticking with the Haltech at the moment due to cost and tuning ability. It was recommended to me by my tuner. Don't forget it's great to get some of these ECU's, but you need someone who can properly tune it. It has all the functions built in that I need to fully run the engine - even closed loop o2 on the fly tuning which will help in fuel economy. Just need to clarify a few things with it first with the tuner in the next few days. Also looking into changing the injectors (220cc) to a slightly larger unit (295cc) while we are at it. This will allow up to 175 horsepower (130kw) at the flywheel without increasing the fuel pressure to the injectors yet. May still go larger yet though..... all depends what swap over ones I can find. |
|
|
|
|
16-03-2010, 01:07 PM
|
#47 |
|
Junior Member
Join Date: Mar 2010
Location: Marrickville NSW
Car: Nissan Navara D22 and BA Astina
Posts: 45
|
Clear Tail lights
hey, did you have any problems fitting them clear tail lights?
|
|
|
|
|
24-03-2010, 05:35 AM
|
#48 |
|
Junior Member
Join Date: Feb 2009
Location: uk wish it was down there
Car: 94 1.5 BA
Posts: 39
|
this is a stunning read and car
and i know a member of club323f.com who has done a similar project the car is called cleanie and is extremely clean keep up the good work, wish i could be bothered to go to such effort
__________________
 1995 BA Hatch 1.5 sparkle green 1197 BA Hatch 2.0 sparkle green
|
|
|
|
|
24-03-2010, 09:39 AM
|
#49 | ||
|
AstinaGT Regular
Join Date: Feb 2008
Location: Quakers Hill, NSW
Car: Mazda 3 & BA Astina
Posts: 277
|
Quote:
Quote:
|
||
|
|
|
|
24-03-2010, 10:02 AM
|
#50 |
|
HONEYWELL REPRESENT
Join Date: Aug 2005
Location: Salisbury - Inner City
Car: 1997 BA Hardtop - Had a 2003 BJii J48 Sport20, and 2x bg SOHC astina hatches
Posts: 5,011
 |
hey mate. hows this baby goin??? she running now
what map u running on her
__________________
|
|
|
|
|
28-04-2010, 01:35 PM
|
#51 |
|
Junior Member
Join Date: Mar 2010
Location: Marrickville NSW
Car: Nissan Navara D22 and BA Astina
Posts: 45
|
hey, i got factory fog lights + dash switch from the wreckers. . i cant seem to get mine working. not sure if i need to add a relay or something. did you have any issues getting them going?
|
|
|
|
|
28-04-2010, 02:17 PM
|
#52 |
|
Senior Member

Join Date: Dec 2006
Location: North Side Brisbane
Car: 1998 BA 323 Astina Hardtop
Posts: 1,414
|
You need to add a relay which the plug for it is in the passenger footwell on the left side closest to the door.
|
|
|
|
|
28-04-2010, 09:06 PM
|
#53 | |
|
Senior Member

Join Date: Oct 2009
Location: NSW
Car: 1998 Toyota Supra 3.0L Twin Turbo
Posts: 1,413
|
Quote:
few of us have recently been doing the same thing and that thread is the wealth of information for foglights
__________________
 1996 Mazda 323 Astina BA Hatch 1.8L - No Longer Mine 
|
|
|
|
|
|
17-06-2010, 12:31 AM
|
#54 |
|
Junior Member
Join Date: May 2010
Location: Melbourne
Car: 96' 323 BA Series 2
Posts: 42
|
this is an amazing job! your attention to detail is indeed inspiring! i have to replace the valve stems in my car as they have gone dodgey, this article shows just how easy things can be if you set your mind to it
thanks!!! and i hope the car drives like a dream when it is done ^_^ BTW was going to purchase the same exhaust system from a mate...worth it? and whats the sound like? |
|
|
|
|
02-07-2010, 07:59 PM
|
#55 |
|
Junior Member
Join Date: Mar 2010
Location: Marrickville NSW
Car: Nissan Navara D22 and BA Astina
Posts: 45
|
thanks guys for the fog lights information. got relay from wreckers. total cost $75 (lights + switch + relay).
|
|
|
|
|
02-07-2010, 08:10 PM
|
#56 |
|
Junior Member
Join Date: Mar 2010
Location: Marrickville NSW
Car: Nissan Navara D22 and BA Astina
Posts: 45
|
i am in the process to do a similar head cylinder job to sp bling. but i prob will not polish the inlet ports. isnt mixing the air and fuel mixture better with rough porting better for efficiency??? i aint no professional.
|
|
|
|
|
16-11-2011, 03:20 PM
|
#57 |
|
Senior Member

Join Date: Jul 2010
Location: Wollongong
Car: 95' Mazda BA 323
Posts: 747
|
what the hell happened to this!
__________________
Too many Mazdas. ♡ |
|
|
|
|
21-04-2014, 09:14 AM
|
#58 |
|
Junior Member
Join Date: Apr 2014
Location: Sydney
Car: Mazda 323 Astina Hartchback 1997
Posts: 2
|
Amazing.......very well job SP Bling !
|
|
|
|
 |
|
|


 Linear Mode

