|
|
 01-05-2011, 07:35 PM
|
#21 |
|
Junior Member

Join Date: Mar 2011
Location: The glorious hole known as Dubbo
Car: 2002 Mazda Protege SP20
Posts: 24
|
What size bulbs go in the central dash surround?
|

|

|
|
01-05-2011, 07:59 PM
|
#22 |
|
AstinaGT Regular
Join Date: Mar 2010
Location: Melb
Car: SP20
Posts: 394
|
Ahh they differ. The red backlight for the gauges is a T10, but if you go LED you will need to experiment with side-emitting ones ie one that casts a more 360 spread like the old filament bulb. The dash backlight is a regular bulb with a red 'condom' on top. If you put in a white LED you'll get more of an oldschool yellowish backlight around the rev counter but your redline will still be red. You could try blue or green LEDs in there too.
For the instrument lights and warning lights I think they are a T5 or even a T3. Some lights are on the board itself so you can't get to it without taking the dash module apart. |
|
|
|
|
02-05-2011, 02:06 PM
|
#23 |
|
Junior Member
Join Date: Mar 2011
Location: The glorious hole known as Dubbo
Car: 2002 Mazda Protege SP20
Posts: 24
|
Cheers, im not game enough to play around with my gauge lighting yet. I was thinking of changing the lighting colour on the power window controls.
|
|
|
|
|
02-05-2011, 07:36 PM
|
#24 |
|
Senior Member

Join Date: Oct 2009
Location: Adelaide, Australia
Car: 07 Subaru Liberty GT Spec B tuned by STi
Posts: 912
|
You'll have to cut the LED off the circuit board then solder a new one in place to do that... Or you could change it to green by replacing it with one from a non SP20

__________________
|
|
|
|
|
02-05-2011, 07:36 PM
|
#25 |
|
AstinaGT Regular
Join Date: Mar 2010
Location: Melb
Car: SP20
Posts: 394
|
Gotta disassemble the switch first. I don't think I'd even bother trying that.
|
|
|
|
|
03-05-2011, 10:16 AM
|
#26 |
|
Junior Member
Join Date: Mar 2011
Location: The glorious hole known as Dubbo
Car: 2002 Mazda Protege SP20
Posts: 24
|
MM maybz
|
|
|
|
|
12-01-2012, 05:36 PM
|
#27 |
|
AstinaGT Regular
Join Date: Mar 2010
Location: Melb
Car: SP20
Posts: 394
|
Headlight blackout mod, part 1. Pulling the lights apart was a piece of cake. In the oven 75C for 5-10 minutes, start working from the corner and be patient and don't use too much force. The end of a metal ruler is perfect for disengaging the clips as it puts less stress on the plastic than a screwdriver.
 Sanded what I could with steel wool then hit it with several coats of plastic primer and then a good automotive flat black. This is also the perfect time to polish the clear front lens while it's out of the car and you don't have to mask up the paintwork. |
|
|
|
|
12-01-2012, 08:09 PM
|
#28 |
|
Senior Member

Join Date: Jun 2011
Location: Sunshine Coast
Car: MPS
Posts: 1,939
|
Good stuff, what does part 2 entail?
|
|
|
|
|
12-01-2012, 08:55 PM
|
#29 |
|
AstinaGT Regular
Join Date: Mar 2010
Location: Melb
Car: SP20
Posts: 394
|
Putting them back together and putting them back on the car?
Also, installing AAC bumper brackets, finally. No more sag! |
|
|
|
|
13-01-2012, 04:18 PM
|
#30 |
|
AstinaGT Regular
Join Date: Mar 2010
Location: Melb
Car: SP20
Posts: 394
|
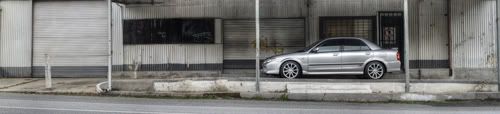
Brackets installed
 JDM-style blackout headlights  Man my car is filthy. |
|
|
|
 |
|
|


 Linear Mode

